Additional Monitor project

When lockdown started in the UK, I had to convert my home setup to be more work friendly (I wanted to fit as many screens as possible onto my desk as possible)

Converted a CEED into an spare monitor by chopping off the modular rail, sticking the hub onto the back and then mounting the back plastic onto one of my screen arms. Here’s the end result with a few photos inbetween!

If you’d like me to do a step-by-step blog post then let me know (also falls inline with my pi-top Frankenstein nature :zombie:)

Let me know what you all think!

I’ve been trying to do this with my pi-top [3]. Do you have any tips? Any way to just use the monitor without having to boot the pi-top?

Hi @Dotly. That’s a little more difficult and you’ll need a soldering iron for sure. Also, I’ve never attempted this before and this is all in theory. If you do manage to get it working, I would love to see it.

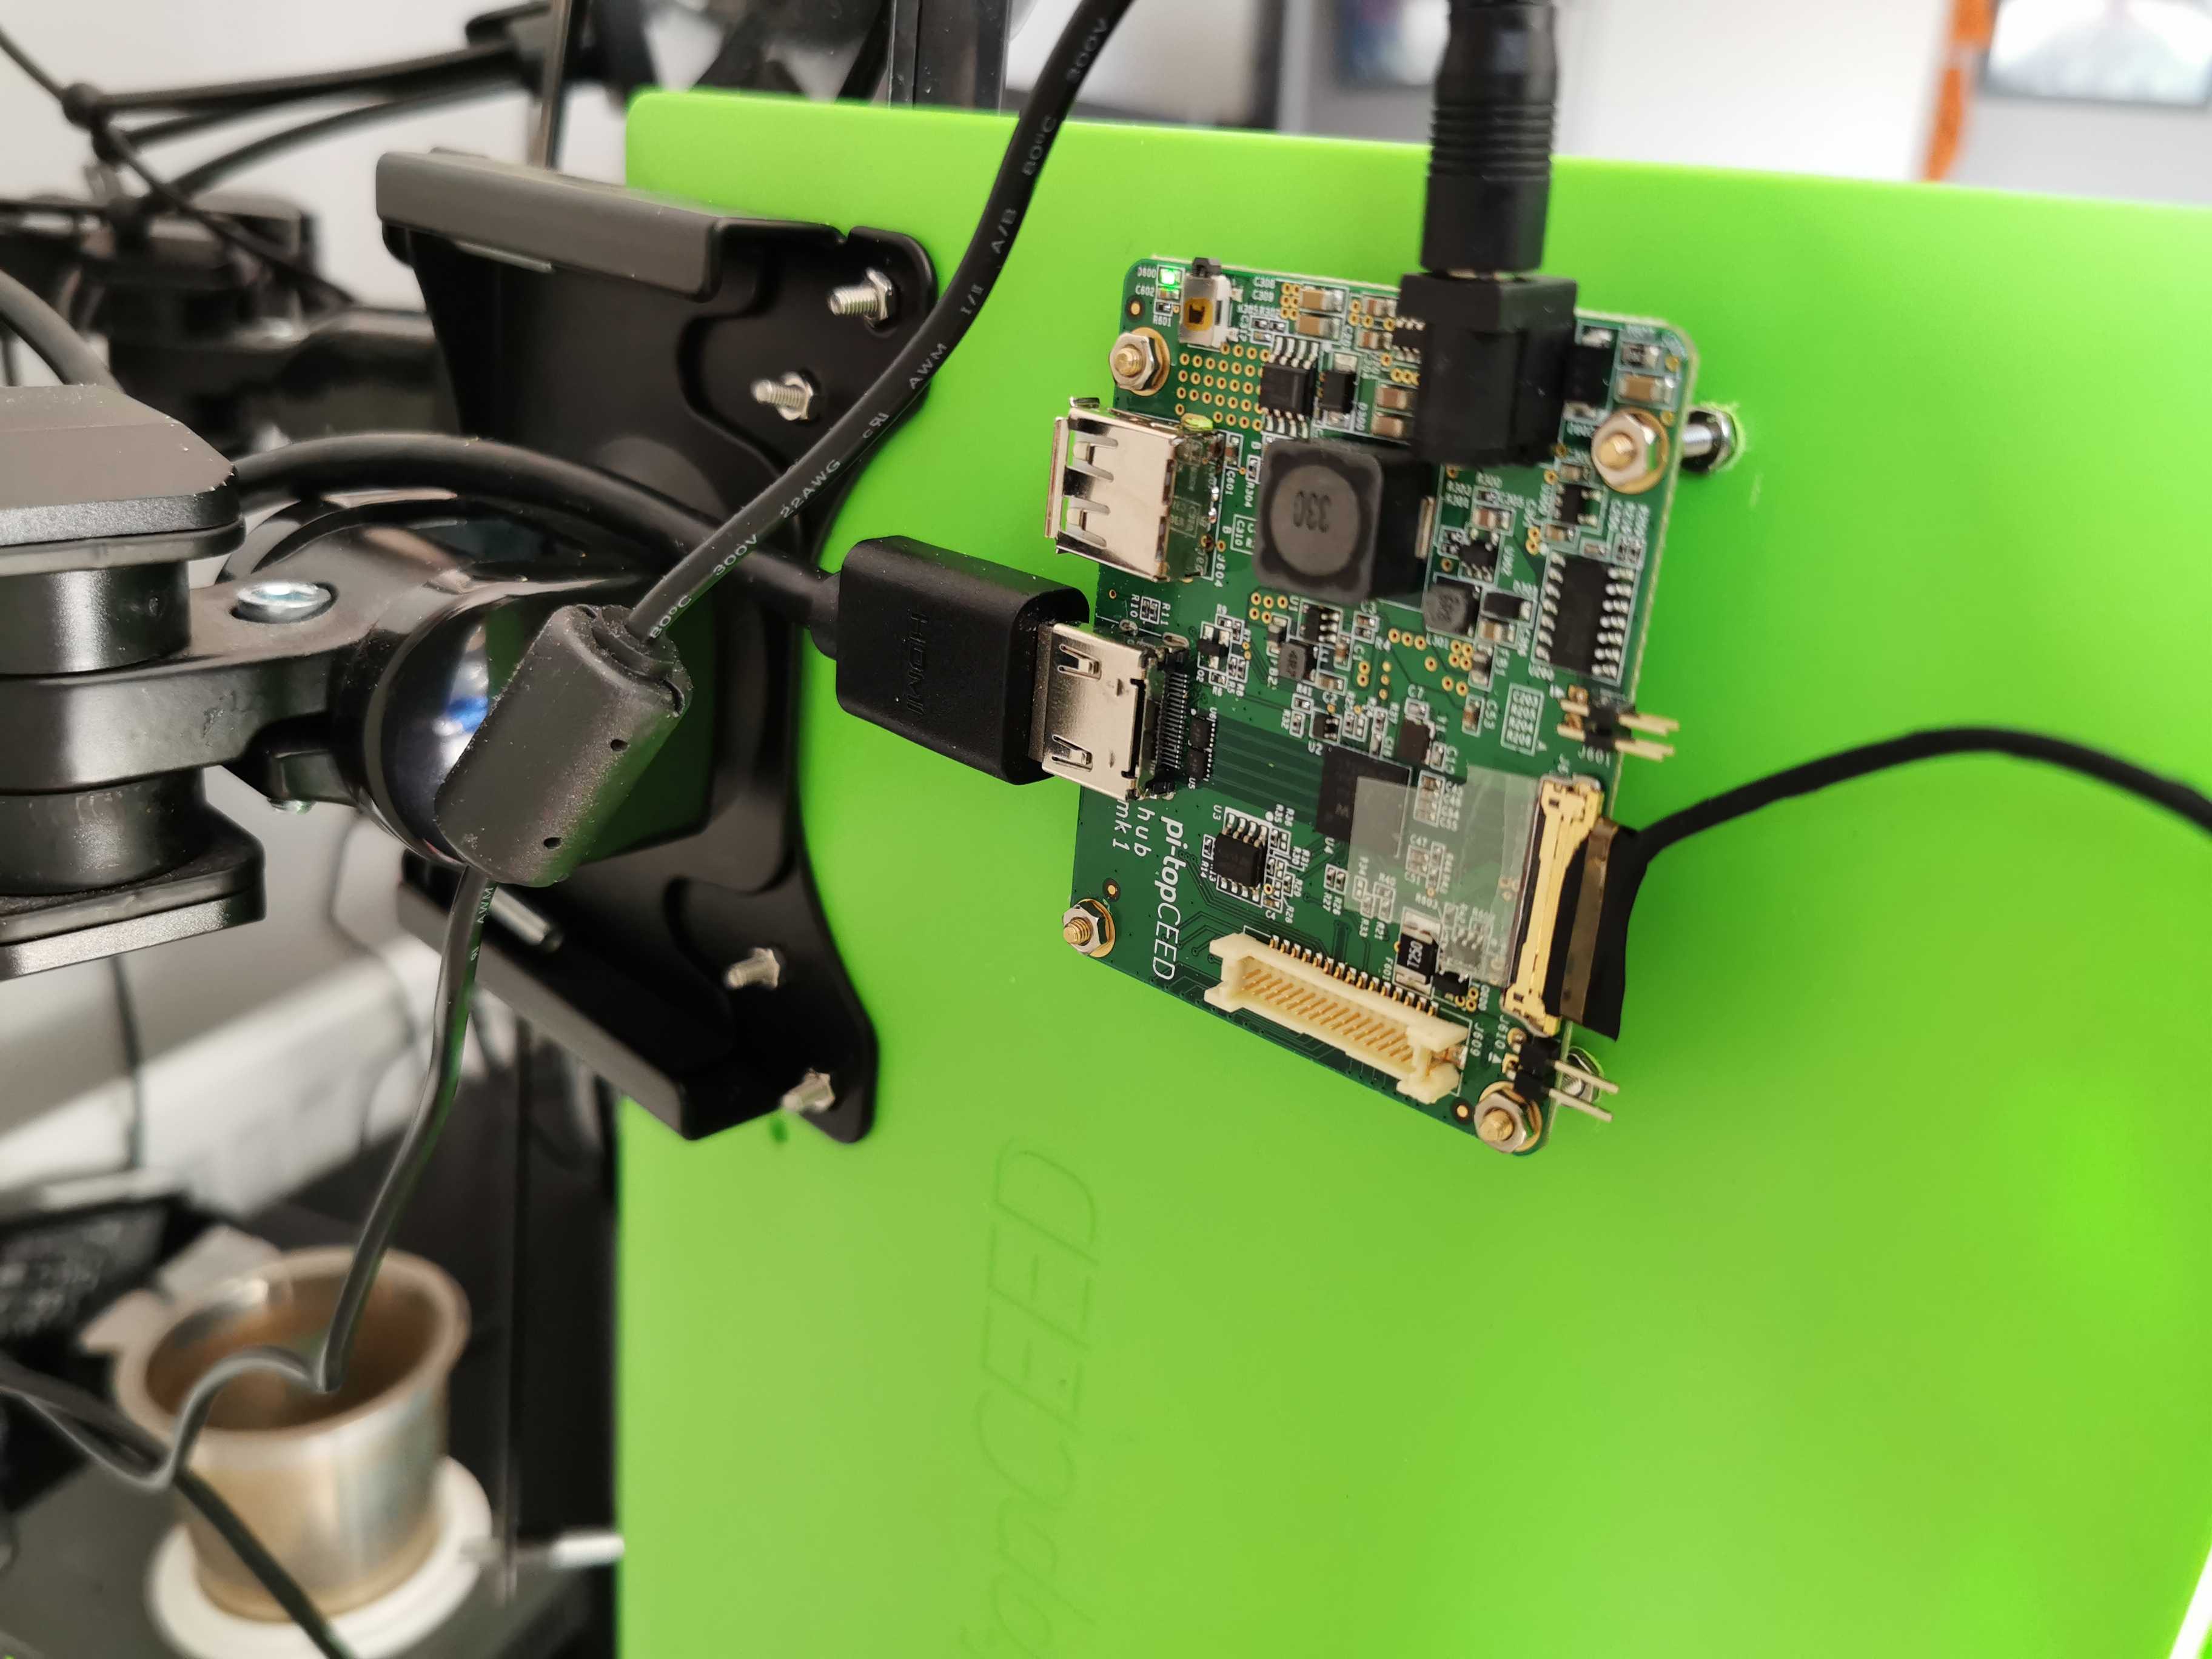
Little warning. If you remove the warranty void stickers (which you’ll have to) then do not reinsert the cables into the hub. If the cable is reinserted at an an angle then it will likely brreak the hub (hence the sticker.

If you ever do want to reattach it to the battery then it’s best to shutdown the battery. You can do this by detatching the PSU and cooling bridge. Press the power button and a red LED will start blinking. As son as it doesn, depress the power button, wait one second, press it again. The red LED should blink twice more after that and then stay solid foor 3 seconds beforre turning off. This means the battery has been shutdown and it would be safe to reinsert the cable back into the hub later. To wake up the battery, you’ll need to connect the hub and keyboard and PSU and you should see the green light on the hub come back. Please note if you remove the sticker and still safely shutdown your battery then your warranty will still be void.

  1. To solve the switch problem, you’ll first need to buy one. There’s some pads reserved on the Hub PCB for a Power On switch already, so you’ll need to buy the switch. Here’s the link from Digikey. It’s a momentary, tactile switch, SMT, SPST.

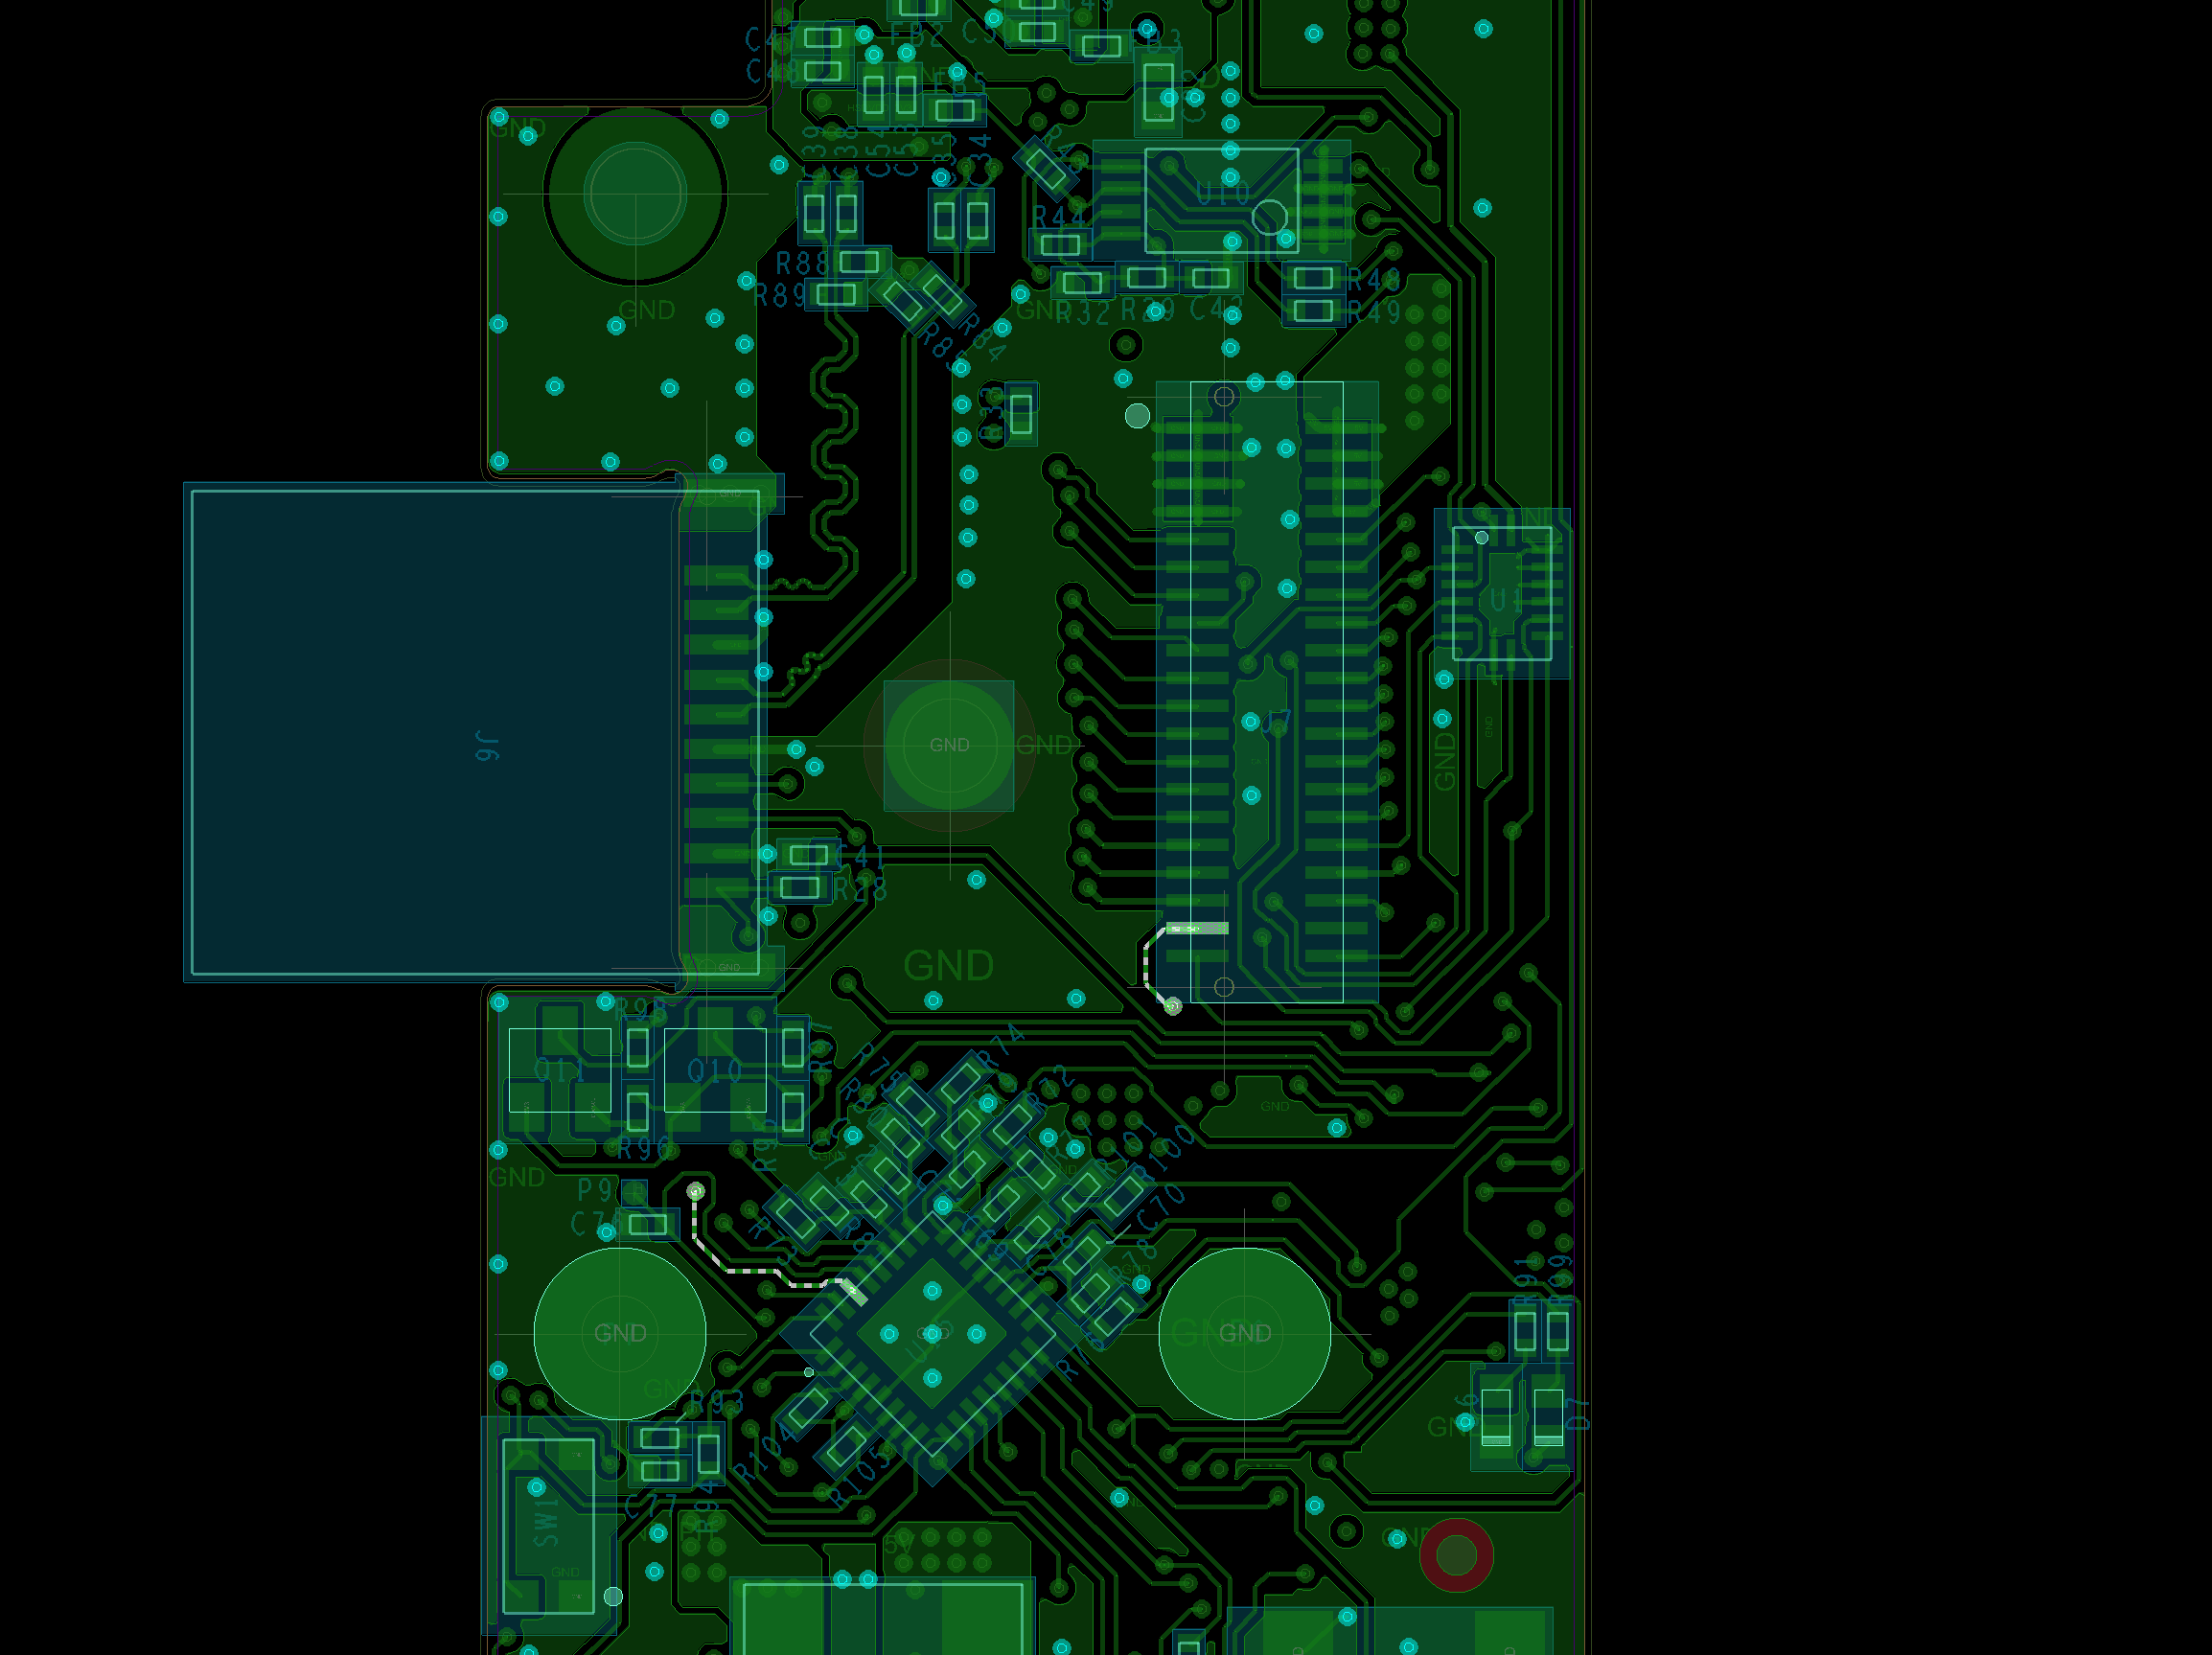
  2. You’ll then need to solder it onto this spot on the hub. The hub should definitely be disconnected from the battery before you do this step image

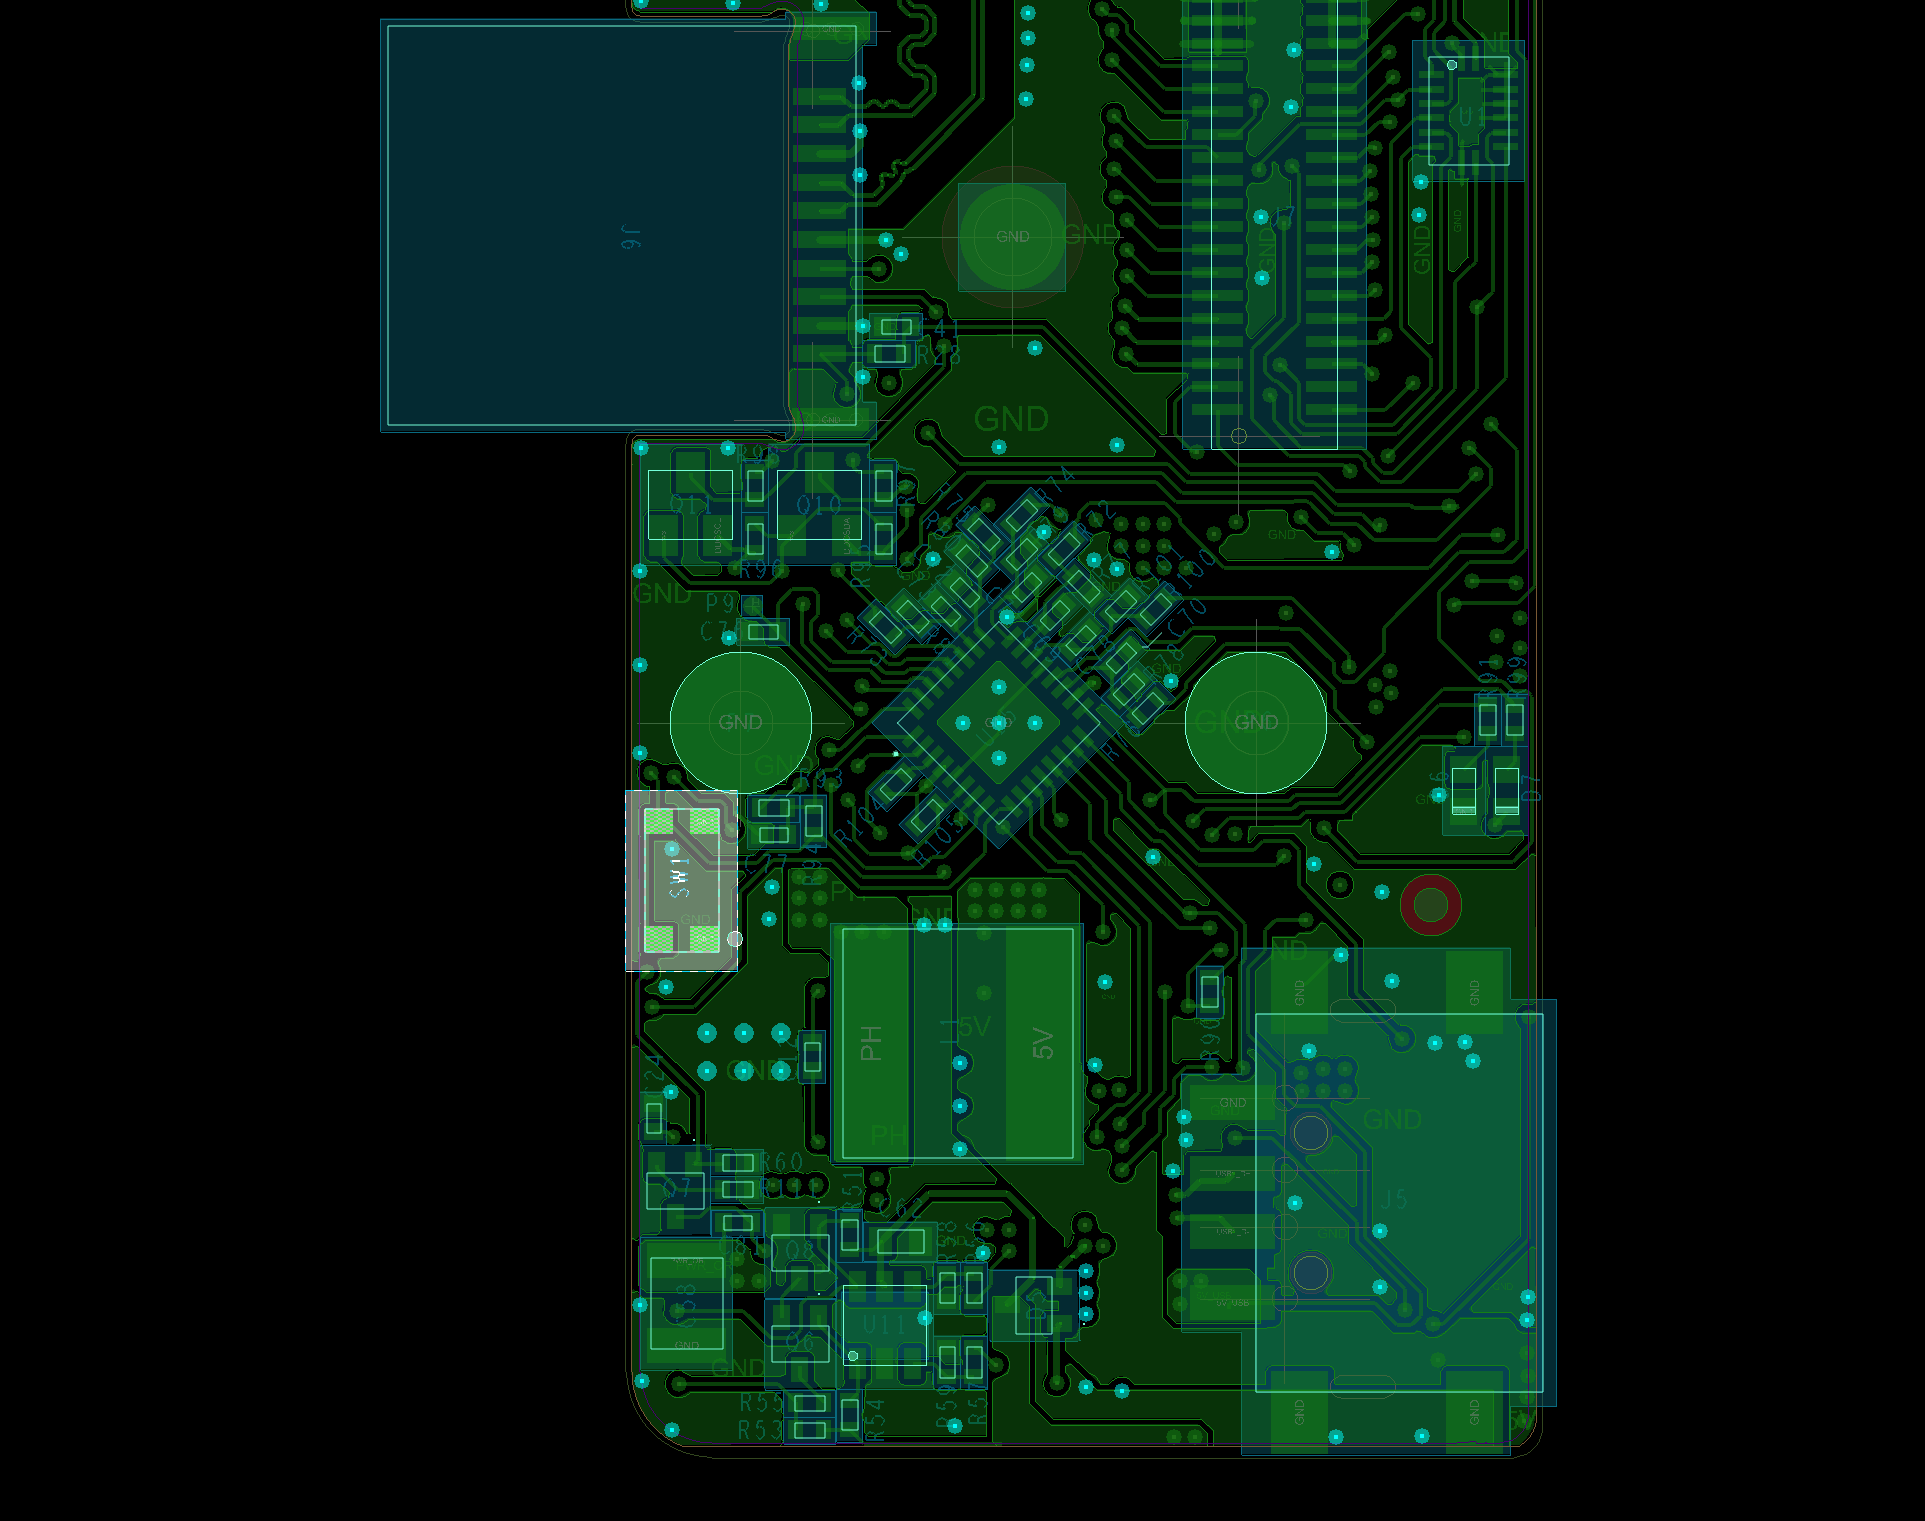
  3. Next you’ll need to solve the board detect problem. In the picture below, connect the highlighted net to any GND. This will fool the hub to think that a Raspberry Pi is connected (The 3 blinking red flashes you get when the cooling bridge isn’t connected). The easiest place to solder is probably from the pin of the board to board connector.

image
Though if you’re not confident soldering this then you can attach the cooling bridge and insert a wire into the correct sockets. It’s just the board detect socket and any GND socket. The only downside here is that the cooling bridge could fall off if you dont have the screw keeping it in place. Remember this image is from the bottom of the Cooling Bridge.

image

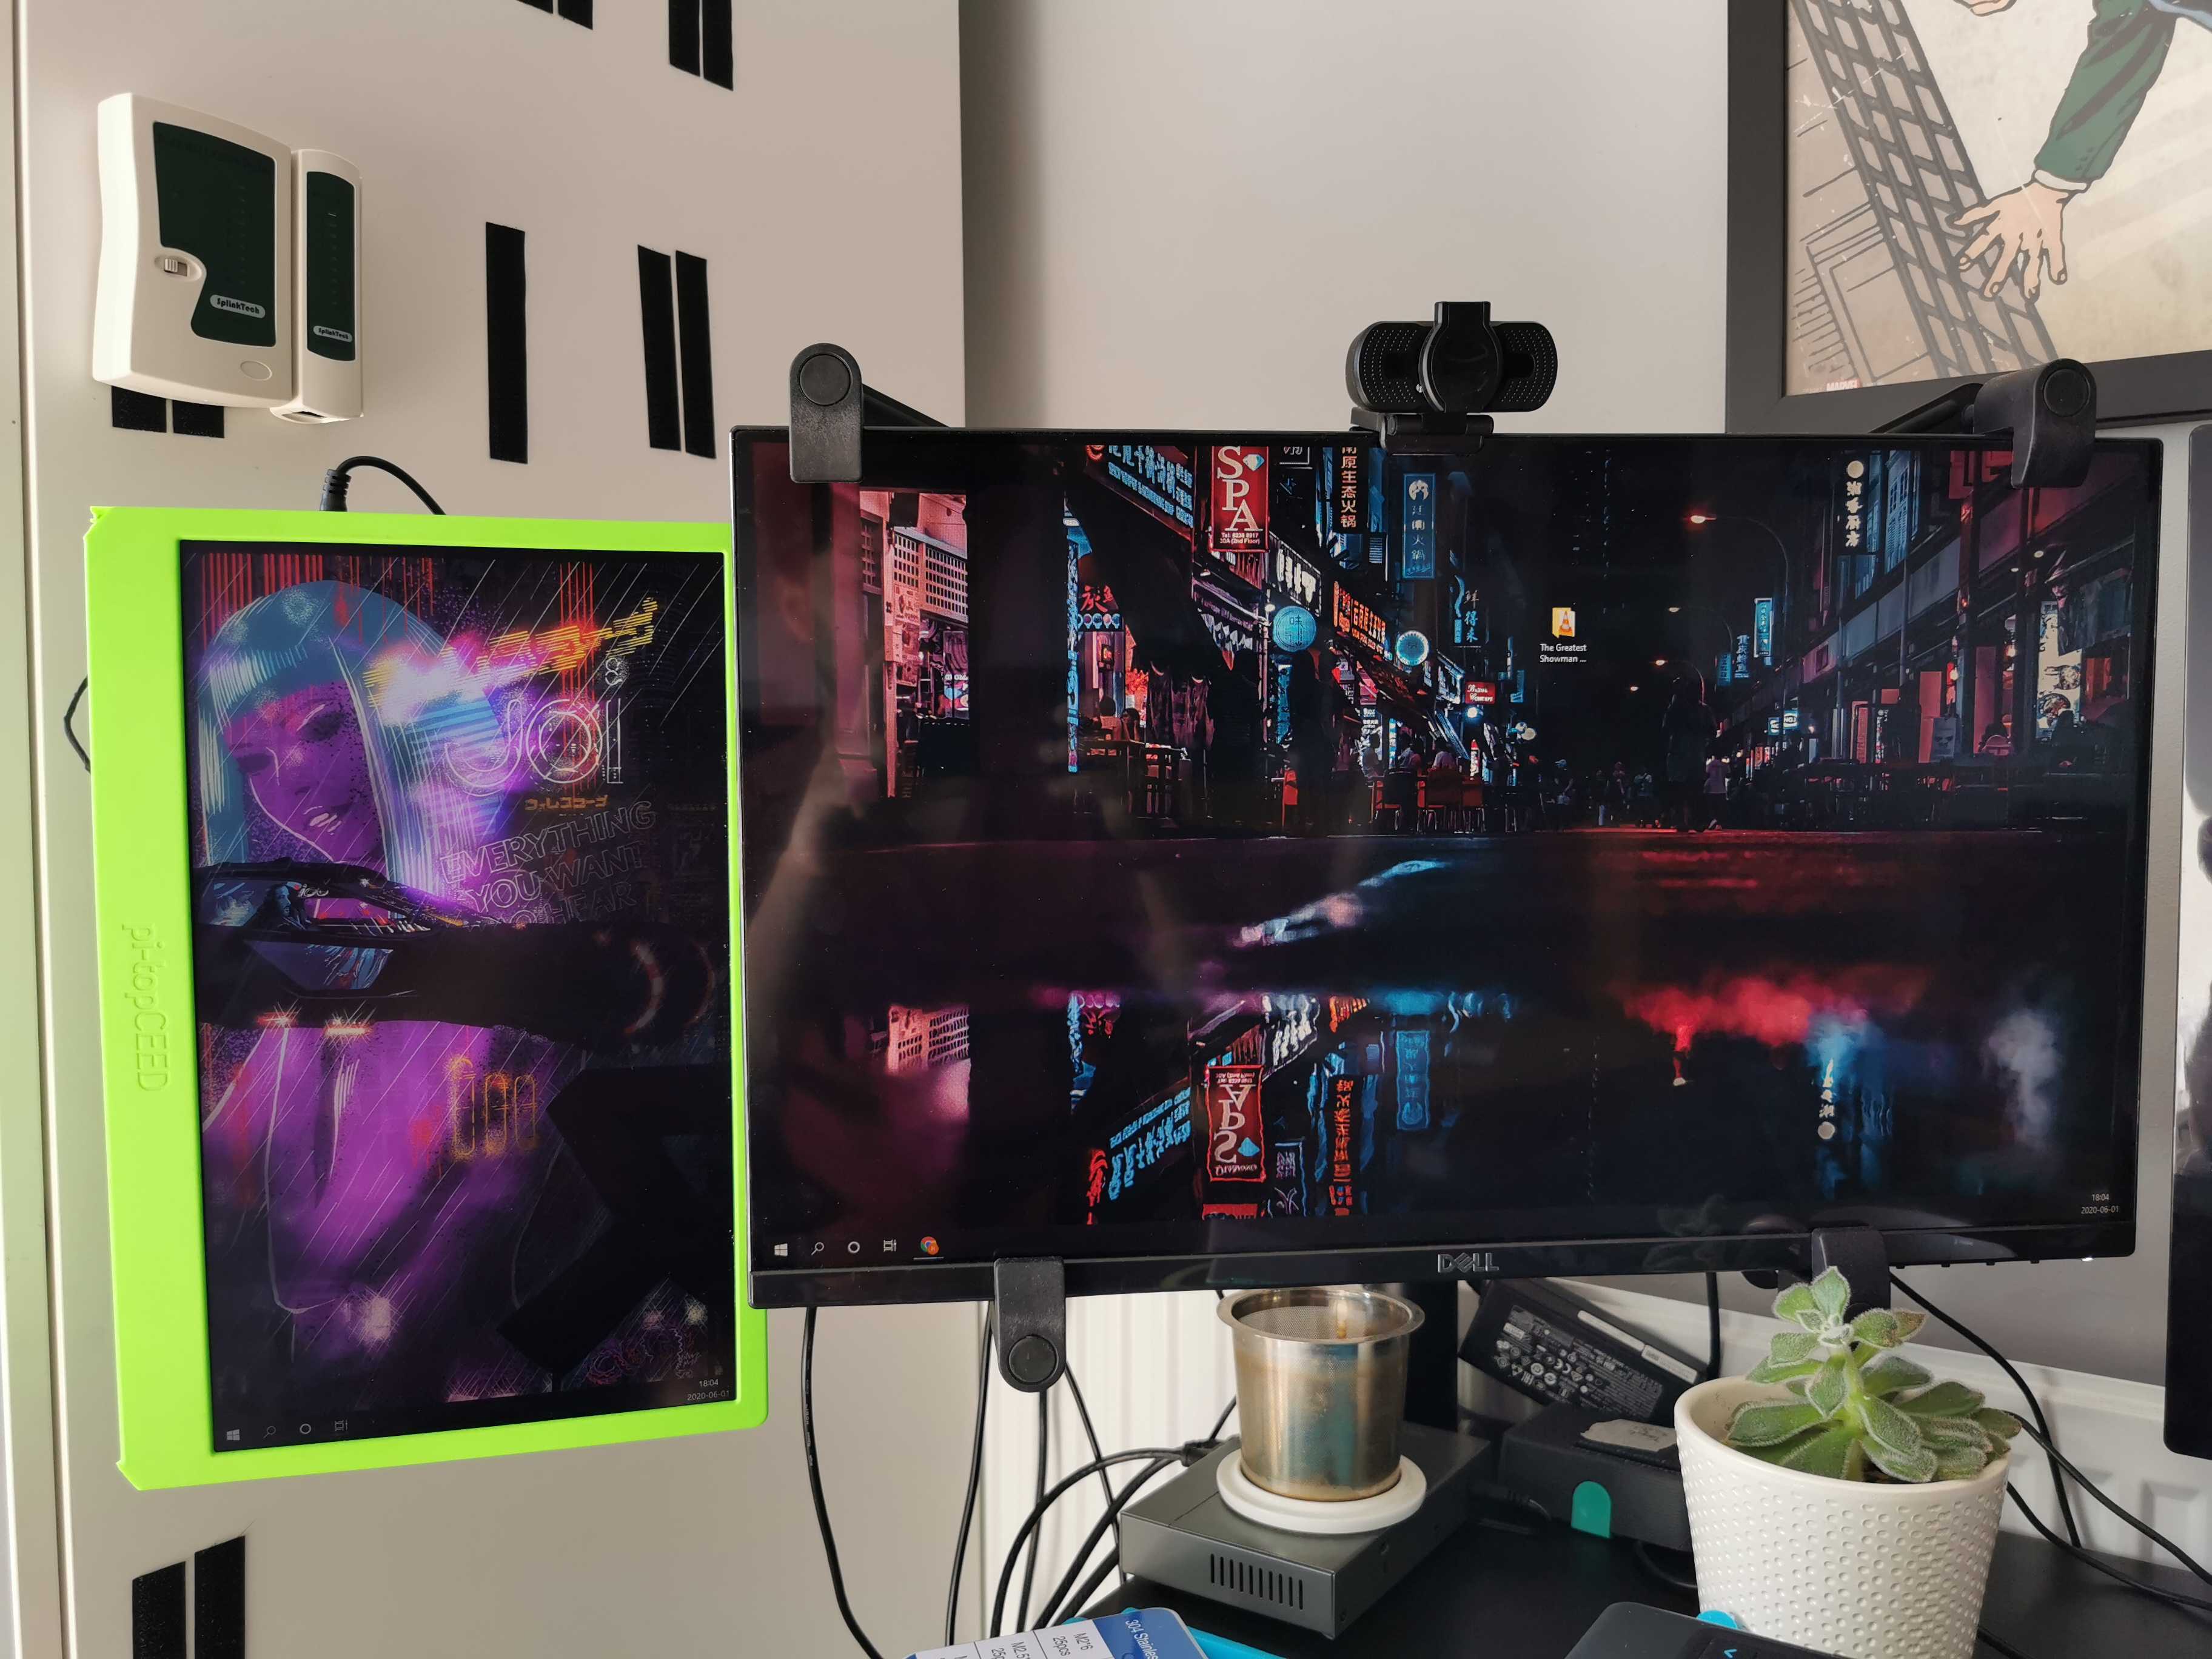
  1. Lastly you’ll need a HDMI cable (female to male)

When booting up you’ll need to make sure that your sorce device is already turned on before the screen.

Good luck!

Hi! How did you do this? Do you know if it would be possible to attach a raspberry Pi to the CEED display without using all the GPIOs?

Hi @sofiania, You could definitely do that. At the bare minimum, you would only need the HDMI and USB Connections between the pi-top CEED hub and the Raspberry Pi. You wouldn’t even need the GPIOs.

However, if you’re not using pi-topOS, you’ll need to remember to separately turn off the CEED screen after you’ve shut down the Raspberry Pi. Because there’s no GPIO connection and there’s no SPI communication between the hub and Pi, the CEED hub won’t know when the Raspberry Pi has shutdown and will supply power to it anyway. It’s not a problem, just remember to unplug the screen or hold down the power button to shut down the device fully

I hope that helped, let me know if anything didn’t make sense

2 Likes

Great! Thank you! So, if you only wanted to use the Pi - Ceed or 1 as a screen, you could even use a respberry pi Zero as well?

That’s correct, you could do both!
Just remember that for the Raspberry Pi Zero, you’ll need an HDMI adapter to get the screen image.

Let us know how it goes! and as always, send us photos of your progress

Ok, since I get such good answers here, I have another question! Can I use the pi-top speakers with Retropie on pi-top 1 without connecting the respberry-pi headers? Do I need some drivers?

Hi @sofiania, I know i answered your question in the other thread though here’s the link for everybody else:

One last thing. If you’re not running pi-top OS, then you’ll need to install the pi-top drivers. You can find the instructions on this Knowledge Base Article

This does not seem to work for me. I assume you mean the USB port on the right side of the hub to the micro-USB port of the Pi 3? It is not powering on at all. I’m starting to think I either have to put the Pi in with the bridge or the kit is DOA - that after months of waiting for it to ship.

So the cable came loose with not even that much force sliding the hub over, I didn’t intentionally remove the sticker.

Okay it actually does still work, gave me a pretty good scare saying that it will likely break the hub. But seriously all I was doing was trying to move the hub over enough to put a HDMI coupler in, I guess maybe the only solution is a right angle female or something.

Hi,

I know it’s 3 years later - if only I’d known!

I would be very interested in a step by step post if you can remember what you did!

Thanks,

B.