
I discovered a bit of software that will run on the Raspberry Pi and it is what I would consider an alternative or optional software to use to VNC. It is very lightweight and has far lower latency than VNC. (VNC is quite useable, but the latency can be a bit aggravating.)
Please note (disclaimer): I recommend backing up your pi-top boot card/drive in case these instructions don’t go well and cause issues. I am adding this guide for how I’ve accomplished this and this guide is for informational purposes only and no mishaps due to errors or inadvertent typos, etc. using this guide will be the responsibility of me or the owner of this forum. Thank you.
Overview:
The software is AnyDesk and they have a specific version for the Raspberry Pi. It allows you to connect to a pi-top[4] via a unique Remote Desk ID and interact with it over a local network from a PC or Mac. (Note: I have found that it is fast and responsive and is perfect for use with the Robotics Kit to remote to the pi-top[4] to run Python code remotely.)
The two devices see each other via a Remote ID that is unique for each device to make it a secure connection and it’s very easy to install, configure and use.
This forum post covers the installation on the Raspberry Pi architecture… but there is a Windows and Mac installer that you will find on their website.
Ready? Let’s get started:
Whenever installing something new, make sure your pi-top is up-to-date. You can run the updater from the pi-topOS menu or even do this in Terminal (which is where the initial installation of AnyDesk will be done).:
sudo apt-get update
sudo apt-get upgrade
Now we move on to installing AnyDesk. To do so, we will need to download the AnyDesk Debian package.
Download AnyDesk to your Pi by running the following command on your device.
wget https://download.anydesk.com/rpi/anydesk_6.1.1-1_armhf.deb
Please note that this may not be the latest version. You can verify this by visiting the AnyDesk for the Raspberry Pi website.
Next step is to install AnyDesk from the Debian package that we just downloaded.
sudo dpkg -i anydesk_6.1.1-1_armhf.deb
The dpkg tool will extract the package, installing all of the AnyDesk files into the correct location.
With AnyDesk now installed, we will make sure no packages are missing.
We can run the command below to use the apt package manager to fix any missing packages.
sudo apt-get install -f
Once this is complete, AnyDesk is installed and we can now run the software from the pi-top OS desktop.
Running the AnyDesk Software
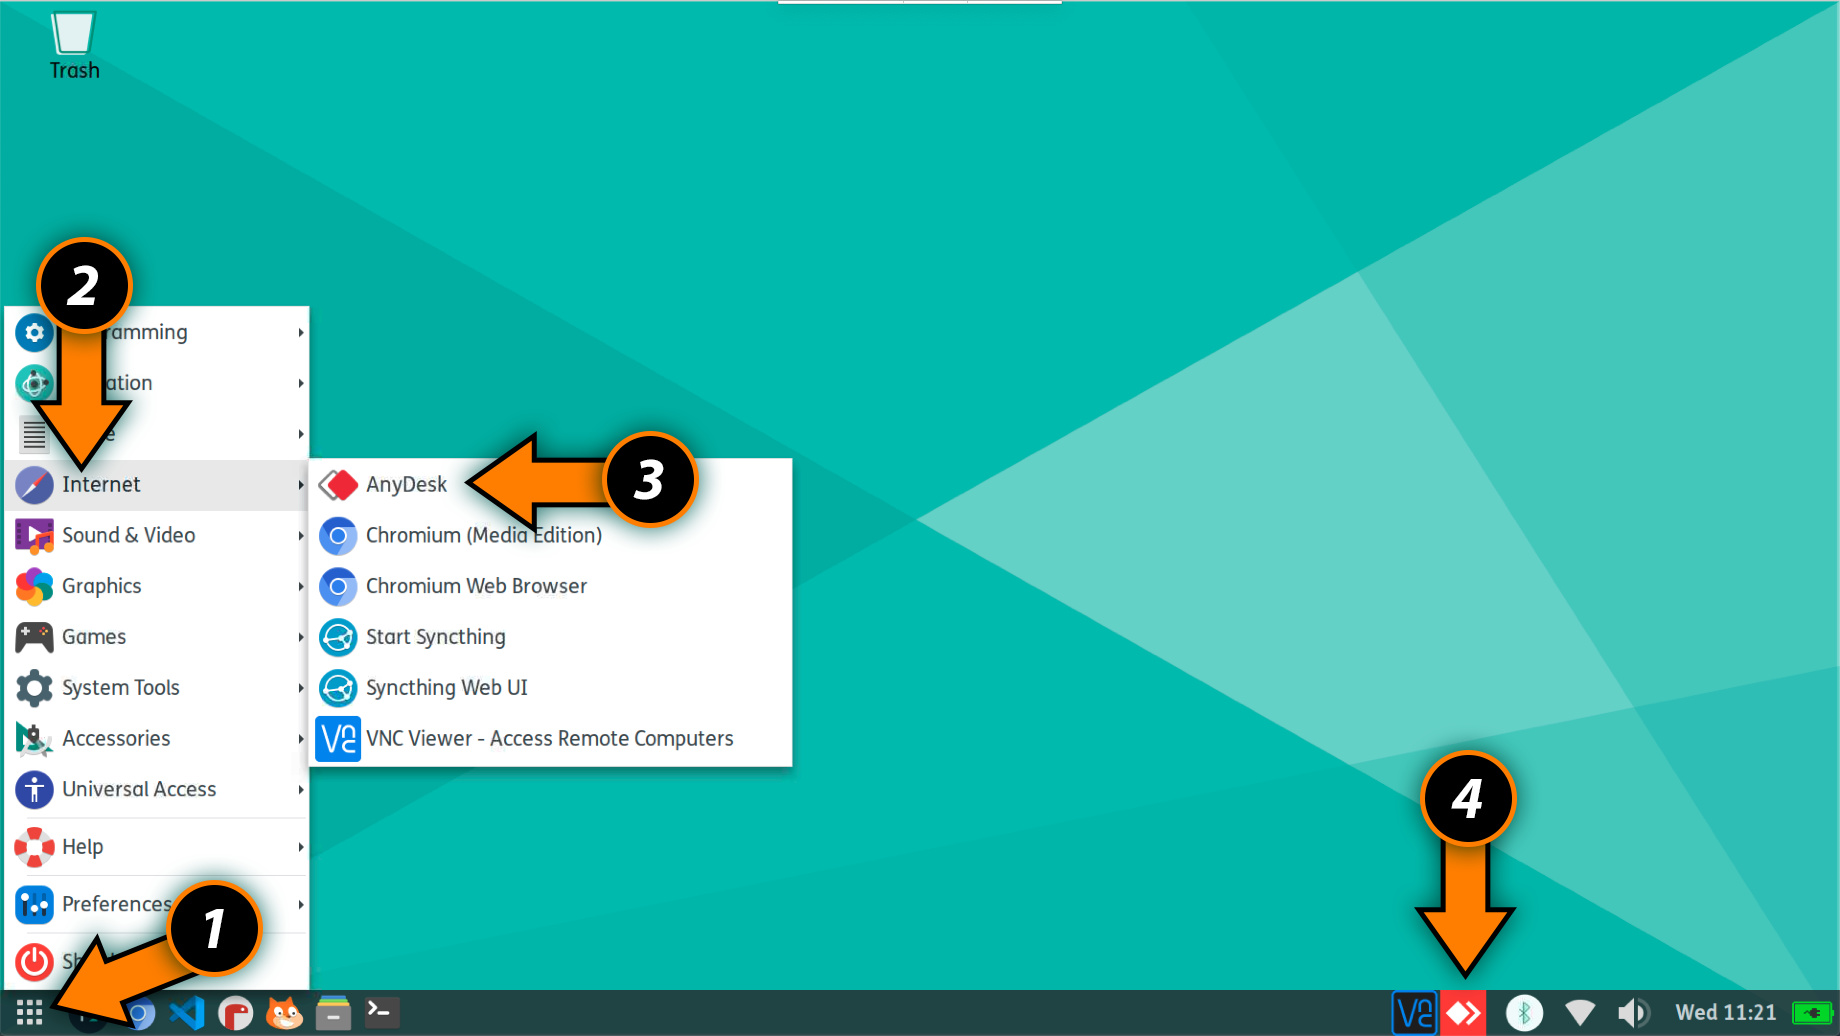
[SCREEN 1] There are two ways to start AnyDesk. Simply click on the taskbar icon [4] or click the bottom left menu icon [1] and then hover over Internet [2] and then click on AnyDesk [3].
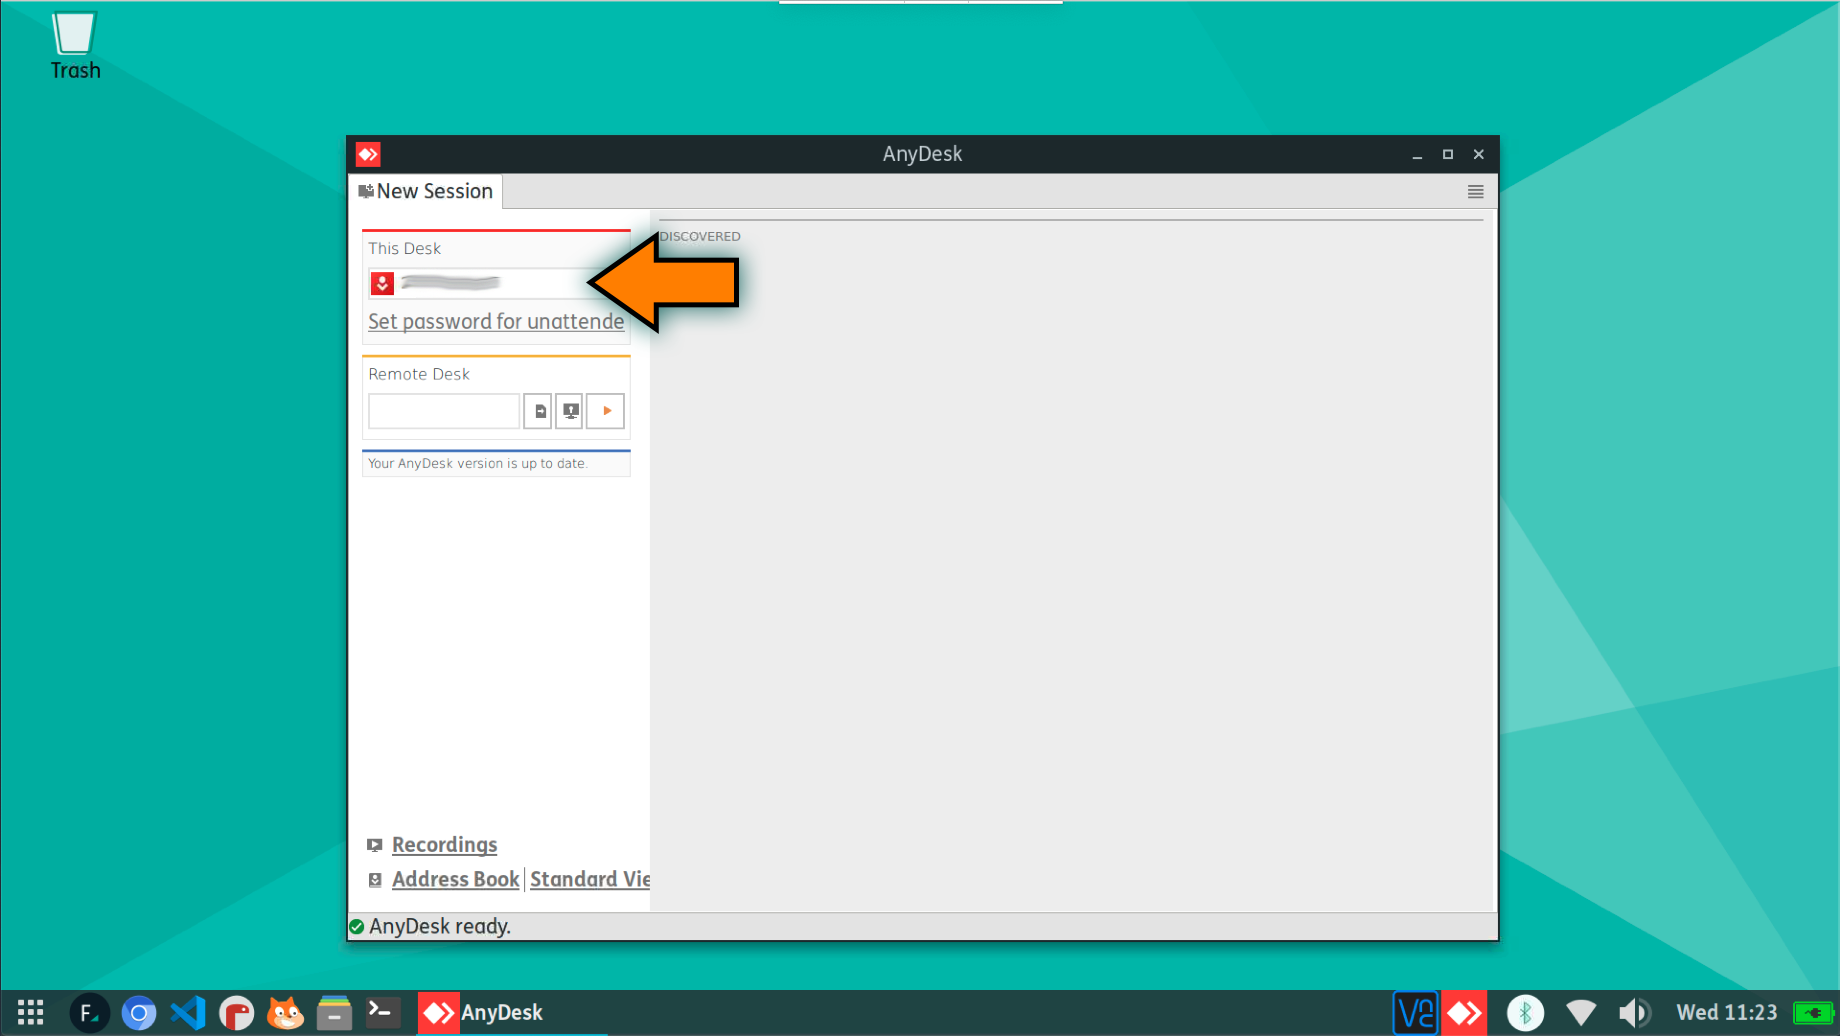
[SCREEN 2] Pay special attention to the Remote ID that is auto-assigned in the New Session under “This Desk”. You will use this ID to connect to other devices that also has AnyDesk installed.
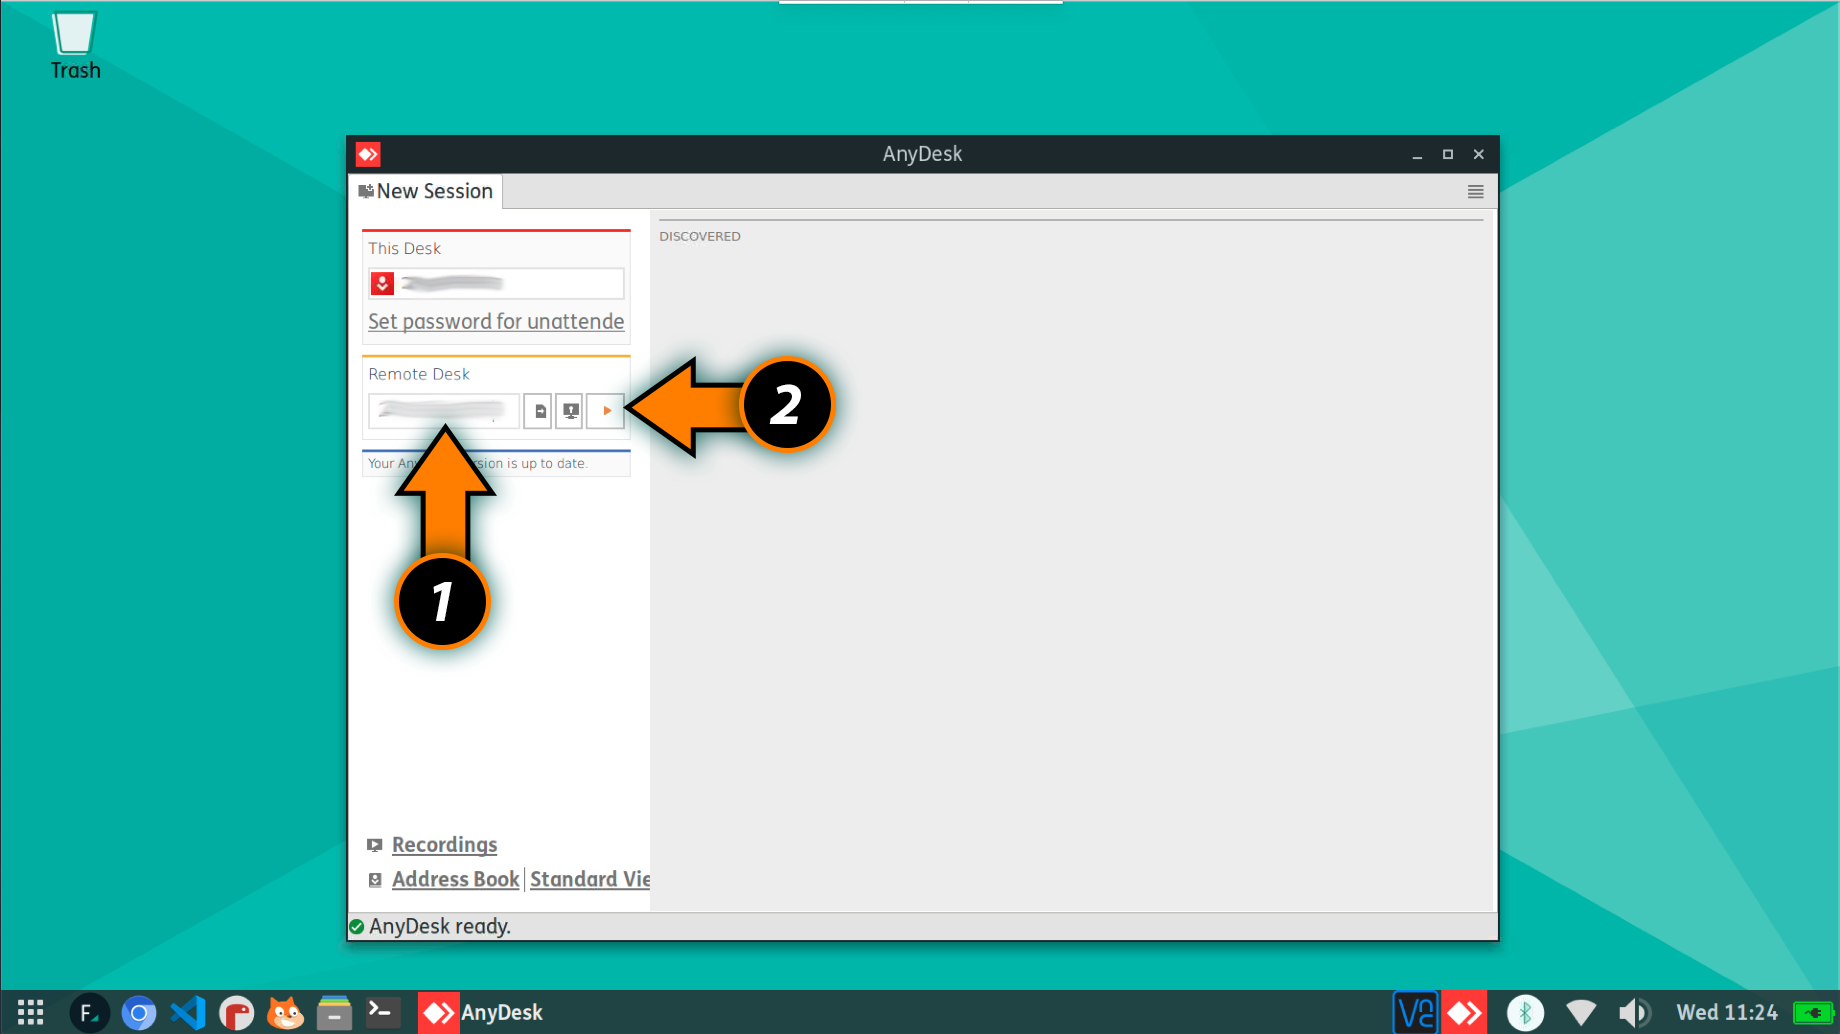
Side-note: [SCREEN 3] You can also use your pi-top to connect to another system in the other direction, as well, to remote to your Windows PC or Mac. In this case, enter your Windows PC or Mac Remote Desk ID [1] and then click the “play” button [2].
When you initiate the connection, you will need to wait for the connection to be “accepted” on the remote device.
Receiving a Remote Desktop Connection
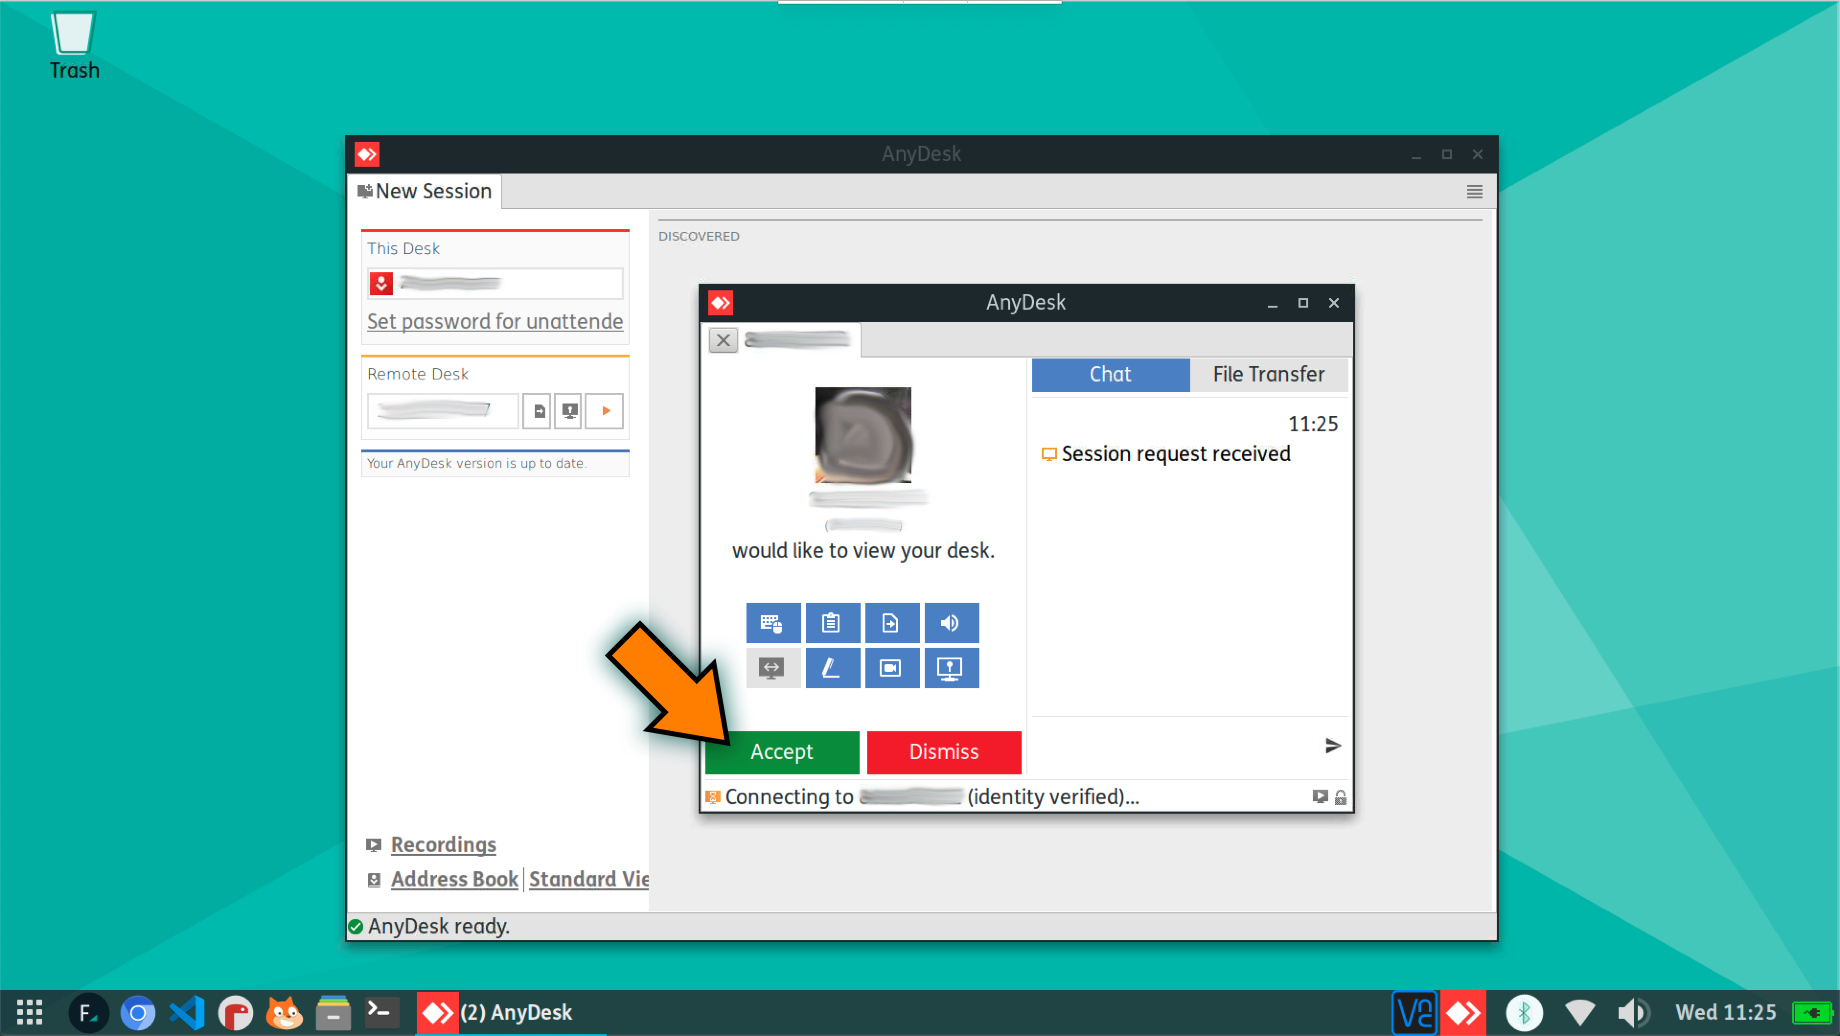
[SCREEN 4] When the connection is initiated, simple click the “Accept” button on the remote device and that’s it!
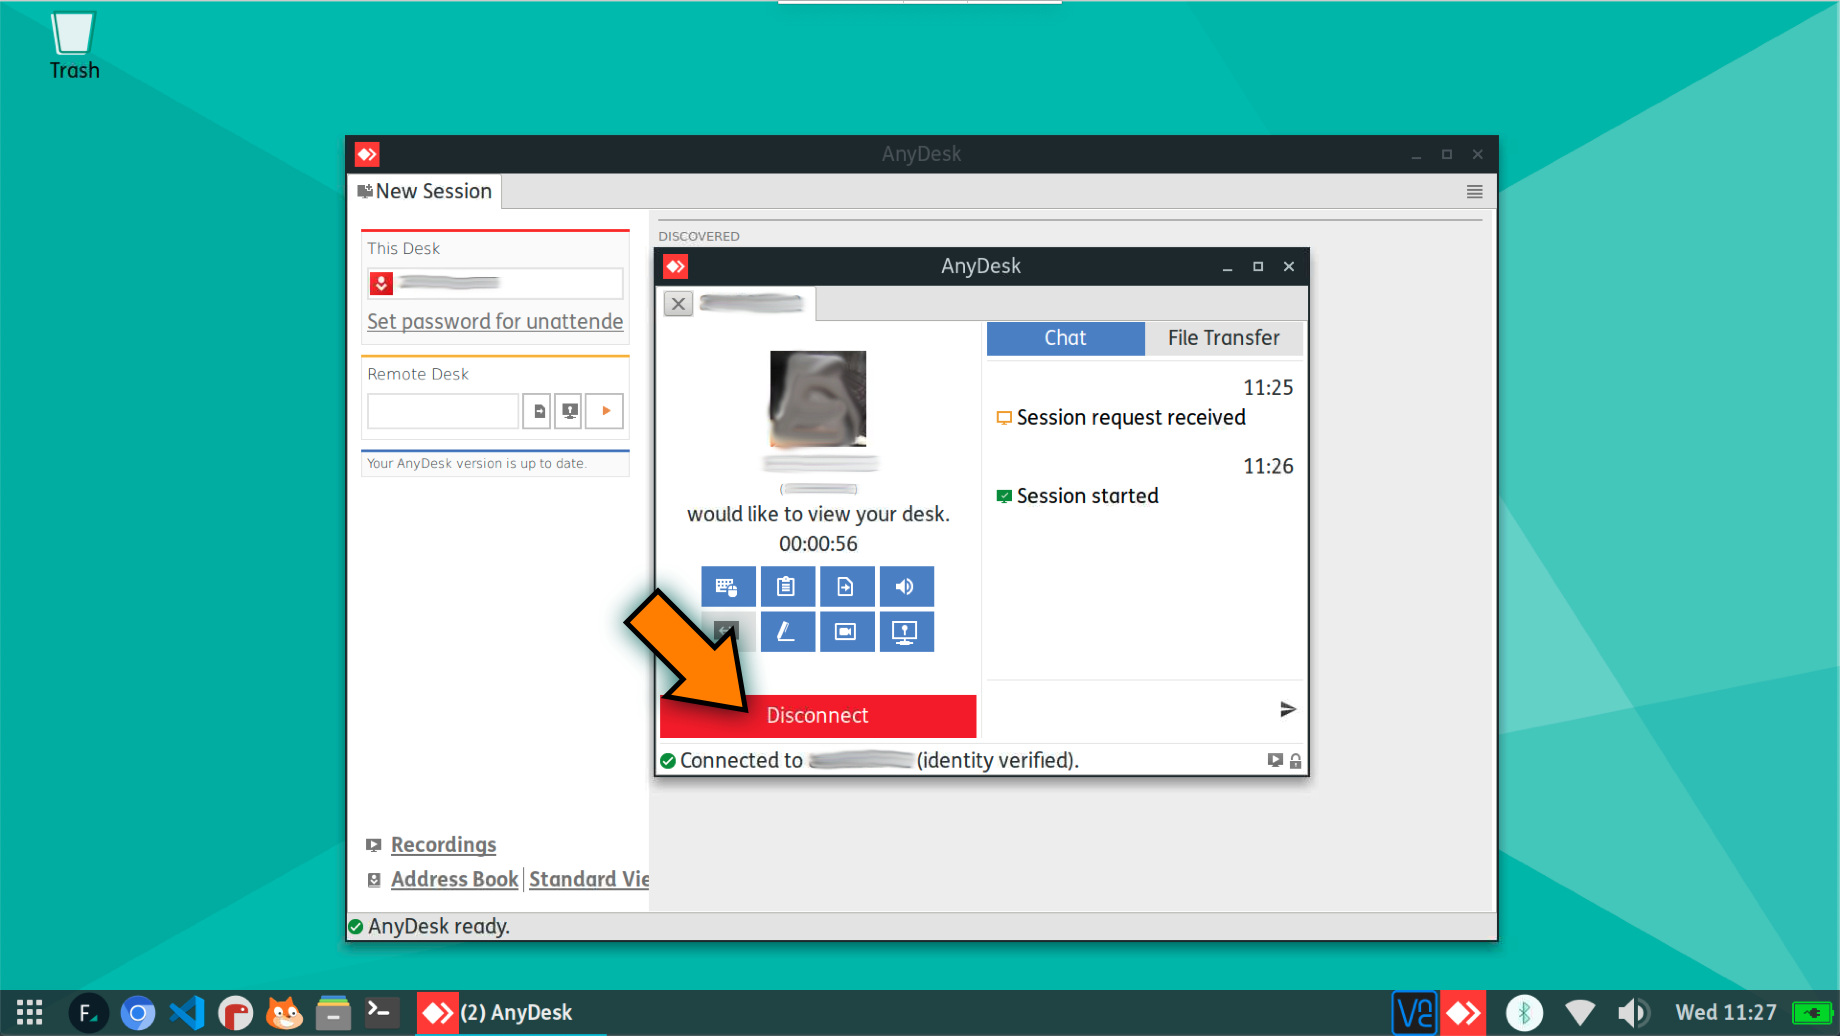
[SCREEN 5] If you’ve accepted a connection, it’s simple to disconnect whenever necessary using the “Disconnect” button.
Configuring Unattended Access
In the case of remote connecting to a pi-top that isn’t connected to a display or has a keyboard and mouse connected (like in a situation that it is connected to a robot), it is very handy to set up unattended access which is already built into AnyDesk.
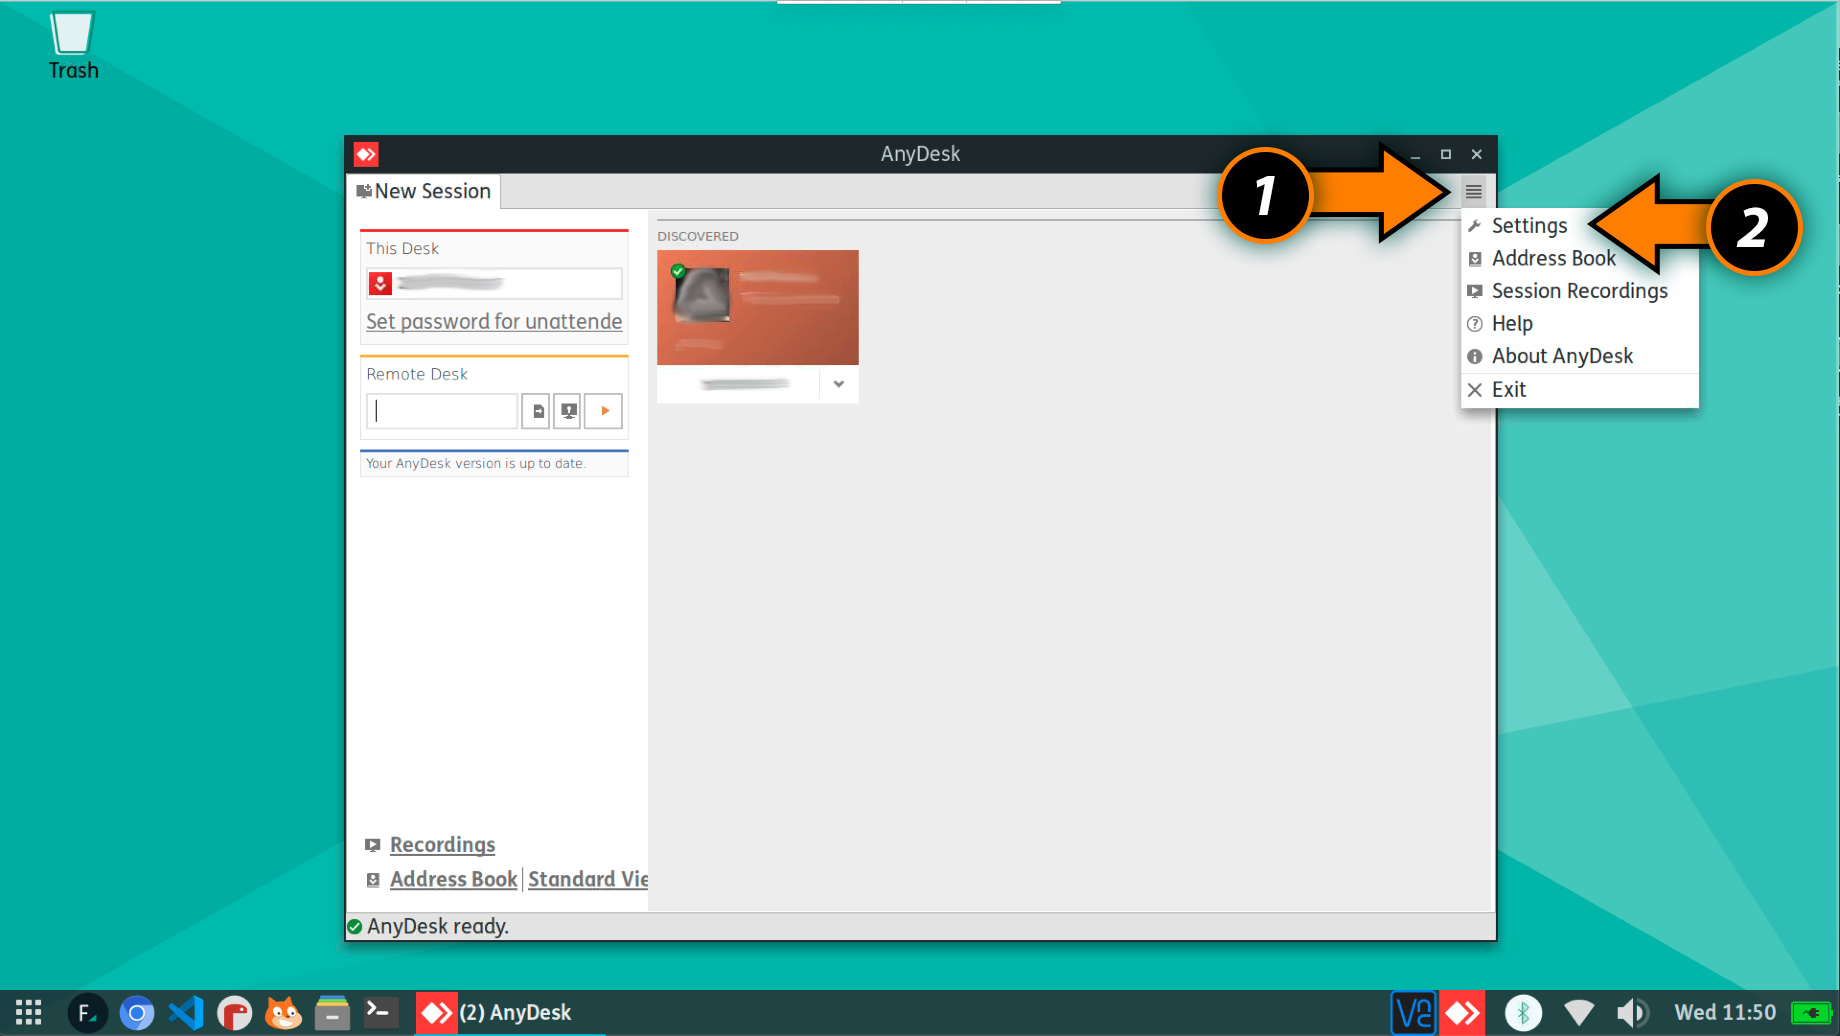
[SCREEN 6] First click the AnyDesk menu icon [1] and then click “Settings” from the menu [2].

SCREEN 7] Then, from the Settings screen, click “Security” [1] and then “Unlock Security Settings” [2].
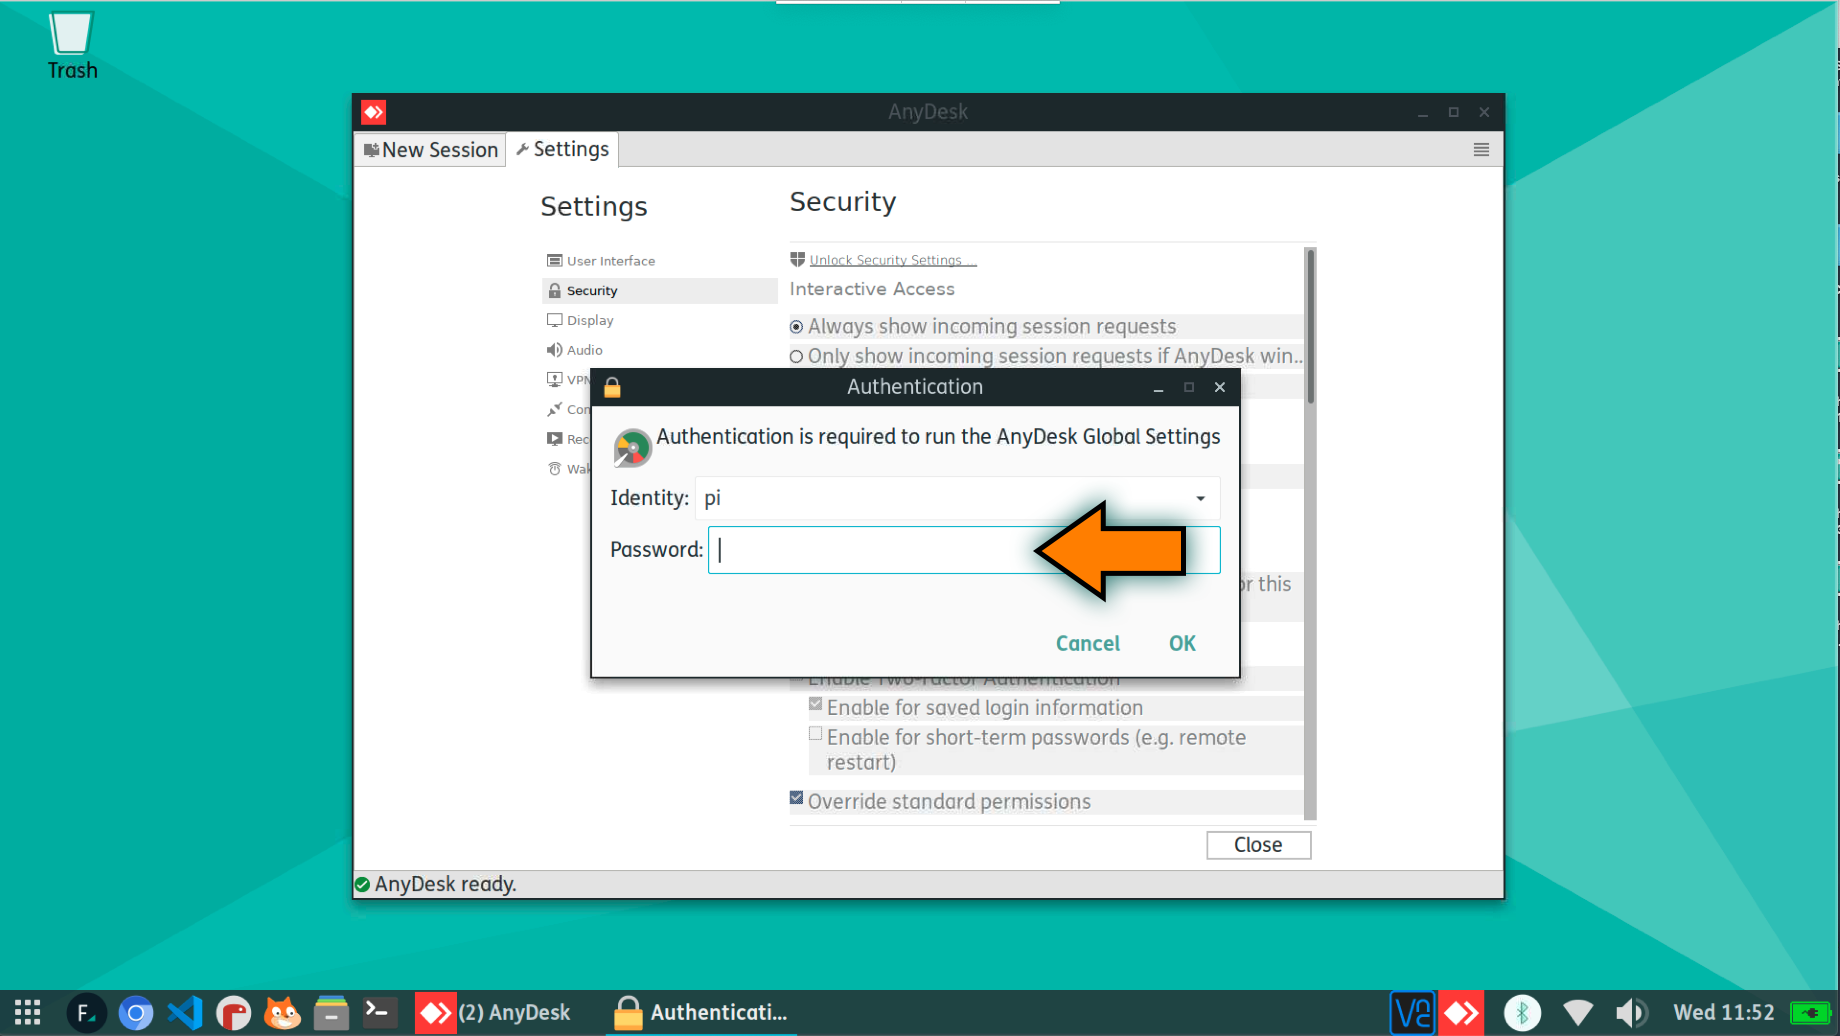
[SCREEN 8] You will need to authenticate the pi user with the same password set for the pi user for the pi-top. Enter that password and click “OK”.
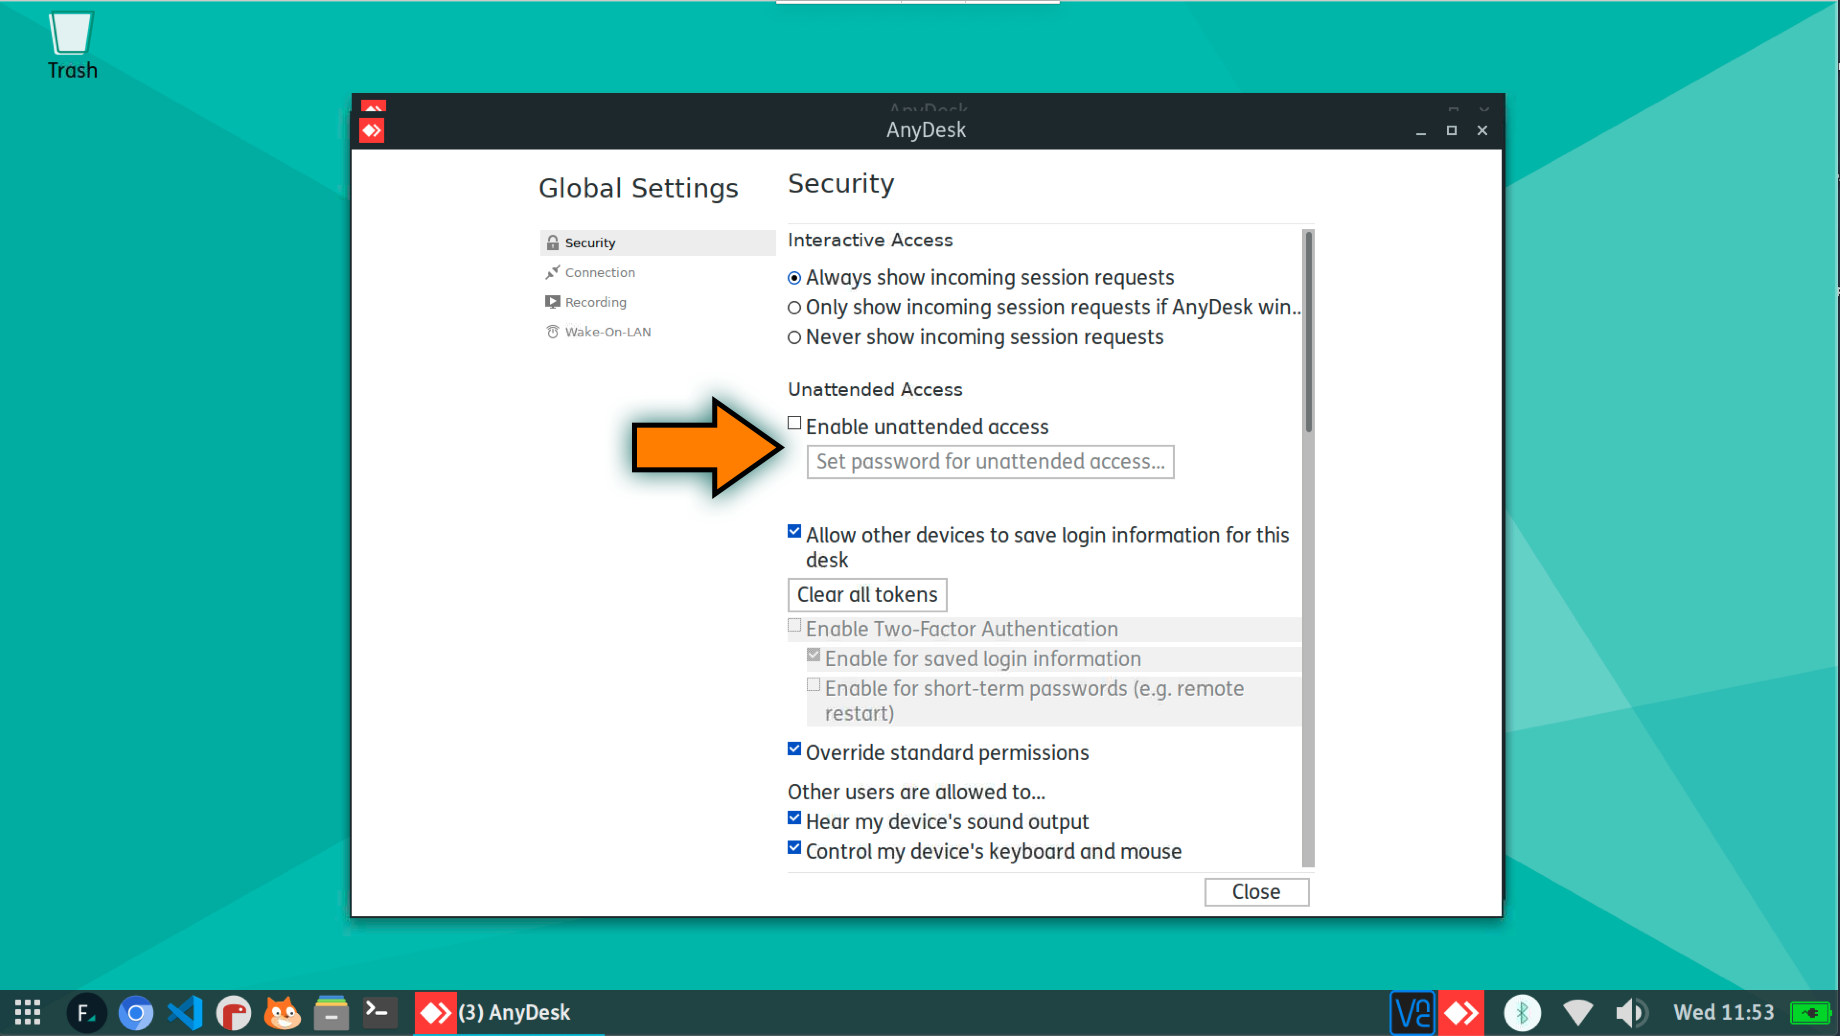
[SCREEN 9] We now adjust the settings for Unattended Access by selecting the box “Enable unattended access”.
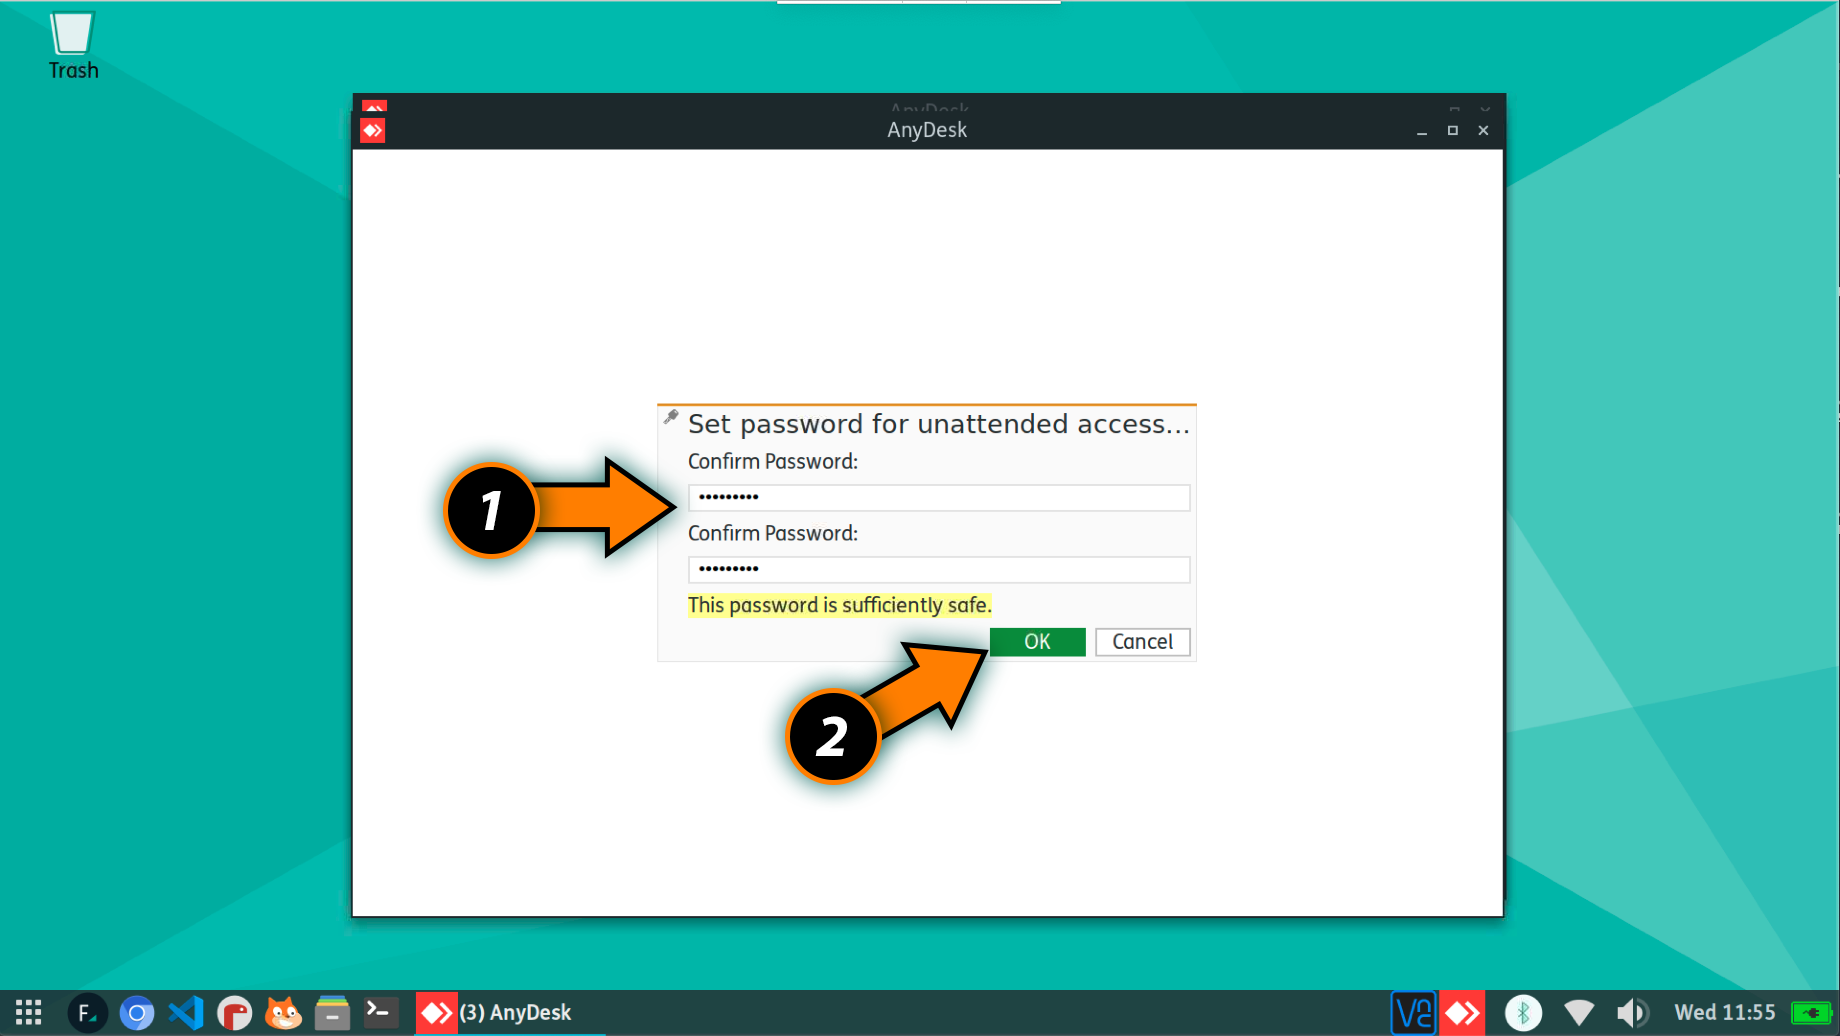
[SCREEN 10] Top set up unattended access, you must set a password and confirm it [1] and then click “OK” [2].
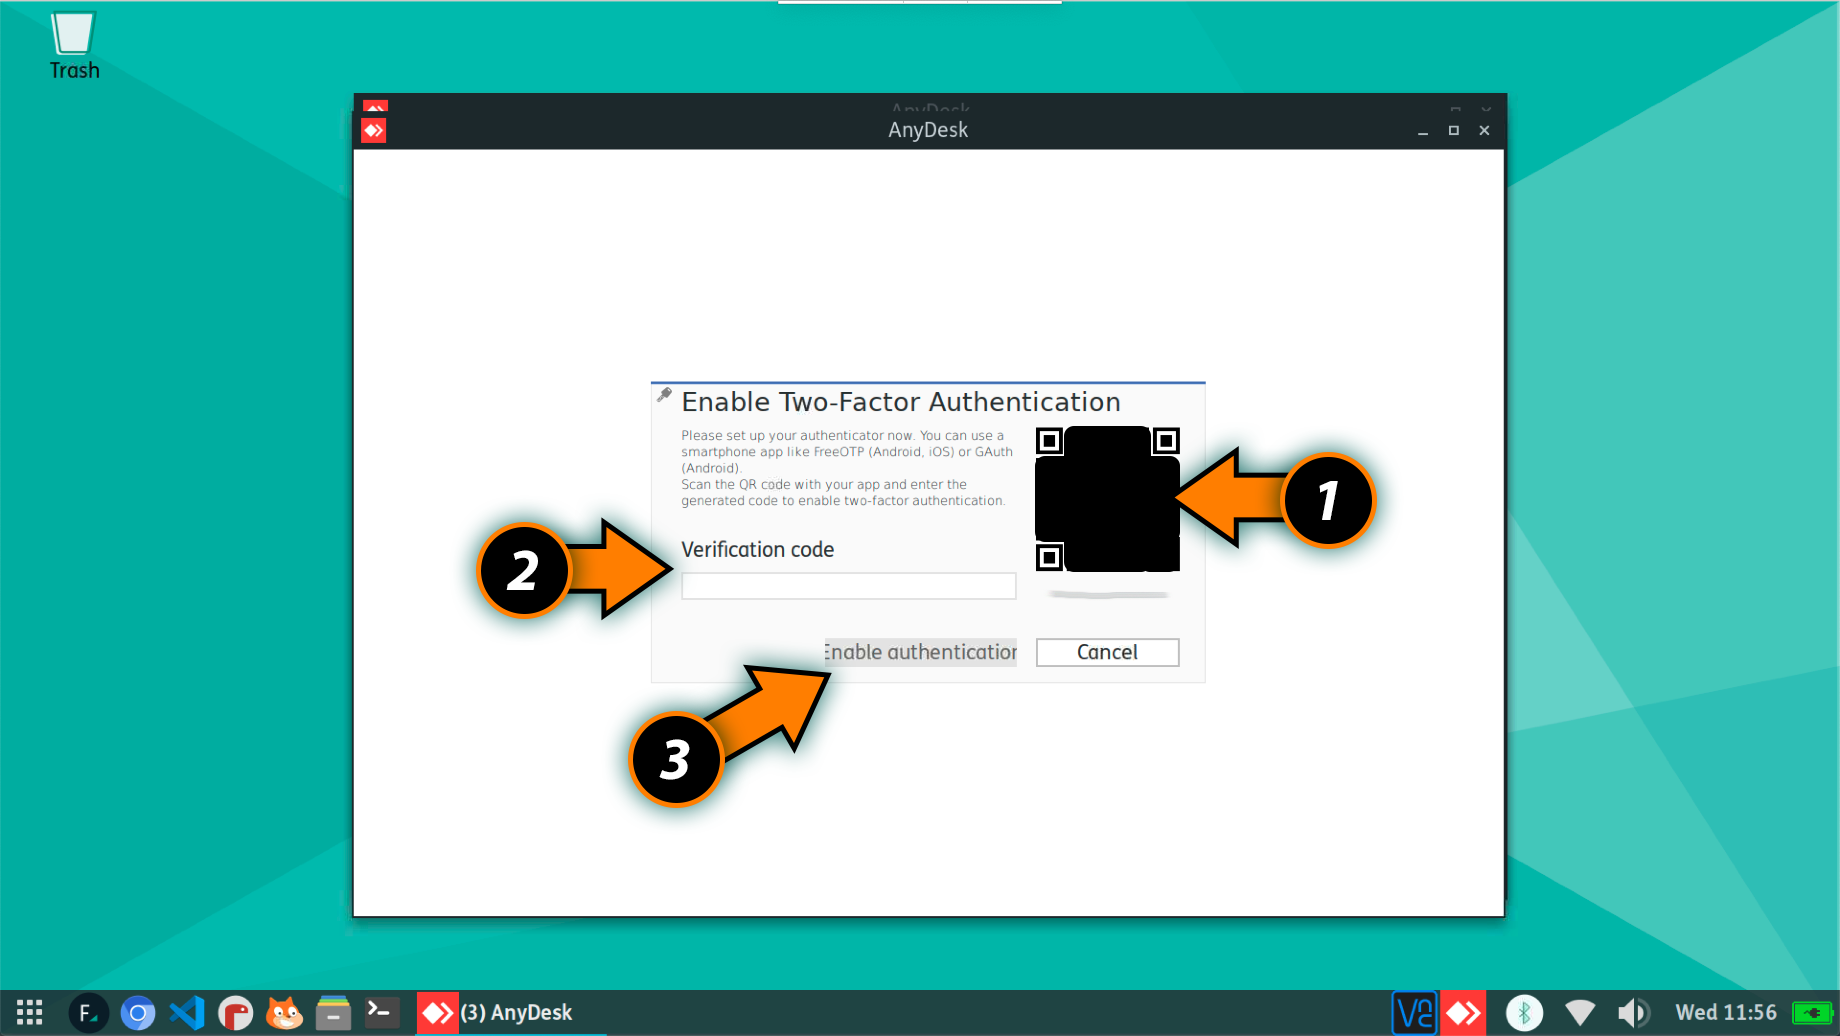
[SCREEN 11] You may be prompted to use Two-Factor Authentication. This is a great idea for enhanced security but seems to be optional.
To use 2FA, scan the code with a 2FA application such a Authy or something similar.
Once you scan the QR code [1], you should see generated codes on your device. Type the code in the Verification code [2]. Then select “Enable authentication” [3].
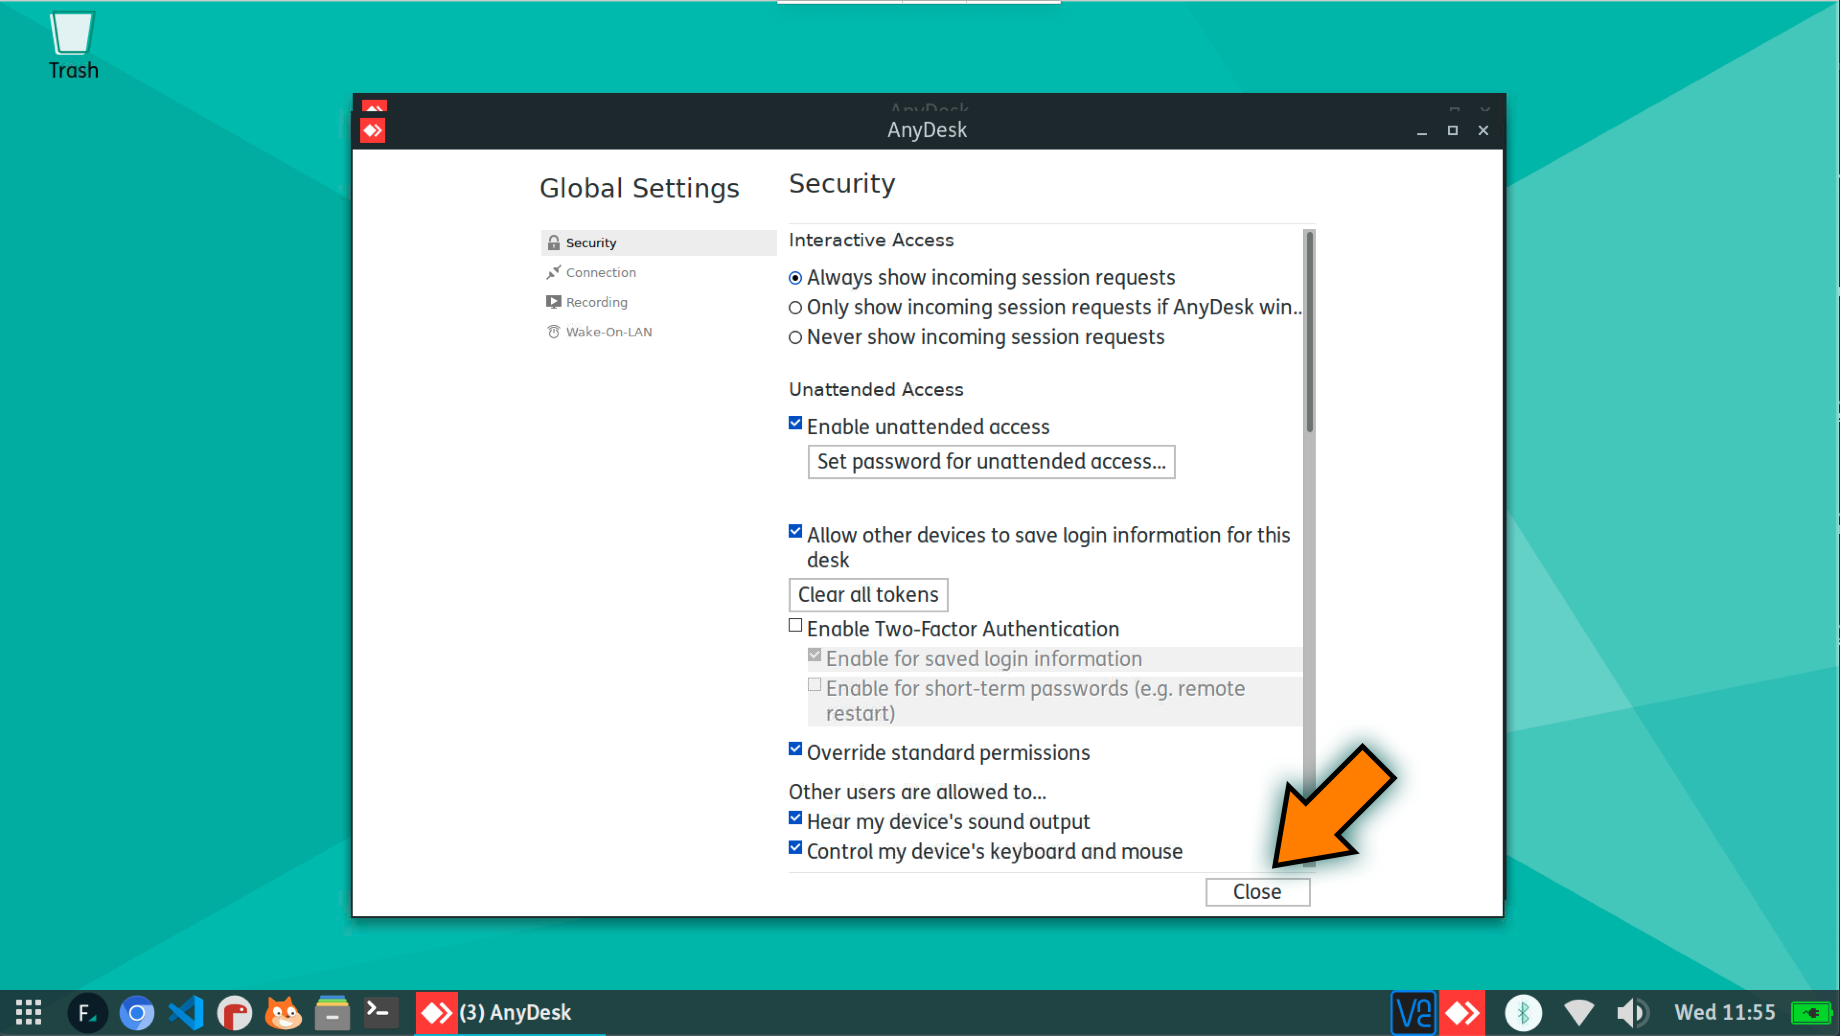
[SCREEN 12] With that completed, the Unattended Access is set up and you can now simply click “Close” and you’re done.
Conclusion
Now you can remote to your pi-top[4] and I think you’ll find it works more snappy and will respond with far less latency. Bonus is that AnyDesk can take screenshots of the remote session and many other fanciness I think you’ll find very handy.
Give it a try and let’s chat about what you think, right here on the pi-top forum!
Closing comments: If you find anything that can improve the formatting of this post or the way the information is presented that can make it more clear and easier to follow, please let me know.