
Have you ever found yourself with a project that you wanted to control remotely but didn’t know how to start? At pi-top we like to use web technologies to add user interfaces that can be opened on any phone or laptop with a WiFi connection to control and monitor our projects. We’ve found them to be so useful we want to make creating interfaces this way easier.
With that we are very excited to announce a new addition to the pi-top Python SDK, Web Labs: experimental Python classes for building web interfaces for your projects! Drive your Robotics Kit projects with a joystick, get a video feed from your pi-top’s camera direct to your phone, add a button to fire rockets (foam of course), add a button to stop it firing rockets, build a full dashboard for a home hub, there really is no limit.
We go through a basic example later but if you want to get straight into trying out this new feature check out the docs. We do recommend checking out the rest of the post though as it illustrates some practical reasons we did this!
Origin Story
We first started building a web based controller for the pi-top back in 2018 when we entered in Pi Wars, a Raspberry Pi Robotics competition based in the UK.
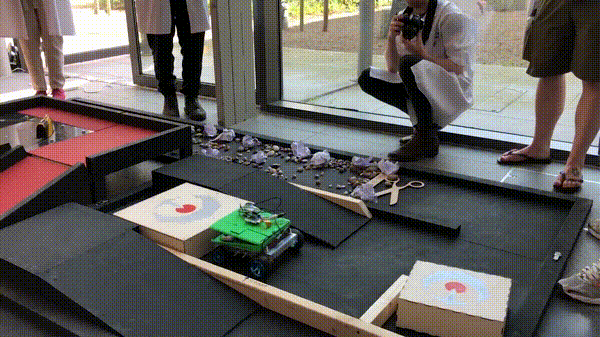
When developing our robot we hosted a server on the pi-top, with a website as our user interface, in order to control and get feedback from the robot. For example we used it to see the results of our computer vision processing while it tried to find coloured balls.
We had a controller page with joysticks so we could use a phone to drive the robot.

We added a photo booth page so other participants at Pi Wars could take a photo using the robot’s camera for us to post on Twitter later.
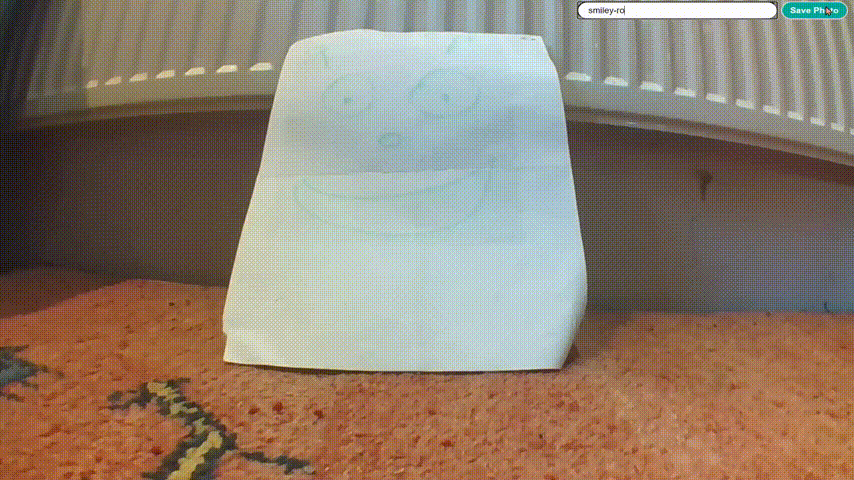
We even used it to give our robot a face, and named it roboTOP.

The most important thing we found was that once we had set everything up we made progress on the core problems of each challenge much more quickly.
At the time our products focused primarily on coding on the device using pi-topCODER so this work never made its way to our users, however with the launch of the pi-top[4] and the Robotics Kit it became clear that providing these web interfaces would help users get up and running quickly.
That thinking prompted a cross-team effort to add a web controller interface to the SDK so it could be used to drive Robotics Kit projects around. The Pi Wars controller interface was converted to use a Python server, improved, and subsequently integrated into the SDK. We didn’t stop there however, over the last month we added the ability to build these kinds of web interfaces from scratch with a basic understanding of web technologies, in fact we hope to use this to teach HTML, JavaScript and CSS!
How do I get started?
You’ll need the latest SDK packages, which you can download by using the OS Updater Tool. You can trigger an update check manually by going to Start Menu - System Tools - Check for Updates, or on a terminal running:
sudo apt update
sudo apt dist-upgrade -y
What can I do?
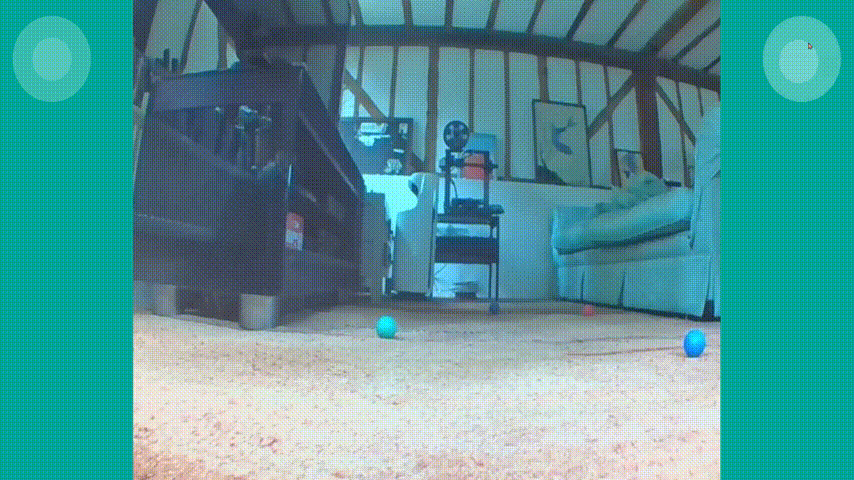
If you want to try the pre-built controller similar to the one used in Pi Wars to drive our robot around you can use the RoverWebController class.
Add a python file named main.py that contains the following:
from pitop import DriveController, Camera
from pitop.labs import RoverWebController

camera = Camera()
drive = DriveController(left_motor_port="M3", right_motor_port="M0")

rover_controller = RoverWebController(
    get_frame=camera.get_frame,
    drive=drive
)

rover_controller.serve_forever()
When you run the file you should see something like this:
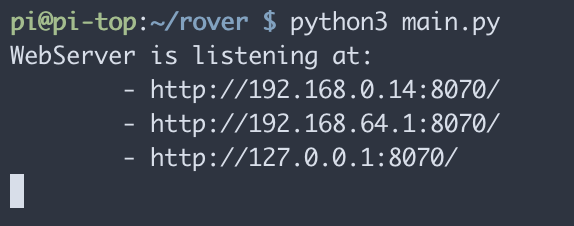
Open the first url printed on your phone or laptop, making sure it is connected to the same WiFi network as your pi-top. You should be able to drive around your pi-top.
If you want to build your own interface from scratch you can use the WebController class. Add the following to a new folder in a main.py Python file:
from pitop import LED
from pitop.labs import WebController

led = LED("D1")

def blink(times):
    led.blink(n=int(times))

controller = WebController(message_handlers={'blink': blink})

controller.serve_forever()
To add the user interface you need to add an index.html file to the same directory. To setup the page you should extend the base-controller.html template at the top of the file, then you can customize it by adding html elements. In this case we want an input to choose how many times the LED should blink, and a button to start it blinking!
{% extends "base-controller.html" %}

{% block body %}
  <input id="times" type="number" value="1"></input>
  <button
    onclick="publish({type: 'blink', data: document.getElementById('times').value})"
  >
    Blink
  </button>
{% endblock %}
Running the python file in the same way as above and and navigating to the url on your device you should see the input and button.
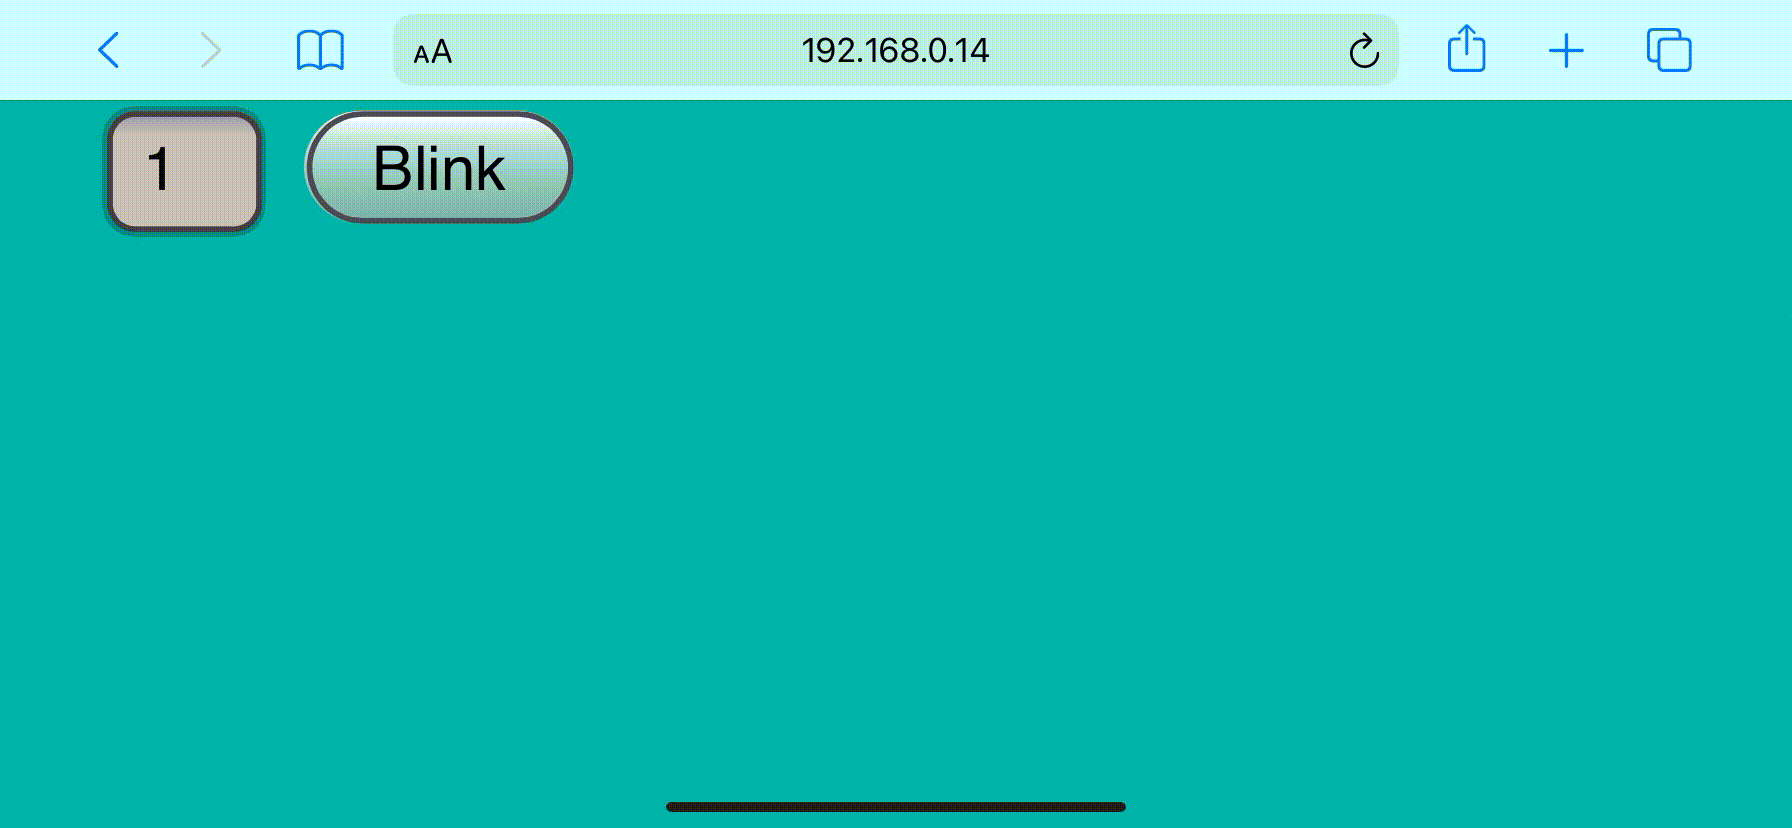
And your device should be responding when you click the button!

This is really just scratching the surface of what you can do, there are lots of examples on the pi-top SDK github for you to have a look at as well.
For a much more in-depth look at all the capabilities have a look at the docs.
We love feedback!
Let us know what kind of interfaces you would like to build, ideas for improvements, issues you find or general thoughts by commenting here.
Or if you would like to add to our Web Labs yourself we encourage you to open a PR on the SDK GitHub!