The pi-top [3] + Raspberry Pi 4 (Franken [3])

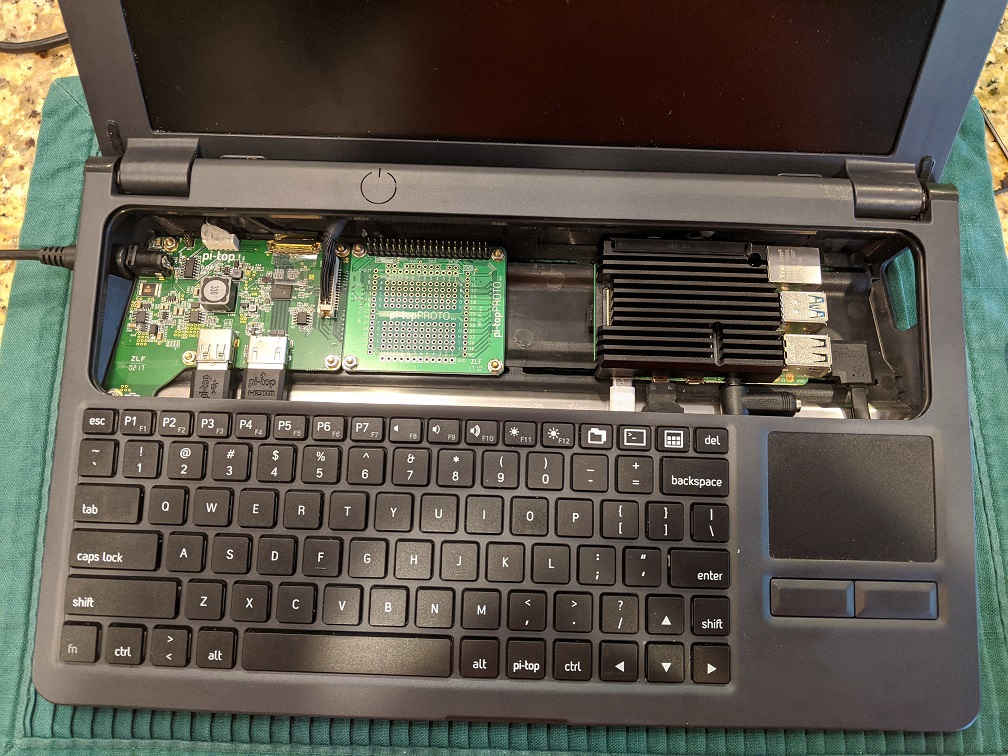
We’ve heard a lot of you asking about when we’ll release a pi-top[3] that can accept a Raspberry Pi 4 and while we love the idea ourselves, there’s a lot of prototypes that need to be made in between to get something like that working!

I have a reputation in the team for being the Dr Frankenstein of electronics (See evidence:zombie: :zombie: :zombie:). So I thought while London is under Covid-19 Lock down, I may as well have a go with putting a Raspberry Pi 4 Model B inside of a pi-top [3]!

Needless to say, improvements can be made but I thought I would show V0.0 of my creation first!

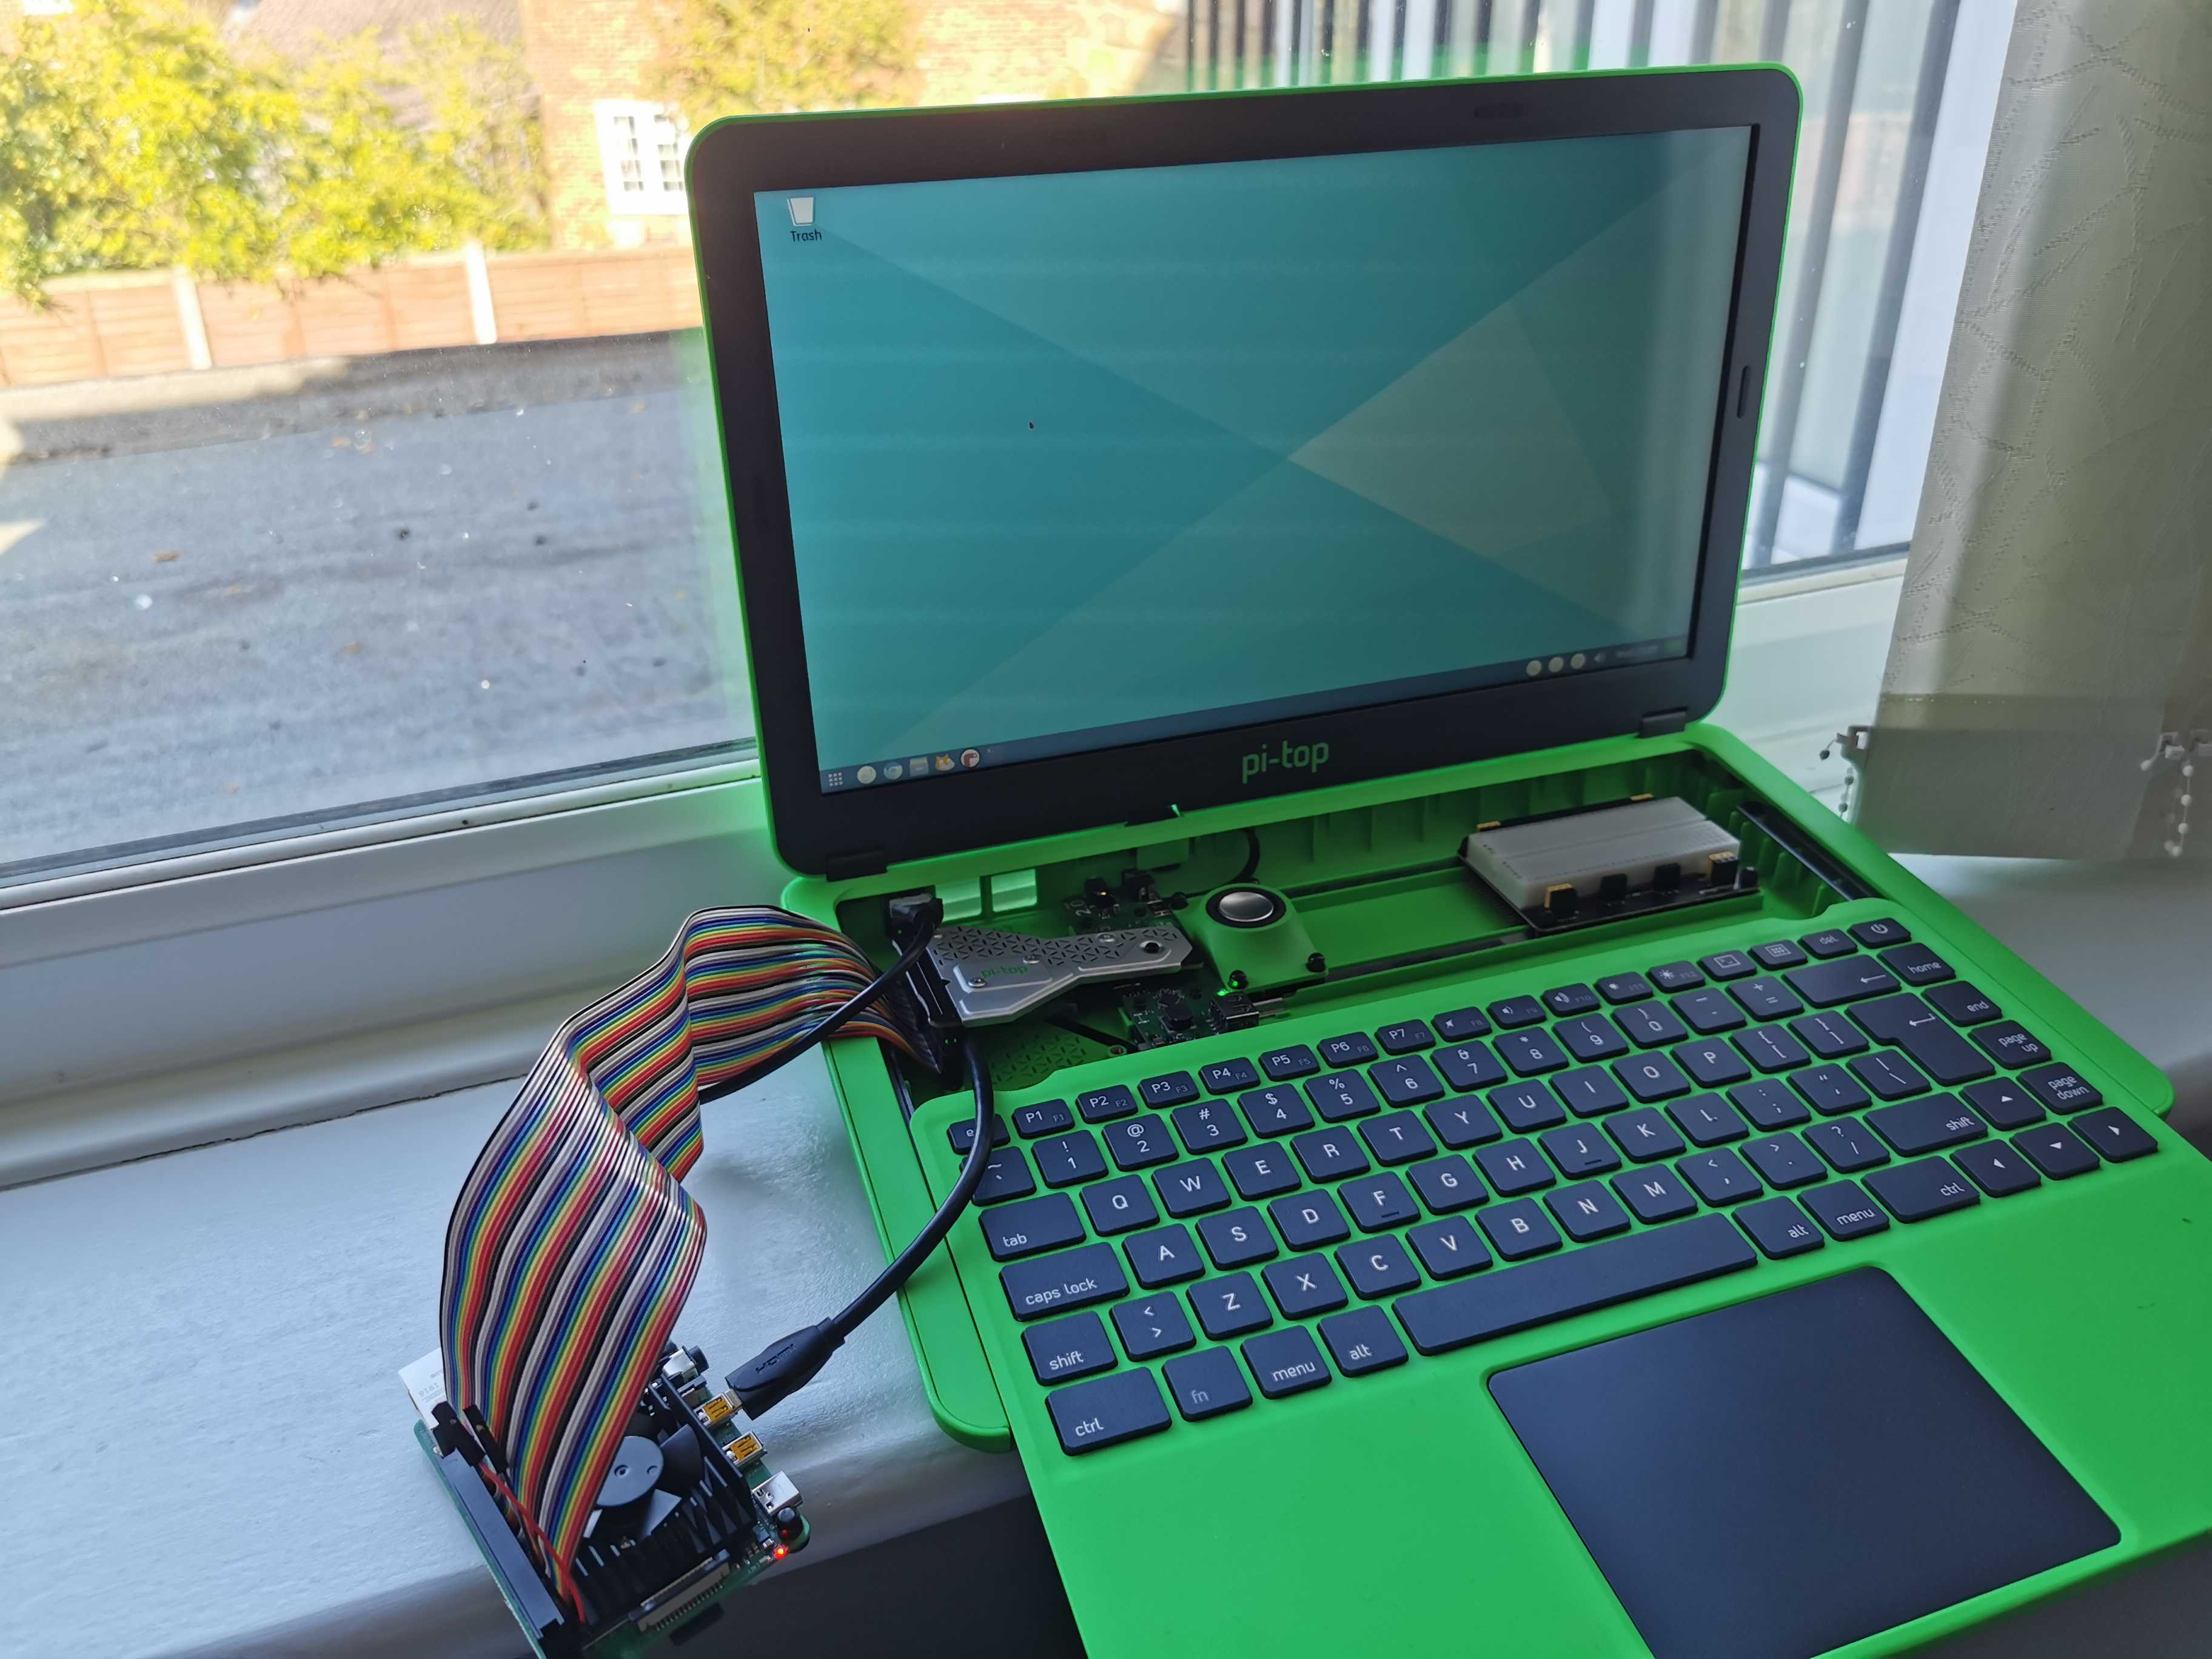
This was all done with:

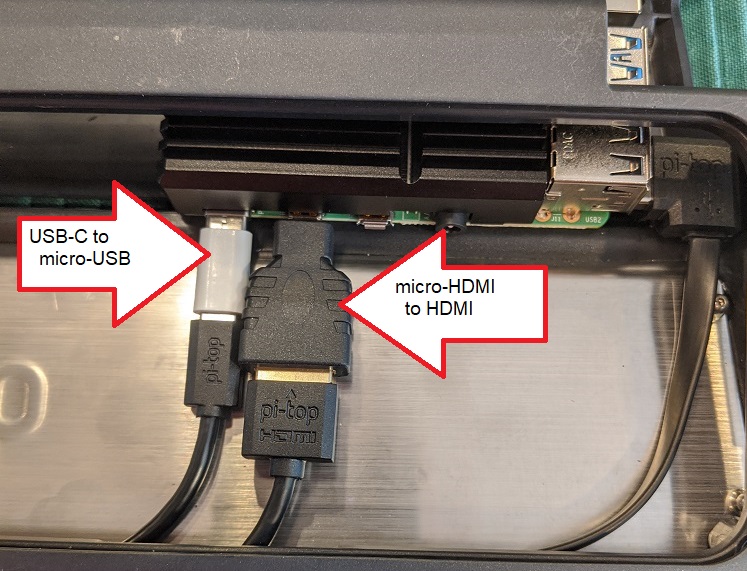
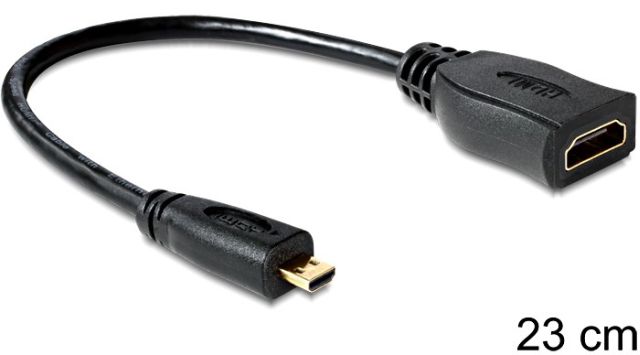
  • Micro HDMI - HDMI cable
  • Female USB - Male USB cable
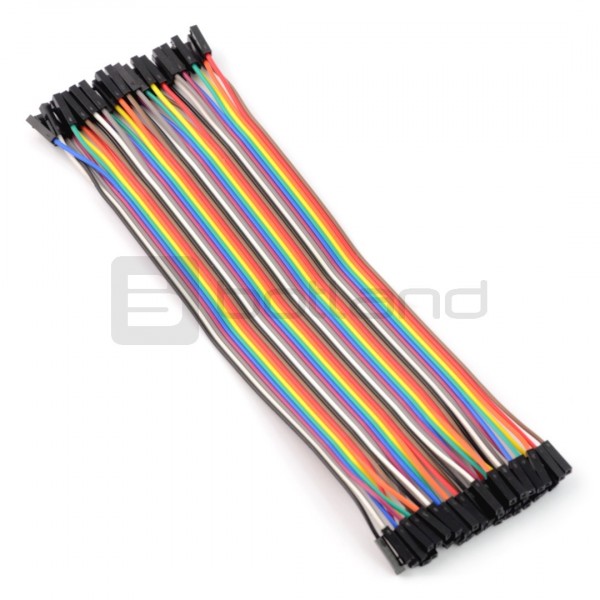
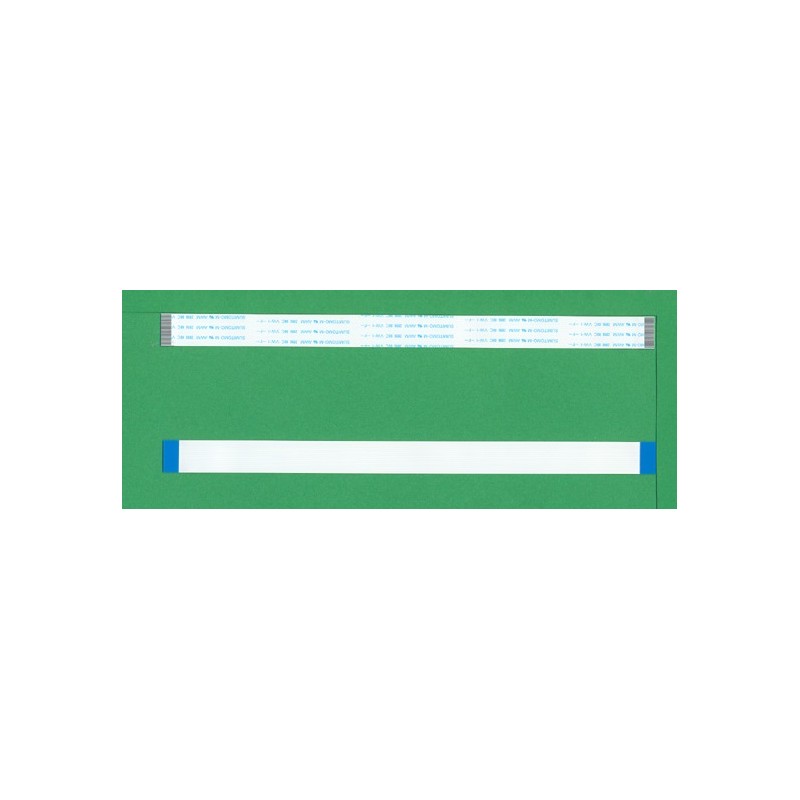
  • 40p ribbon cable

I could have made it with just a few male to female jumper wires. In that case I would have only connected 2 x 5V pins, 4 GND pins, GPIOs 2+3 and the GND pin at Pin 9. The next steps are getting the whole Raspberry Pi mounted underneath the sliding keyboard and also getting the second HDMI Port accessible without having to slide open the keyboard.

Let me know what you all think!

Edit: Blog post on the build steps is here

-Rez
pi-top Team

1 Like

Rez,

It is great to see that attempts are being made. The laptop form factor is great.

Perhaps the pi could rest/mount on the rail and repurpse the port openings for heat exhaust.

In any case, this is very interesting.

thank you.
Rob

monstrously beautiful xD , I was designing a solution on paper but in the end I told myself that the least painful solution would be a new hub with type-c, 3 mini-hdmi: 2 connected to the pi4 and another to connect an external monitor if needed someday
I had several problems, one was that it is necessary to modify the pitop3 from behind so that the pi4 fits well.
the other problem is the usb cable that connects the pi2/pi3 with the hub needs a new location since the pi4 in that place has a gigabit-ethernet port…
dont know if the “40pin-bridge” will need a redesign.
ok, let me share my frankie with you guys.(i was compiling bitcoin/altcoins wallets with pitop3 thats the reason of those fans)

a little bit overkill xD

this other one is not so crazy

1 Like

I was thinking exactly that (mounting it on the modular rail). I even took off the magnetic mounts from one of the Speaker_V2s I had lying around. However the USB +HDMI cables i got were a little too short. Having seen @AkiAfroo’s Im thinking about mounting it above the cooling bridge, but then I definitely wouldn’t be able to close the lid!

Little more thinking is needed unfortunately!

@AkiAfroo Wow, that’s a serious Raspberry Pi cooling system! Got any benchmarks on performance?

hi,
in the 2nd photo i got better cooling (direct air) i dont have bench but i can tell you the PI was really cold.

pd, i will pay double the price for a pi3 with 4gb of ram just to avoid to modify my pitop3 or a raspberry pi4 classic version (pi3 form factor)

I managed to run cables out of the back and put the Pi 4 in a case on the lid of the Pi-top. Not the most elegant solution but what would make it easier would be if there was a single cable that carried the 40 pin connector, USB, and HDMI out from the pi-top. It could then be connected to an external Pi 4 yet still leave the original connections so you could still use a Pi 3 if you ever wanted to change it back

the pitop3 power cable its enough for to feed the pi4?

are you power on the pi4 through 40pin connectors?

@dvnmedia Nice! Got any photos? Interested to see it.

Also, I hear you on the USB, HDMI and 40p over a single cable - that’s been a long-standing dream at pi-top for a while. We had a project called Node at one point, which was a 5.5mm diameter very flexible cable that carried all 40p GPIO about 60cm across to another connector. It was our fight against the usual 40p ribbon cable that you see being used so frequently with the Raspberry Pi - which we found to be cumbersome unless you are going in a straight line (which is rare).

Bit of background: it was made for pi-top [4] when it was docked to the back of its touchscreen so that we could still have GPIO access at the front of the screen for projects. Eventually, we decided to instead have the pi-top [4] around the front and use a single cable to connect to Touchscreen - we managed to get 2x USB 2.0, HDMI and power over a single cable using USB-C connectors. Sadly, this is about the limit of what you can stuff down any standard interface without getting too costly.

How about this for a solution:
Use a USB-C cable to carry HDMI, USB and power - you’d need to break this out into it’s constituents with PCBs/connectors at either end (to convert from pi-top [3] -> USB-C connector -> RPi4). Then get a 40p ribbon cable, break the wires apart and wrap them with some rubber tube or acetate tape so it was circular and more flexible. Then make it all as neat and tidy as you can - this would reduce cables to just 2 and both would be circular and fairly small in diameter, so hopefully you might even be able to get the pi4 on the magnetic rails inside :smiley:

@AkiAfroo pi-top [3] has more than enough power on the 5 V rail for a Raspberry Pi 4, I believe it’s 3 A max current (15 watt) - the only thing that would limit you is if your cable was long and had a high resistance, causing the voltage to drop below operating point

2 Likes

Hello, some words about my project “RPi4 inside PiTop3”
What you need?

  • some cables
  • some goldpins
  • radiators
  • microHDMI to HDMI cable
  • mini jack adapter
  • connection tape 24PIN 200mm/12mm TYP 06
  • driller, hot glue, a bit of courage :slight_smile:

Warning! You will definitely lose the warranty! I DO NOT take any responsibility for errors in the project. You do everything only at YOUR responsibility. CHECK ALL CABLES AND CONNECTION TWICE!

Everything is here, pictures say more than 1000 words.: https://photos.app.goo.gl/KdmAnLxT3bBCShNB9

Remember that RPi4 heats up a lot, probably it could use active cooling, but this is a topic for me later.
Good luck!

4 Likes

Wow, nice work Amiga! The pictures are brilliant and you’ve even got the keyboard and lid closing!

I have to say, well done having the patience to do all that wiring, I am massively impressed :smiley:

1 Like

Hello,
Not so elegant, but that was 2 hours project :slight_smile:
Greetings.

For a first attempt it’s brilliant, all projects have to start somewhere! If you have any ideas on how to make this easier for others to do themselves I would fully support it :+1:

1 Like

It was very easy, “not elegant” means my drill work :slight_smile:
Greetings.

1 Like

@ MajorAmiga waoo! , wait ! , holy cow i saw the other pics in google photo . :heart_eyes: everything works? and thnks to post all the components. you save me a lot of time.

how many mm is the official adapter?

i think i will start modding the next week but i will not make a new holes as M.amiga did maybe i will try to use a extender cable.

ok, the model printed is this one yhy-18002500 with dc jack:
5.52.1/5.52.5 etc

i need confirmation of the diameters.

edit, https://forum.pi-top.com/t/pi-top-3-technical-questions/72

Excellent hack. You definitely got the most out of it. I suggest that you now add a decent storage solution (E.g. mSATA) and get rid of that MicroSD. Your pi-top will fly.

What I am looking for in the next Pi-Top:

  • Raspberry Pi 4 or later, RAM 4GB or more.
  • Storage ‘add-on’ such as an mSATA solution that fits on the rail.

That would be an actual laptop that can replace a PC.
MicroSD is a waste of time: slow & short life-time.
It’s quite easy to operate 100% with MicroSD removed.

Example of an mSATA solution (might be too tall for pi-top:
https://raspberrypiwiki.com/index.php/X856
We really need something that can sit on the rail.

I have older style Pi-Top. Not sure what version it is called. Today I converted it to Pi4 w/4GB RAM using a couple of adapters and a heat sink plate. I was only able to use the top plate of the heat sink but it appears to do the job just fine. The screws holding it down come up through the bottom of the Pi-Top case. The plate required some grinding/sanding to allow the 40-pin connector to fit. It is VERY snug.
I had to shave down a lot of rubber off the HMDI adapter as it was just too bulky. Everything is REALLY crammed in there.
08-2222222222
plate
08

1 Like