
That’s the original pi-top (the pi-top [1]) That’s awesome that you got it working! Could you send some photos of it all powerd up?
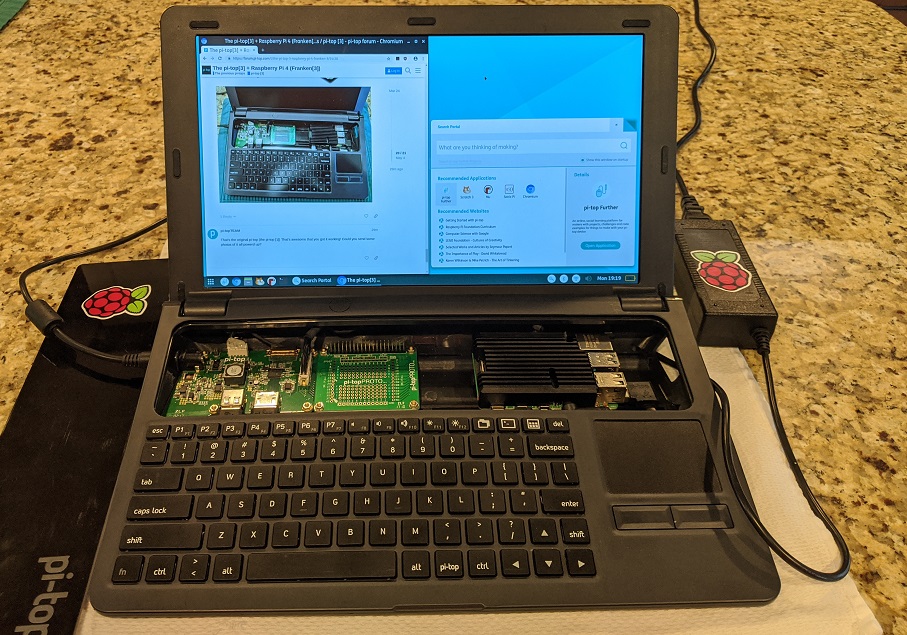
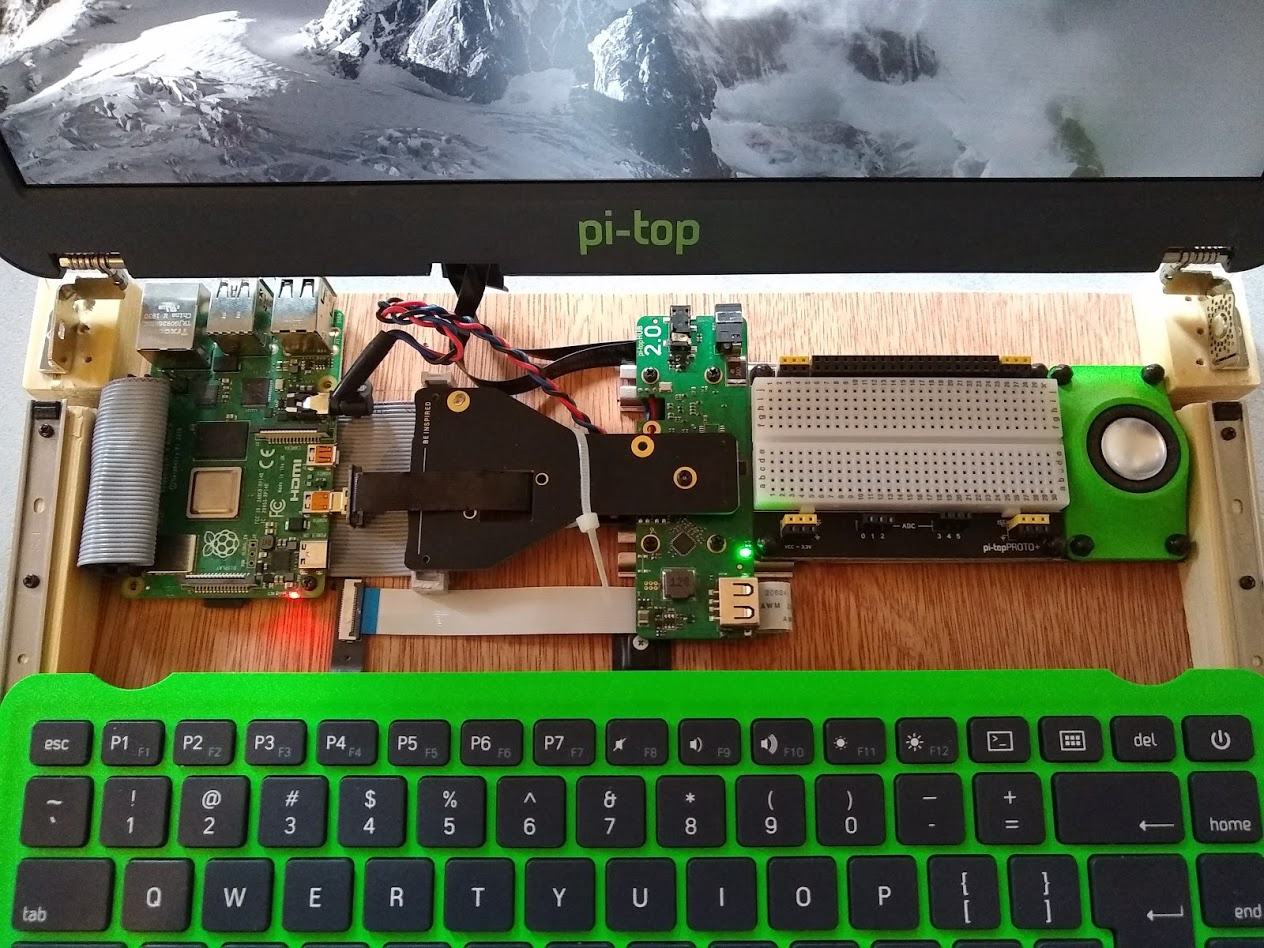
Sure. Here it is powered up and reading about itself in the blog.
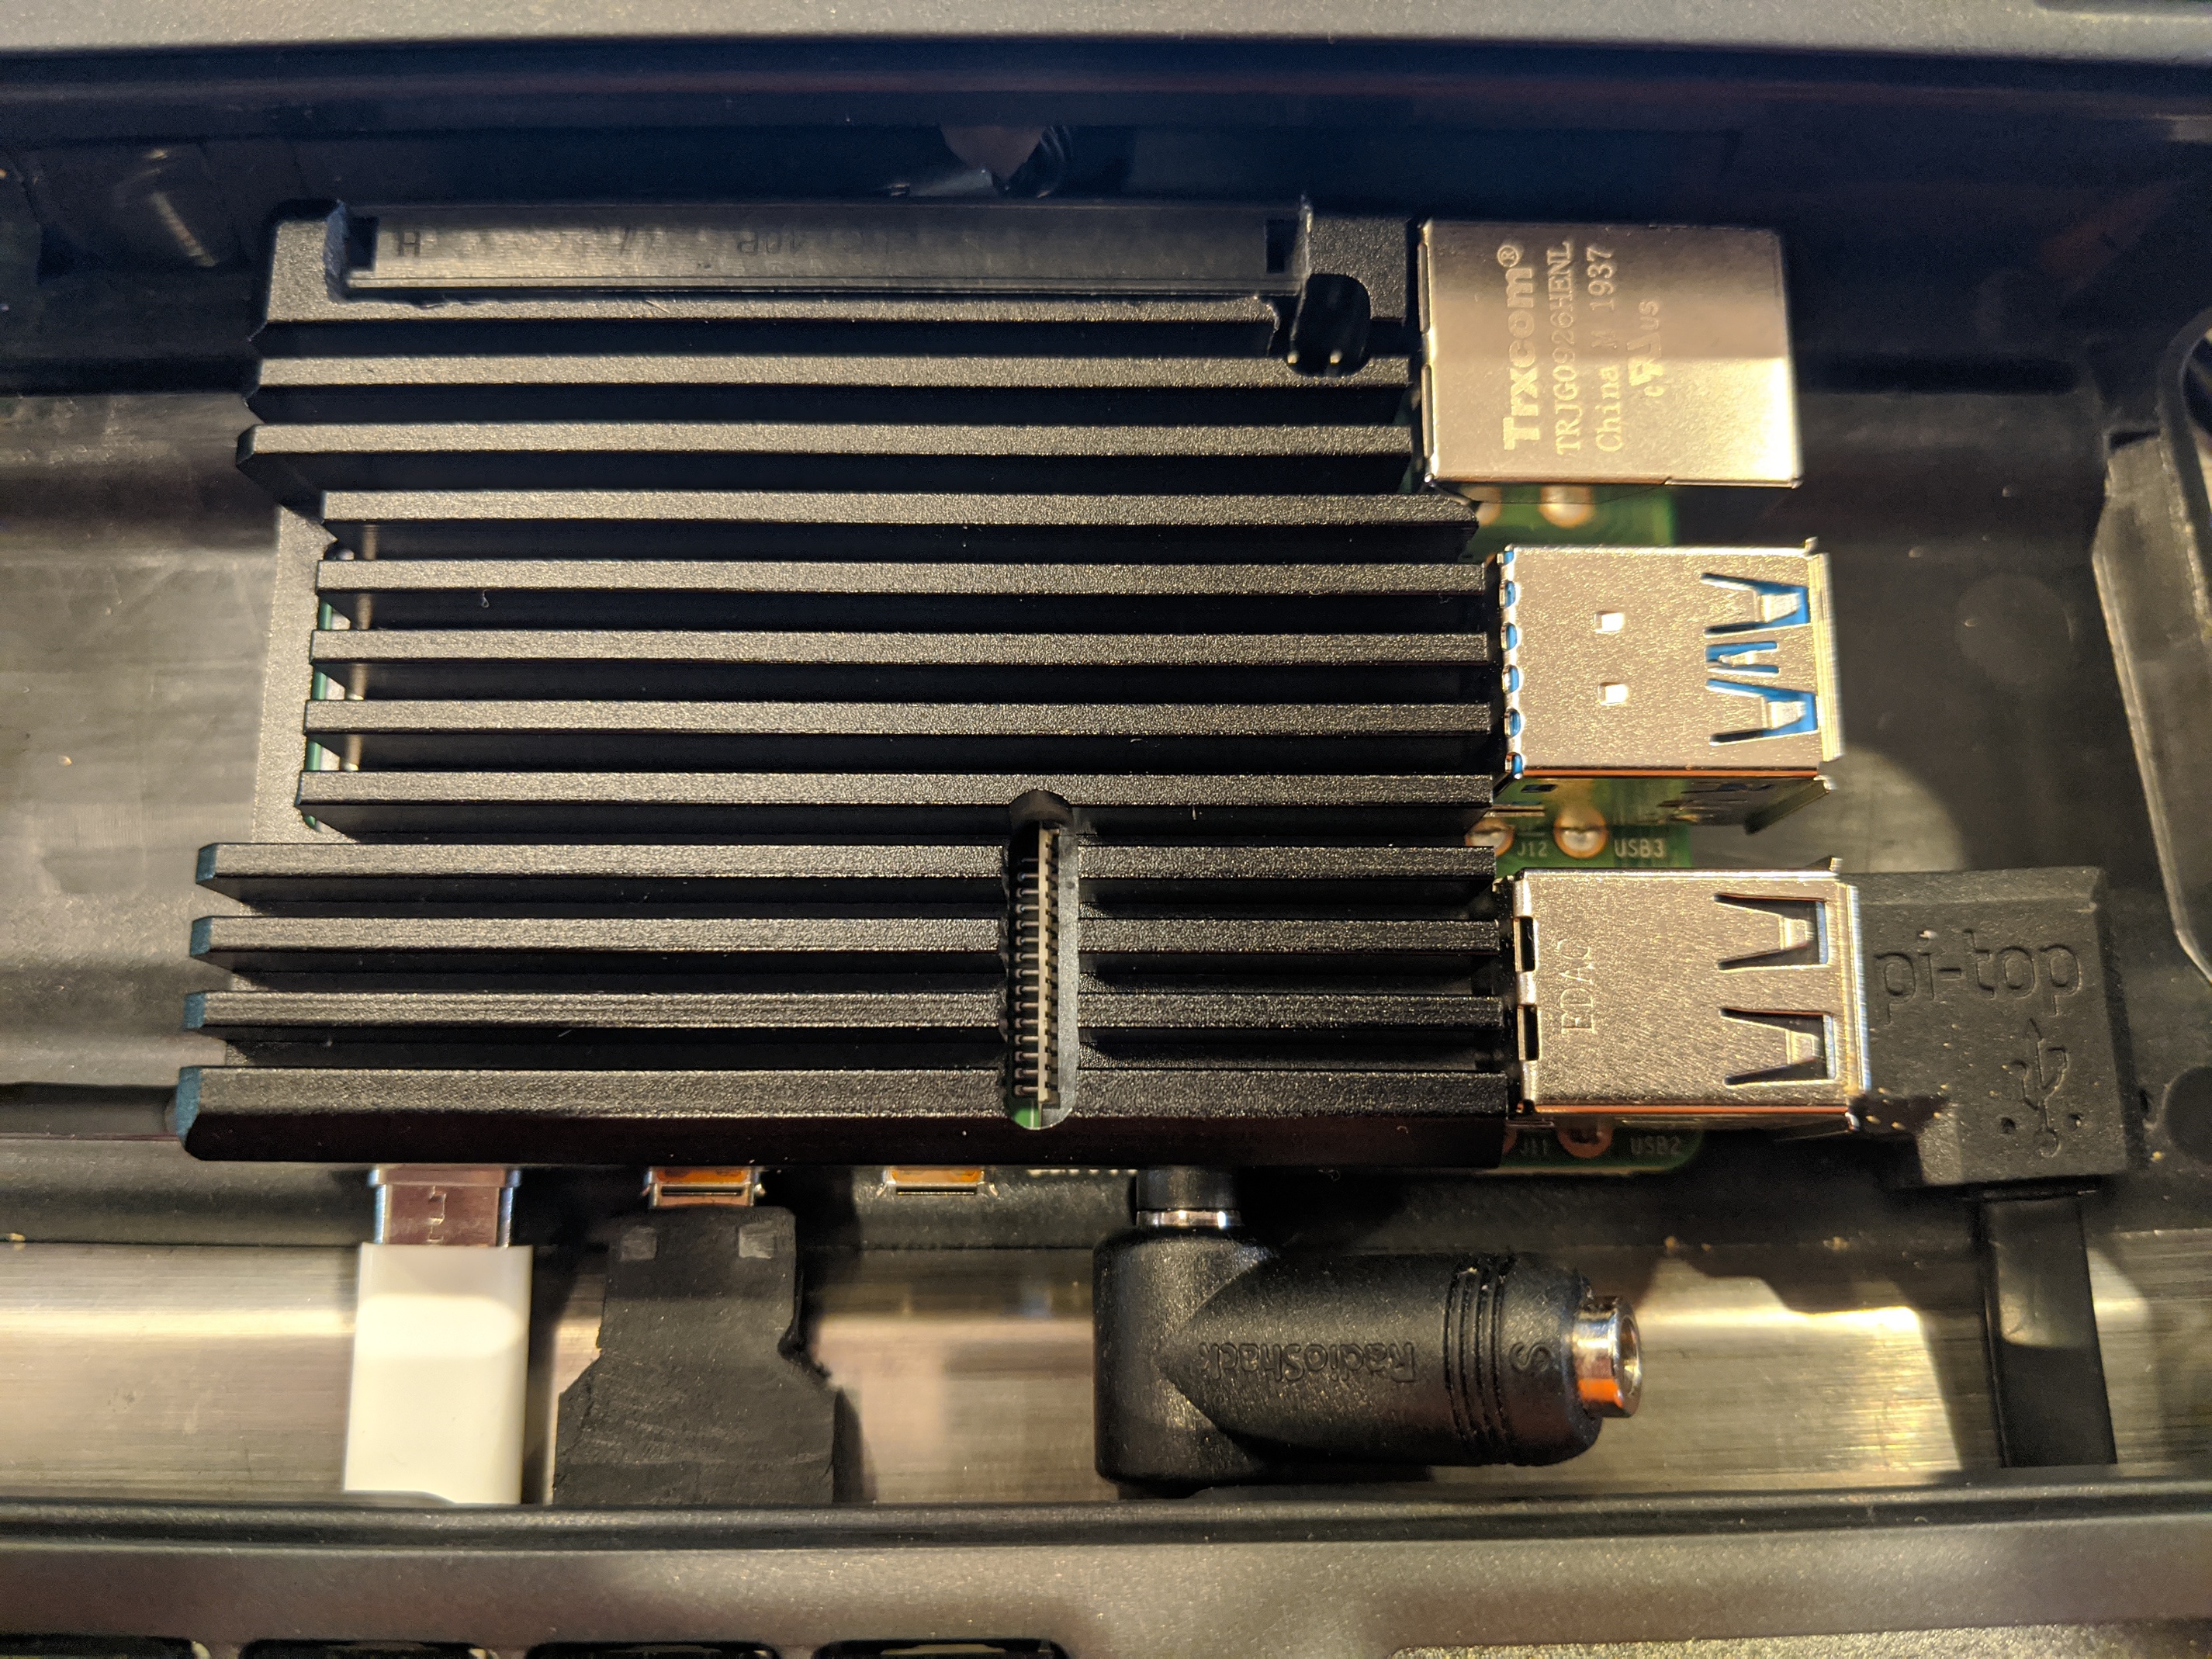
You can see the connectors & adapters crammed in here; from left to right, USB-C to Micro-USB (fit fine), Micro-HDMI to HDMI (trimmed down with belt sander and a knife); 90 degree angle audio jack adapter from defunct Radio Shack which rotates up to allow access. You can’t see it here but the keyboard definitely bulges out a bit. I just happened to choose the heat sink plate over a fan… because, well, I hate fans.
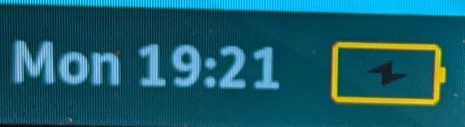
About the only thing that does not work on this original Pi-Top is the battery. It stopped working a LONG time ago.
Oh, and I never did get the new Sirius O/S working on this original Pi-Top using a Pi3. And the old Polaris (?) did not work in it with a Pi4. So I moved to Sirius and you can see it works.
1 Like
Unfortunately now that it’s been on and connected for a couple days it has had a chance to complete all its updates and it no longer boots up. 
Rainbow screen comes up, goes black, never comes back. Green LED blinks occasionally, but nothing else. Back the O/S drawing board I guess.
So, after some extensive and repetitive testing here is what I have found:
[Pi-Top1] + [RPi4] + [Last released POLARIS O/S 2018-07-09] = [no boot, nothing but a blank screen]
[Pi-Top1] + [RPi4] + [Newest clean SIRIUS O/S] = [boots up, works great]
[Pi-Top1] + [RPi4] + [Newest clean SIRIUS O/S] + [All available updates] = [rainbow screen, then black screen, then nothing]
@tzott I’m having a look at the issue. We never planned for the pi-top[1] to take the Rasberry Pi 4, so it will take me a little time to investigate (my main issue is that I don’t have a spare RPi4 at my home, please bear with me while i get one delivered!)
No, please don’t spend any time on this. Who else has even kept their old original Pi-Top1 running?
To add to my equation:
[Pi-Top1] + [RPi4] + [RaspbianBuster] = [no boot, nothing but a blank screen]
Who would like me to keep going? LOL
2 Likes
@tzott i’ve just realised that it may be due to the hub and screen you have. Some pi-top [1]s and CEEDs have a 1366x768 screen resolution, while the later models have a full 1080p scree. These latter ones are the ones that seem to successfully work with the Raspberry Pi 4. If you send a close-up photo of the hub, then I’ll be able to identify if it’s the Full HD or the 768 version.
I bought the pi-top3 for 2 reasons:
- A general purpose laptop for me.
- Get my daughter into coding.
It worked brilliantly for #2, but I found the pi 3 to be a little under-powered to be used as a laptop. When the pi 4 was released, the hacking began…
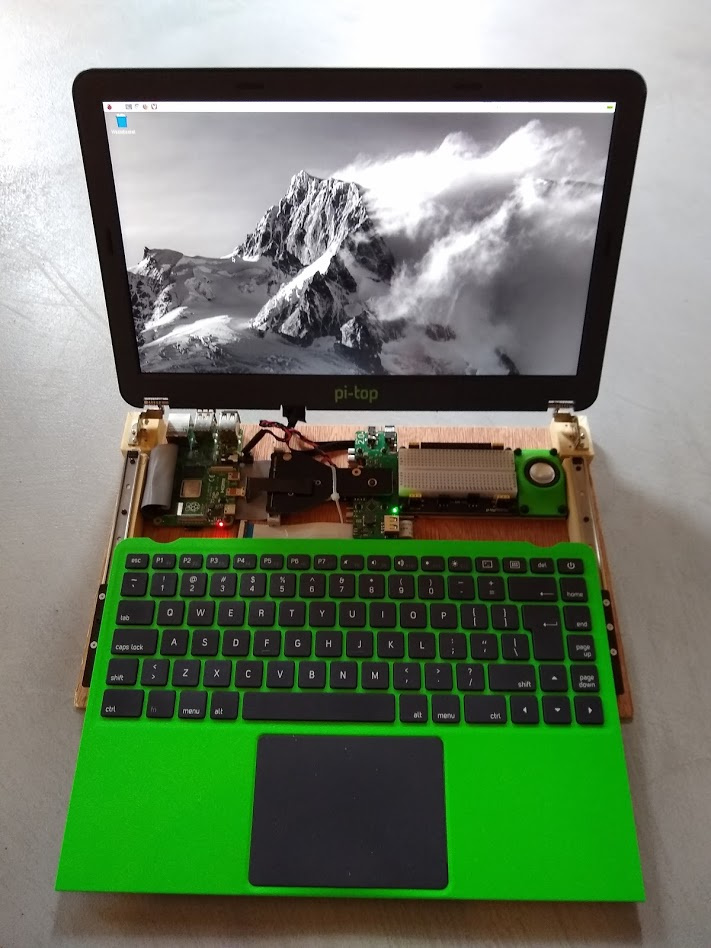
As a proof on concept, it works well. Now I’m thinking of 3D printing a custom case. It is the pi4 - 4 GB (8 GB wasn’t available when i bought it). Its been up and running for a couple of days using Rasberry Pi OS (May 2020). I plan to add a fan SHIM (https://thepihut.com/products/fan-shim-for-raspberry-pi) at some point to help with cooling.
I took me a while to get the speaker (v2) working. Eventually pt-i2s enable worked, but not sure what combination of previous commands are also necessary! It could also be due to the fact that I have damaged the hardware - I think my warranty might be void! 
2 Likes
As a new user, I can only post 1 image per post. Here is another image:
5 Likes
This is incredible! Are the hub, speaker and Proto+ fixed to the base?
I also love that you fed the uHDMI cable through the hole in the cooling bridge and resoldered your own 3.5mm audio cable!
I think I’m most impressed that you managed to keep the Peripheral FPCB (the USB Plugs that go inside the Raspberry Pi) intact when you removed it from the base.
If you do a step-by-step guide on what you did (in another topic) and a shopping list of your parts then I’ll maintain your warranty!
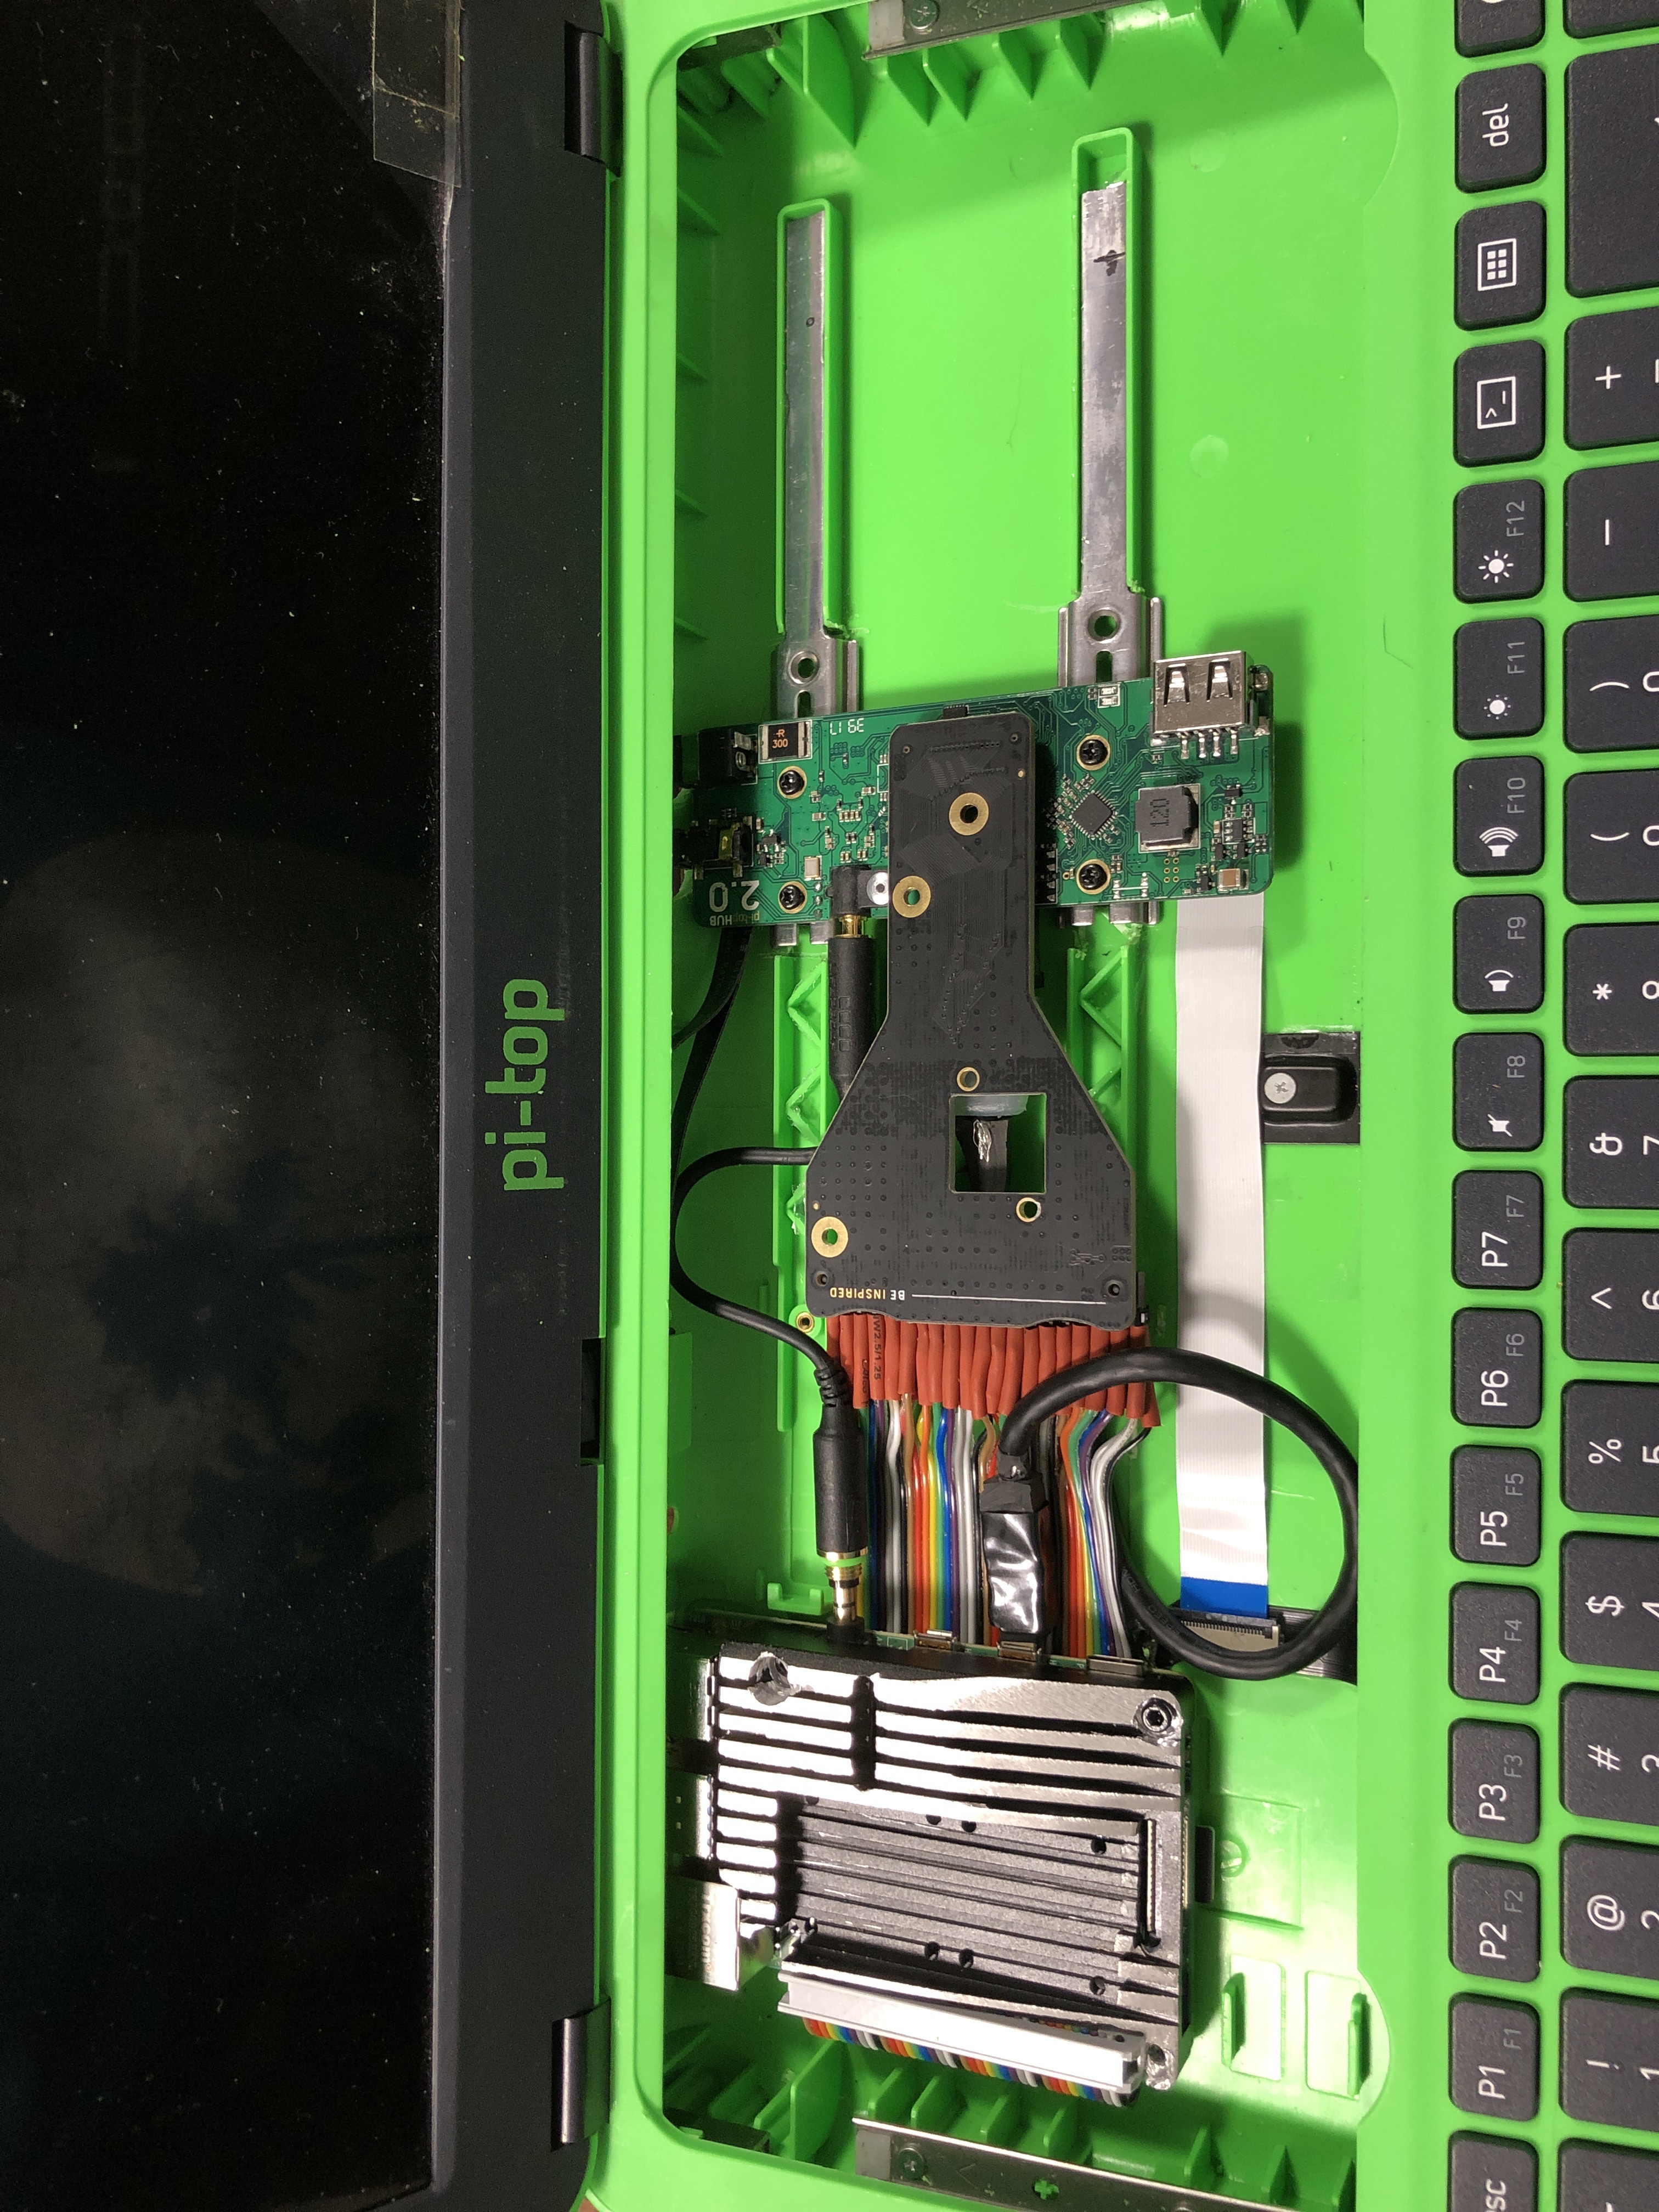
Thanks! The Hub, Proto+ and speaker are fixed to the rails (I managed to prise the rails out of the bottom case). I then trimmed the rails down to fit in as they have moved to the left. With hindsight, I would have positioned the hub, proto and speaker slightly to the right so that I can slide the speaker out - at the moment I have to undo the fixing bolt (that goes thought the Hub and Cooling Bridge) and shuffle things about.
The 3.5 mm jack is the one from the Hub. I cut the 3 wires as close as possible to the PCB, unscrewed it, and inserted the extension wires.
Removing the the peripheral FPCB wasn’t too bad, just pulling slow and gentle.
I’ll try and do a guide. I didn’t take as may photos as I should have - wasn’t sure it was going to work!
1 Like
my God! everytime i want to mod my pi3… appears new ideas. xD
I know how you feel, I’ve been trying to plan a v2 of my first mod, but lots of great ideas coming out of here so i’m not sure where to start!
My FrakenTop v2 Pi4!
Was made by pulling out the old USB connector, Mounting the Pi4 and connecting the gpio cable, cutting and then soldering to length onto a right angle header expansion.
Then once I had the position for the Hub cutting the old mounting rails to length to reuse the old mounts and cutting away the plastic that was in the road of both ribbon cable and mounting connectors so no rubbing would occur.
Made some minor modifications to the micro-hdmi cable so it was as slim as possible. There is an aluminium heat sink on top of the Pi to try and keep it cool, might need to add a fan later on.
Best thing is that both the proto+ fits in as well as the keyboard closes without issue. The keyboard and mouse pad are both functional as well as the USB on the Hub board.
Took me about 5-6 hours to modify. Only regrets is over cutting the USB connector holes and the holes for the power and headphones to outside of the case aren’t the best aligned so they are larger than needed.
5 Likes
I like the use of the right-angle GPIO connector - it might solve the issue I had of the connector and cable (from the Pi GPIO) preventing the keyboard from sliding back.
The parts I used were:
HDMI to connect Pi to Hub
-
DIY USB or HDMI Cable Parts - 10 cm Ribbon Cable: https://thepihut.com/products/diy-usb-or-hdmi-cable-parts-10-cm-ribbon-cable
-
DIY HDMI Cable Parts - Right-Angle Micro-HDMI Plug: https://thepihut.com/products/diy-hdmi-cable-parts-right-angle-r-bend-micro-hdmi-plug
-
DIY HDMI Cable Parts - Straight HDMI Socket Adapter: https://thepihut.com/products/diy-hdmi-cable-parts-straight-hdmi-socket-adapter
Stereo Cable
I used wire to extend the 3.5mm jack. I drilled through the rivet and removed the connector from the Hub PCB and extended the wires by soldering. With hindsight, a less destructive method like this might be a better option (but this has not been tested so I can’t guarantee this will fit in the space):
-
Right-Angle 3.5mm Stereo Plug to Pigtail Cable: https://thepihut.com/products/right-angle-3-5mm-stereo-plug-to-pigtail-cable
-
Breadboard-Friendly 3.5mm Stereo Headphone Jack: https://thepihut.com/products/breadboard-friendly-3-5mm-stereo-headphone-jack
Gerneric Parts
I used a 3.6 mm ply as the base, with 6mm threaded inserts pushed in flush to the bottom face (and glued). This results in the inserts protruding 2.4 mm from the top face of the base. This is enough space to run the ribbon cable under the Pi, but ideally a little higher would help with cooling on the underside of the pi.
-
2.5 mm inserts for the raspberry pi screws: https://www.amazon.co.uk/dp/B07R6HST85/ref=pe_3187911_185740111_TE_item?pldnSite=1
-
2 mm inserts for the battery, rails and monitor screws: https://www.amazon.co.uk/dp/B07R6HT9FZ/ref=pe_3187911_185740111_TE_item?pldnSite=1
You can reuse the existing screws to fix everything. However
-
I used slightly longer M2.3 self tapping screws to fit the bodyboard slides to the wood: https://www.amazon.co.uk/Phillips-Laptop-Computer-Self-Tapping-Electronic/dp/B07GP3CM8M/
-
I also bought a these as I damaged the head of an M2 screws taking it apart: https://www.amazon.co.uk/Phillips-Countersunk-Electronic-Accessories-Samsung/dp/B07HC8CJ68/
HTH
2 Likes
I wanna upgrade to RockChip64
Is it possible?
I’m sure it’s possible, it’s just a question of how difficult it would be 
At first glance, it looks like the power may be tricky because the Rockchip wants it through a barrel connector. Not sure if it will take power through the IO pin header. It also looks like it consumes quite a bit more power than a Raspberry PI, so battery life and heat dissipation would be two additional things to look at.
I’ve heard members of the community using the ODroid and I myself have used a Tinker board in the pi-top, though it does really depend on the single board itself. Do give it a try and let us know how it works out
From a hardware point of view the NanoPi M4V2 looks like a nice drop-in replacement:
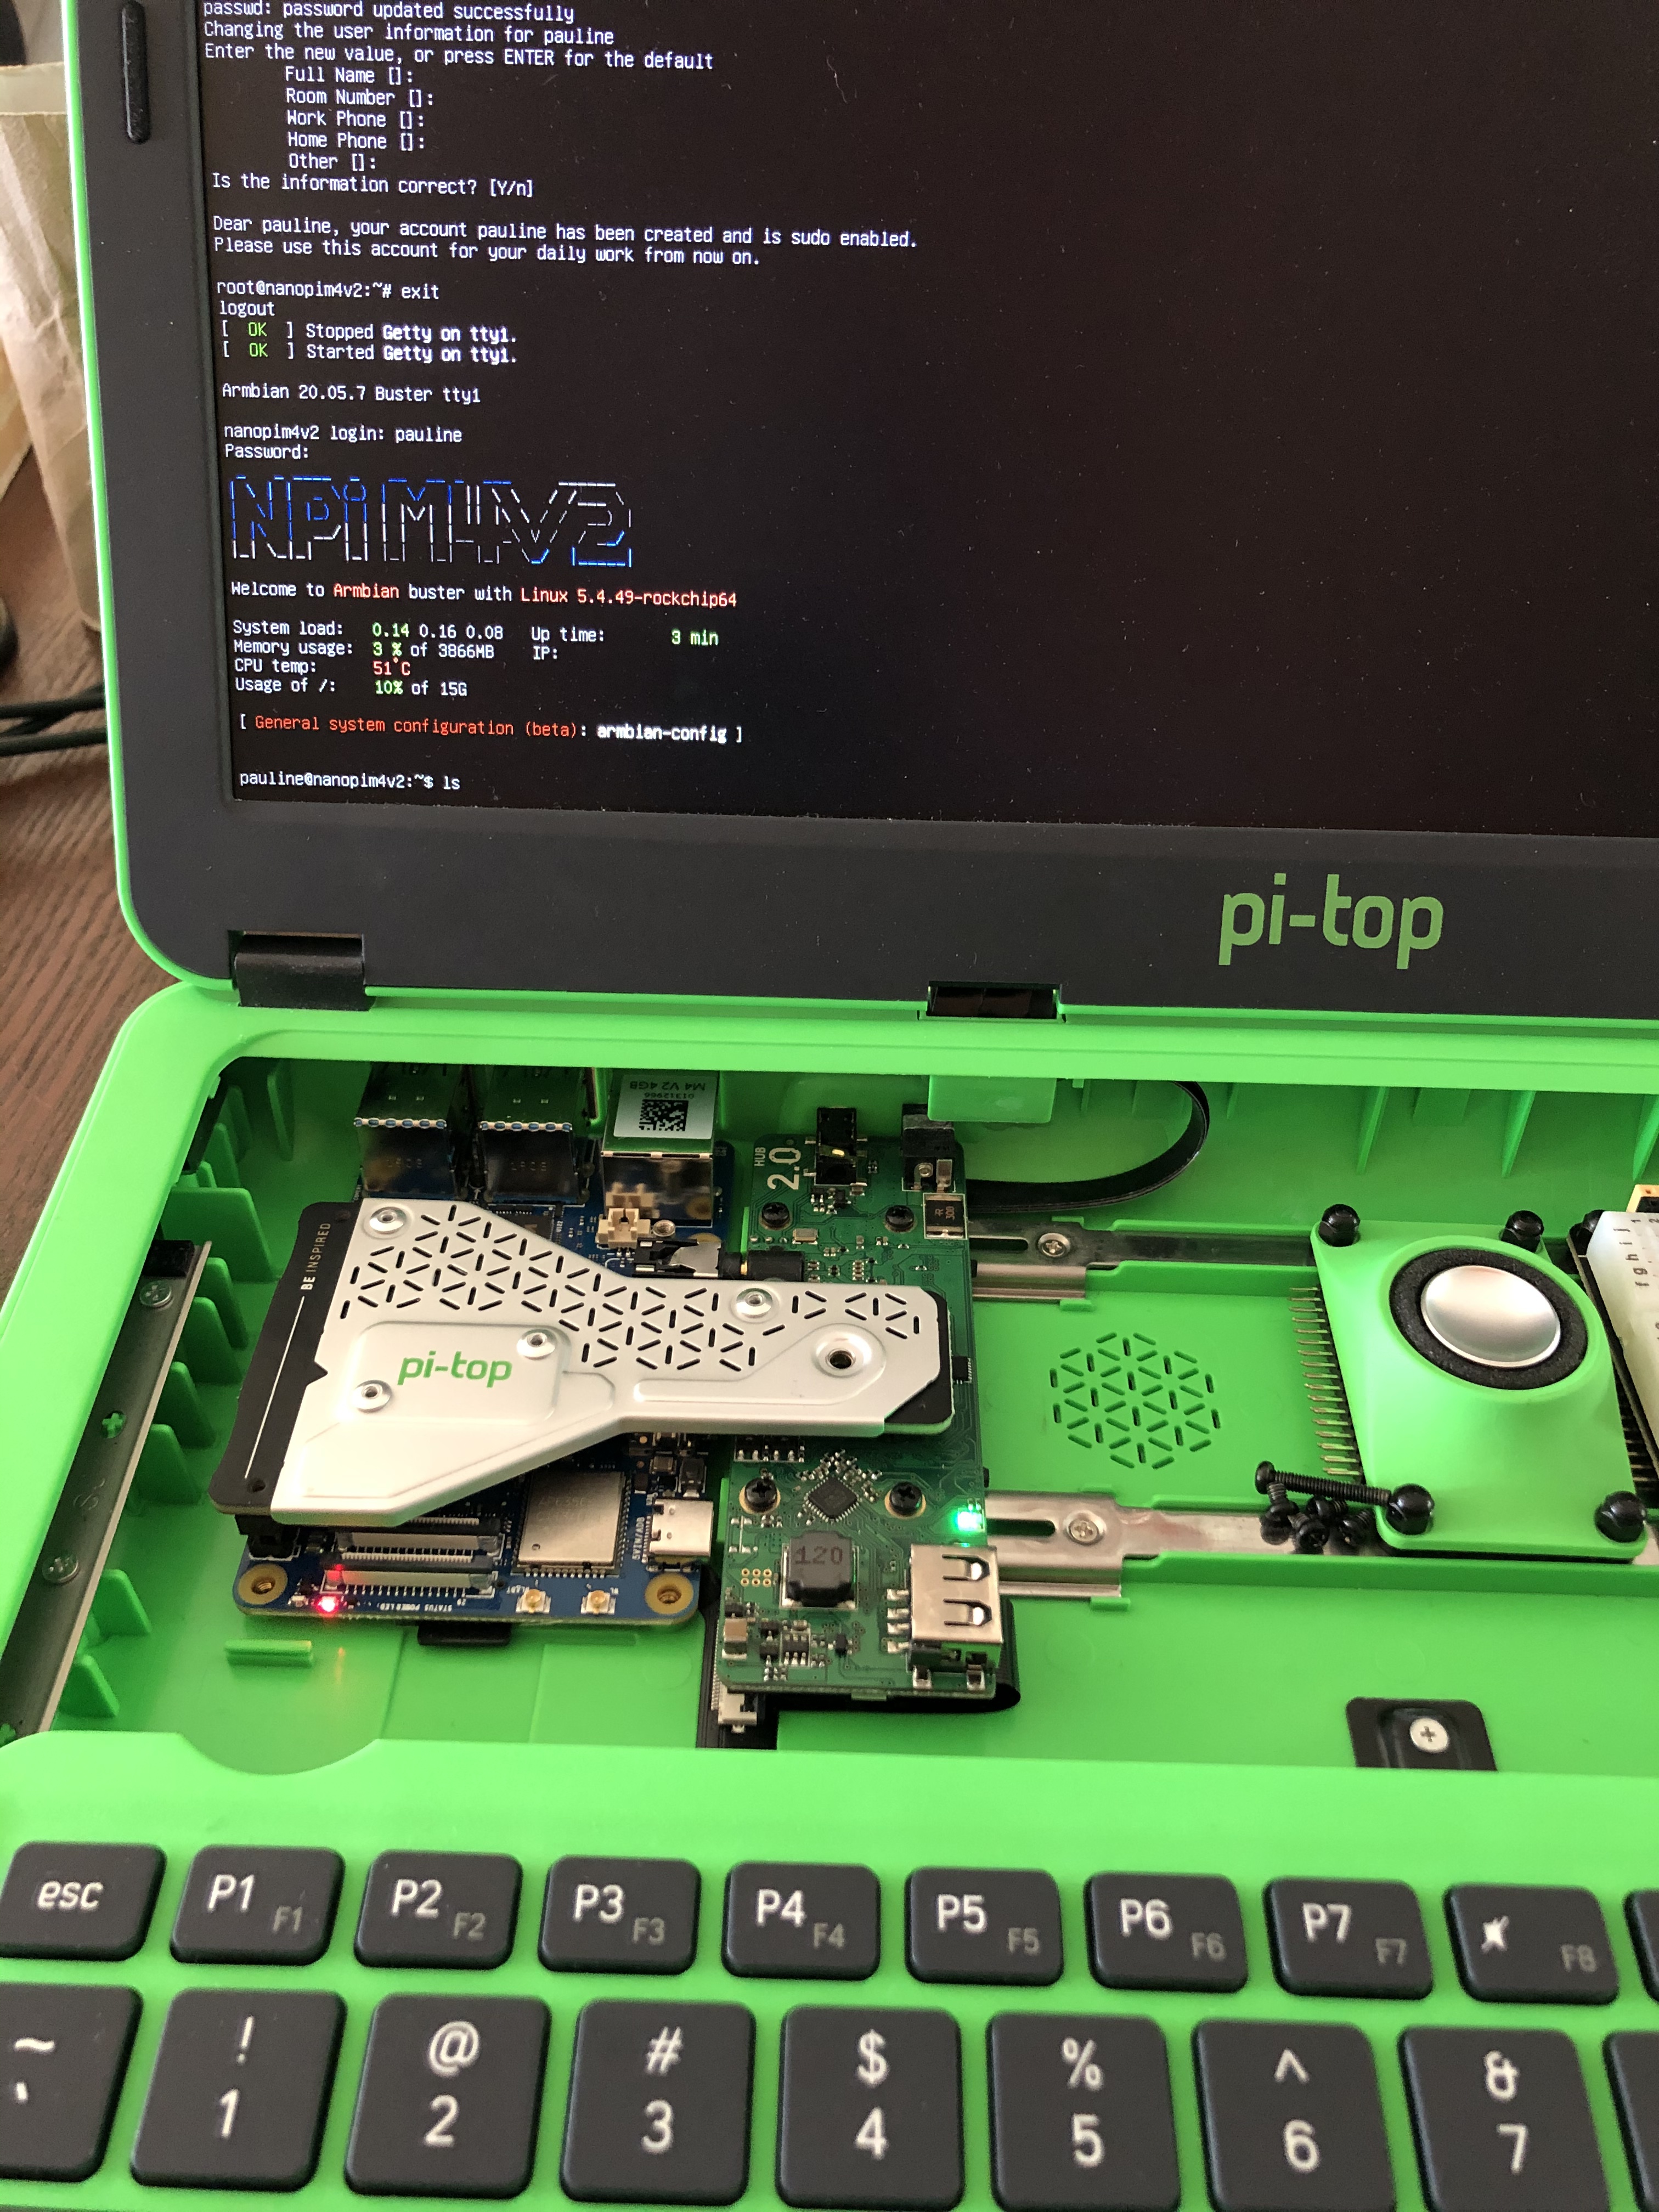
Performance is superb, however sound, battery indicator, i2c, poweroff, GPU acceleration are not working yet with armbian. I would love to keep pi-top os but it’s probably beyond my ability to merge it with armbian boot and kernel.
3 Likes