
The product I bought was described as “Pi-Top2 Educationsnotebook mit Raspberry 3+ 14” Display, US-Layout, Inkl.Inventors Kit" (in Switzerland.) It’s definitely a laptop though.
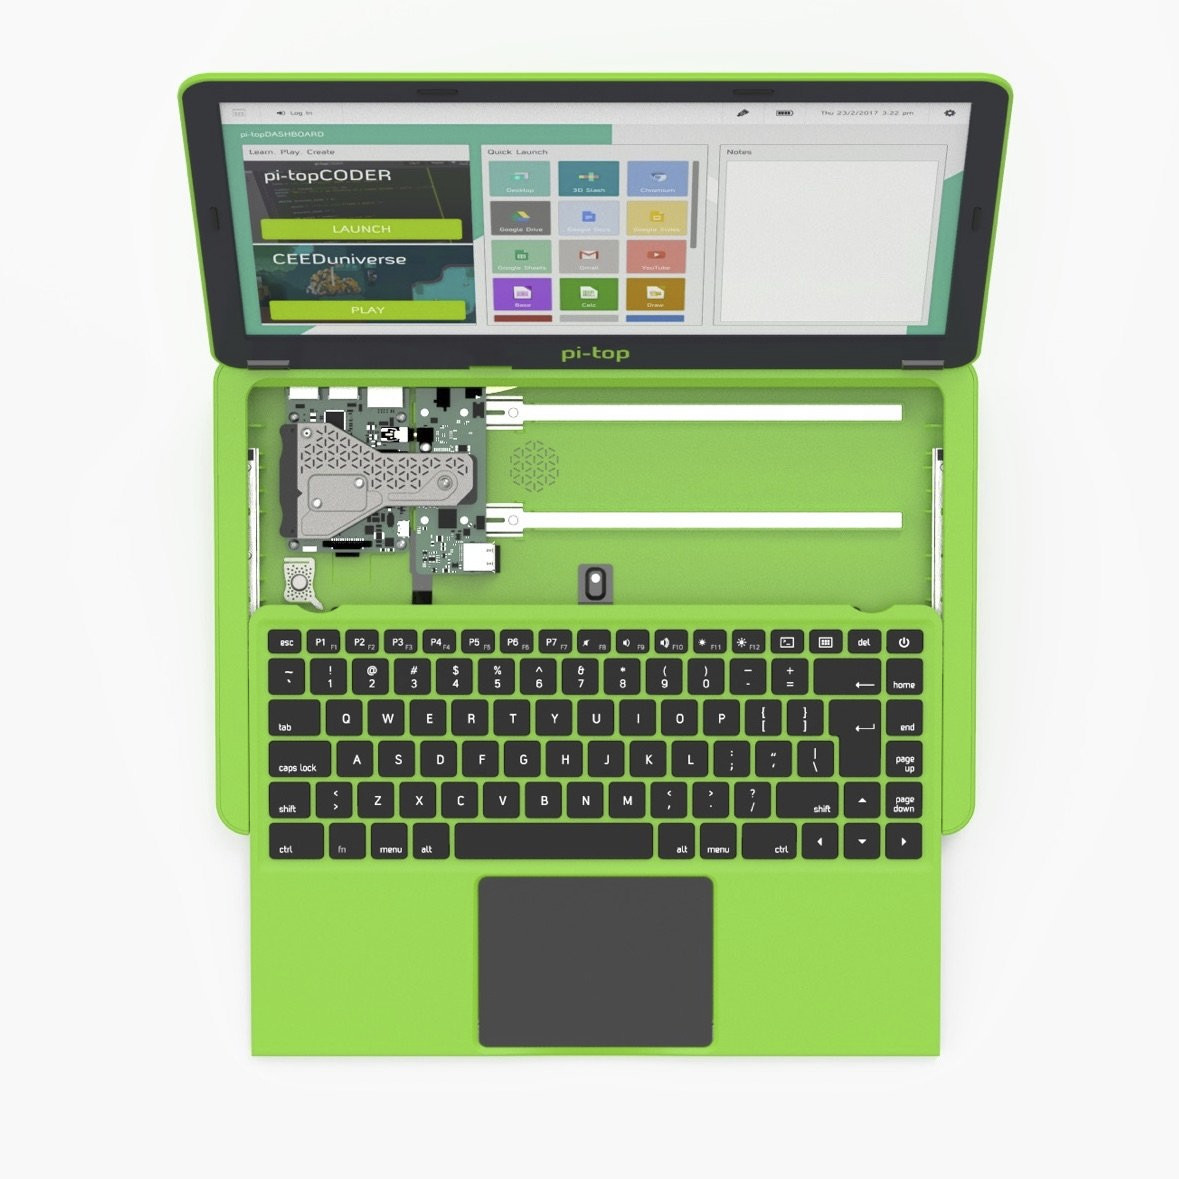
Yes. That’s it. Mine also has the speakers and a breakout board.
I see it is, look in the pi-top[3] forum. RPi 4 has some problems due to repositioned USB and Ethernet. Rpi5 has them the same way as the RPi3. Power may be your problem, it will complain that the power supply isn’t compatible, albeit if the “Hub” power capability the same as the Pi-top[1]/Ceed can supply 3.5A max. And the cooling will need to be sorted due to the weird Connector from the Hub to the RPi. Hope that helps?
Thanks for the advice.
Regarding the power supply, do you think the official Raspberry Pi 27W USB-C power supply would be able to handle the pi-top[3] upgraded to RPi5?
Cooling is another problem.
I have a pi-top[1] running with a RPi5 and it runs fine. You need the 18V i/p for the Hub, battery and display. You may need to upgrade the 18V pwr supply that to give you a few more Amps. Magic thing is that there is (On my Hub anyway) a 18V supply available to use, which is available on the proto breakout board. Whilst the RPi5 works with a warning with the standard 3.5A supply I was going to see if one of the chinese Buck converters that handle the PDR3.1 protocol that the RPi5 needs. In any event it should be possible to get > 3.5A using a buck converter and you can tell the OS to ignore the fact that you don’t have a PDR power supply. I don’t think that giving it 5V rather than 5.1V will be a problem , hasn’t been for me.
Wait to you try and get the latest operating system working 
1 Like
Just realised the HDMI connectors will be a problem. Someone suggested a waveshare product for the CM4, https://www.waveshare.com/CM4-to-Pi3-Adapter-B.htm. It would be a neat solution, doubt they will do it for a CM5 tho, and cooling problems in spades. lots of ideas here The pi-top [3] + Raspberry Pi 4 (Franken [3])
1 Like
Thanks for the further advice.
Could pi-topOS be a problem on the RPi5? The webpage only mentions support for RPi3 & 4. Is there any reason to want to use pi-topOS rather than, say, standard Raspberry Pi OS? Will the mousepad, keyboard, screen, etc. still work OK?
pitop OS, I think I had it working, but standard bookworm needs some software loading to get battey monitoring and Power switch working. Problem is for the piTop[1] and CEED power switch doesn’t work, and you lose the Battery ICON… Pi-Top are not really interested in supporting these old HUBS, which is a shame. I’d try the pi-top os 1st and see how you get on (the approved version is 32bit) https://knowledgebase.pi-top.com/knowledge/pi-topos-64-bit
As another thought, but I haven’t tried it, you may be able to connect,using a standard ribbon cable, the GPIO from the proto board pins to the RPi5, then just move the hub top the left and get some short cables to connect everything up. You will need a 5V USB C connection from the proto board to the RPi5, and you may need to snip the 5V cables on the Ribbon cable. (The GPIO pins that the Hub need may well be connected to the GPIO header on the Proto board, but qui sait…) Just a thought
Hey! I’ve just recently picked up a Pi-Top v2 and been playing with connections too.
Unfortunately connecting a Pi via the PROTO board doesn’t work. The Hub when turned on checks if there’s a compatible Pi connnected via the standard GPIO pins (on the Cooling Bridge), if detected there is one it will turn on the screen & hub and only then will it enables the pins used for the PROTO board or other accessories connected via the 34 pin connection on the side of the Hub - odd setup but it’s is what it is.
Good way I’ve got around this is to connect a FPC-40P PCB with a standard male GPIO pins connected to the Cooling Bridge’s GPIO female socket - the boards a little smaller than a Pi Zero so fits nicely under here. I then used ThePiHut’s DIY HDMI connector with a female standard HDMI head to connect directly to the Hub.
For here you can just about pass the two flex ribbon cables under the Hub (just mind the screw hole for the Bridge!) and voila!
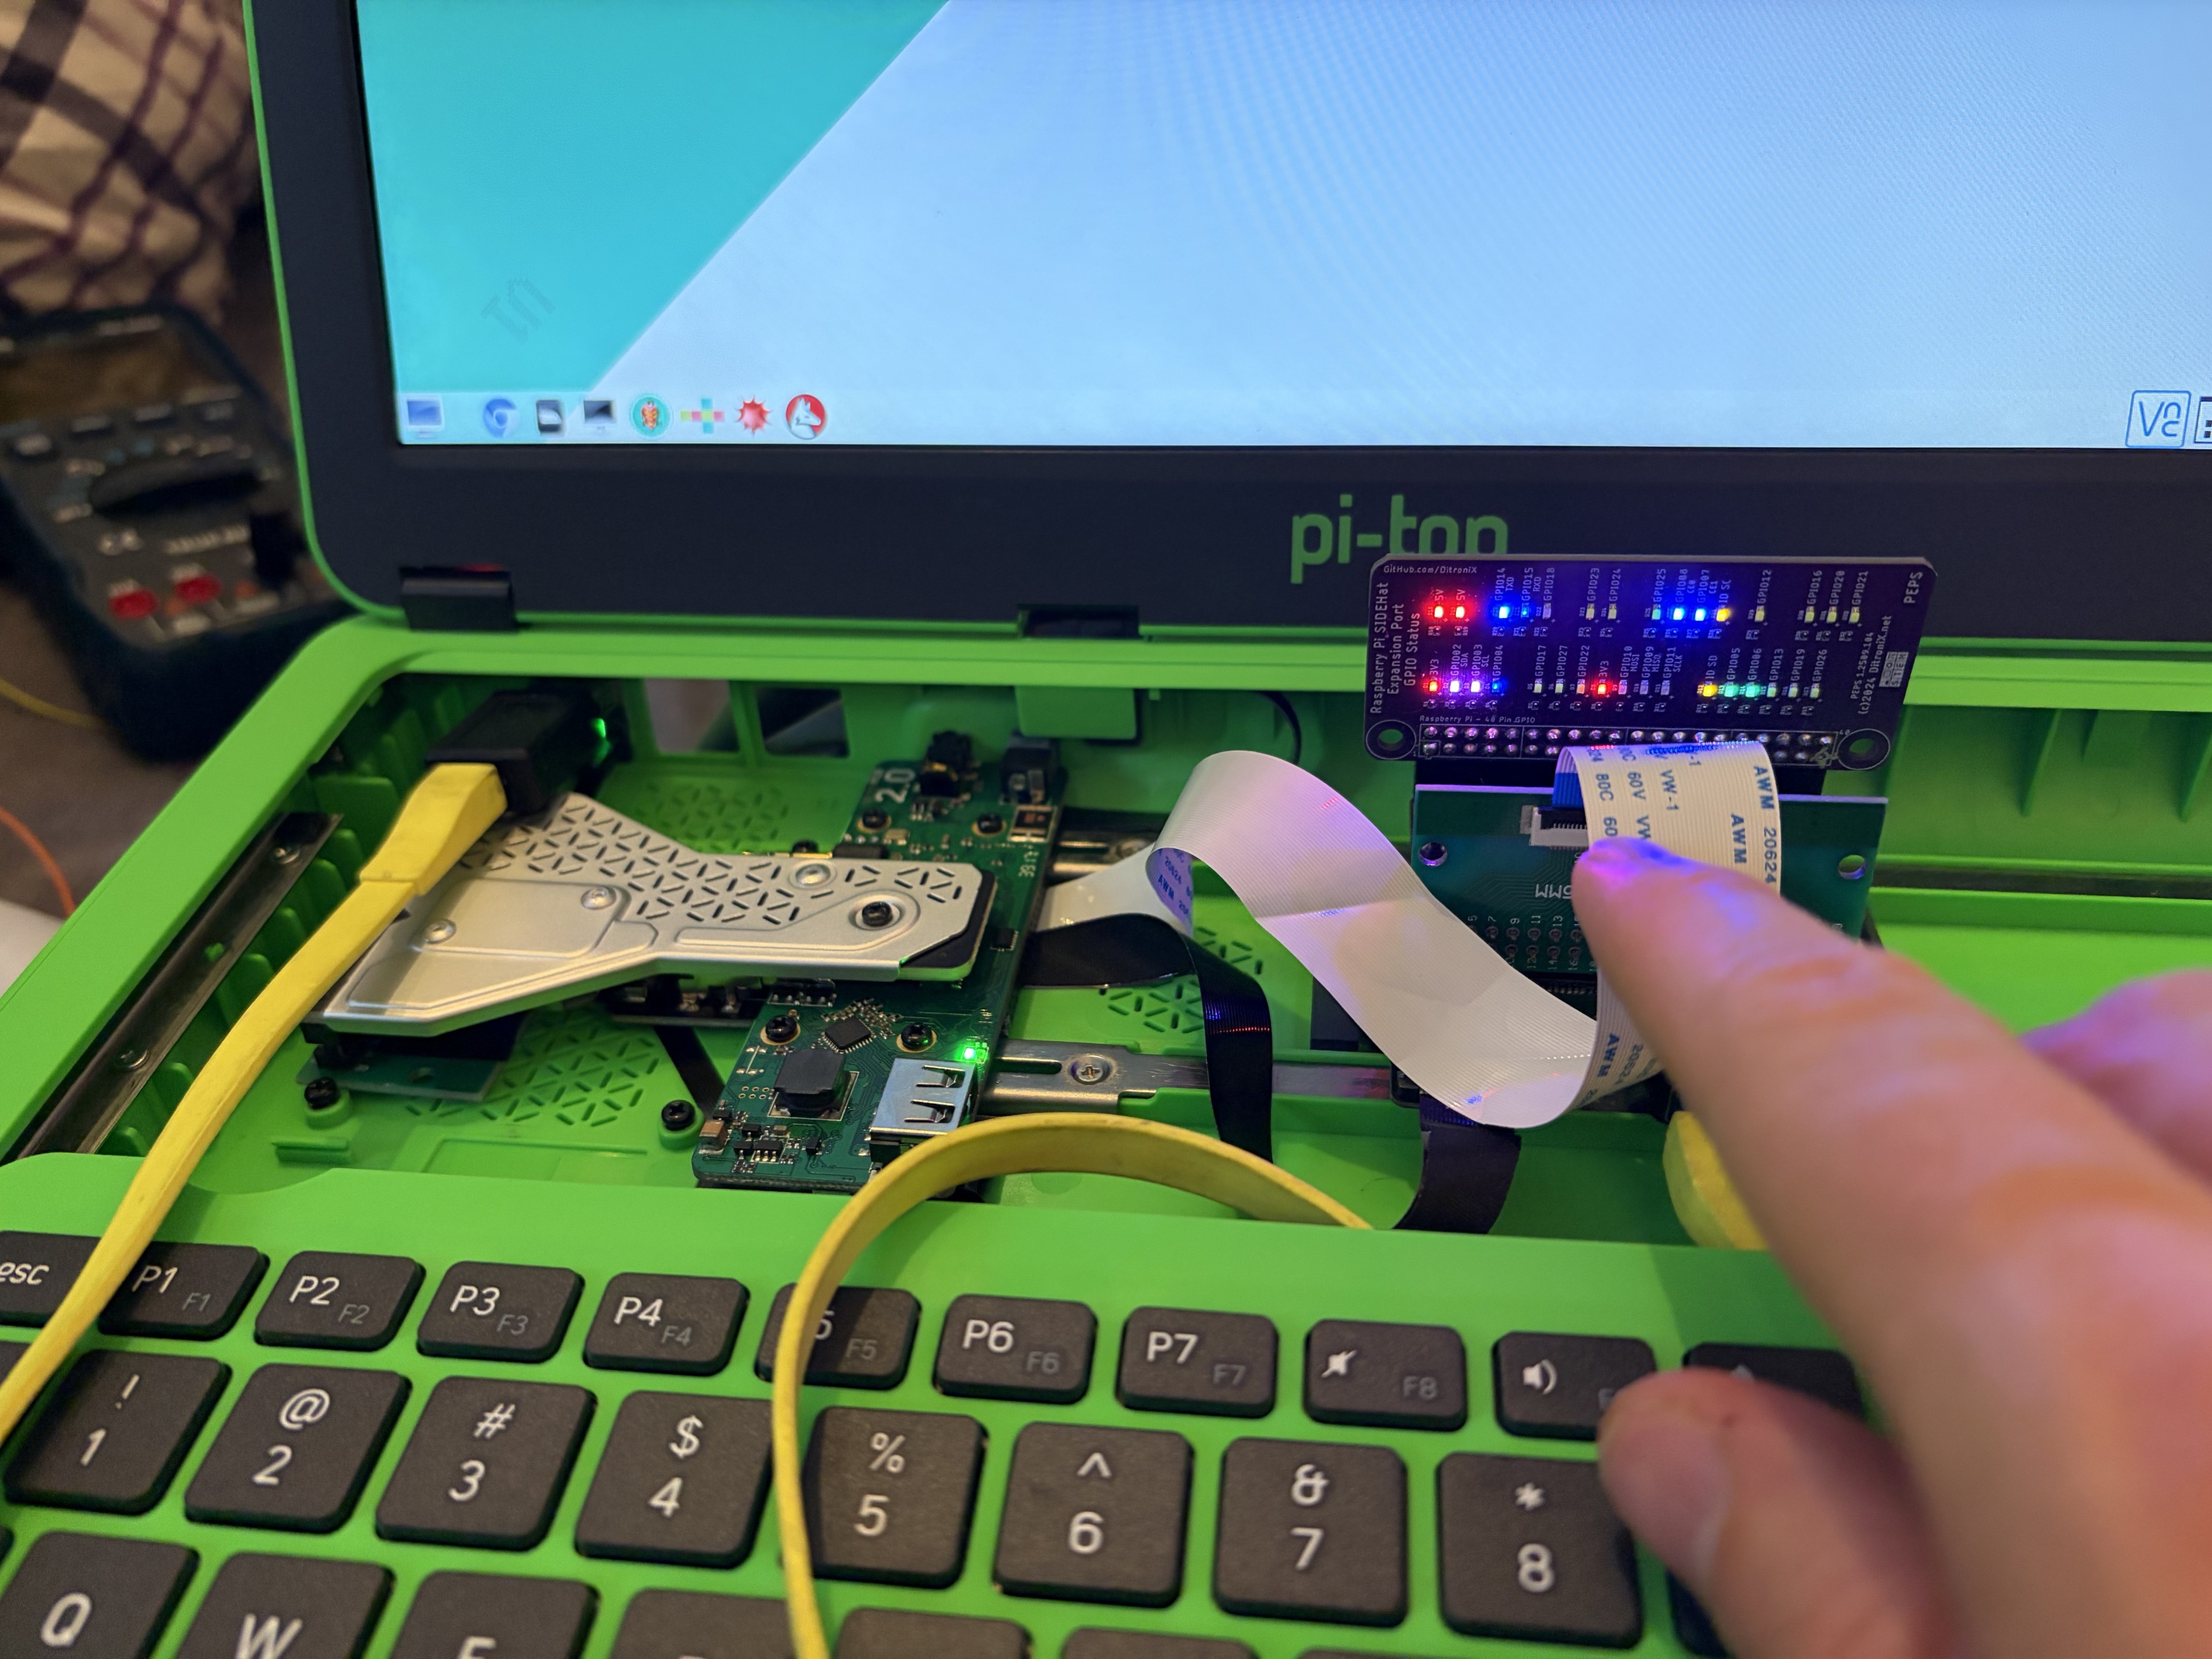
You’ll need two FPC-40P; one for the Cooling Bridge’s GPIO female & one to connect to your desired Pi and two DIY HDMI PCB with the second end matching the Pi you’re using (Pi4 & Pi5 uses Micro HDMI), along with the relevant ribbon cables for both. I found 20cm for the HDMI was ok but 30cm may be better for other Pi locations, and same for the 40P ribbon for the FPC. Just make sure to get a A-B version for the FPC, otherwise you’ll have to mount the second FPC on the Pi outwards (like a side Hat - learnt that the hard way ).
Also tested the two USB-A males at the back of the laptop; the top one is for the Keyboard & Mouse, where as the bottom one is a pass through to the USB-A female port on the Hub itself so you only need to extend the top USB.
Just found out why the Hub needs the Bridge connected to turn on:
@RezIN worked it out a while back when turning the CEED into an external monitor:
There’s a ‘board detect’ socket/pin that needs bridging with Ground on the Hub.
Shall try this myself and report back 
Just tried bridging the ‘board detect’ pin on the Cooling Bridge GPIO header (Ground pin No.9) with another Ground pin and as if like magic it worked! 
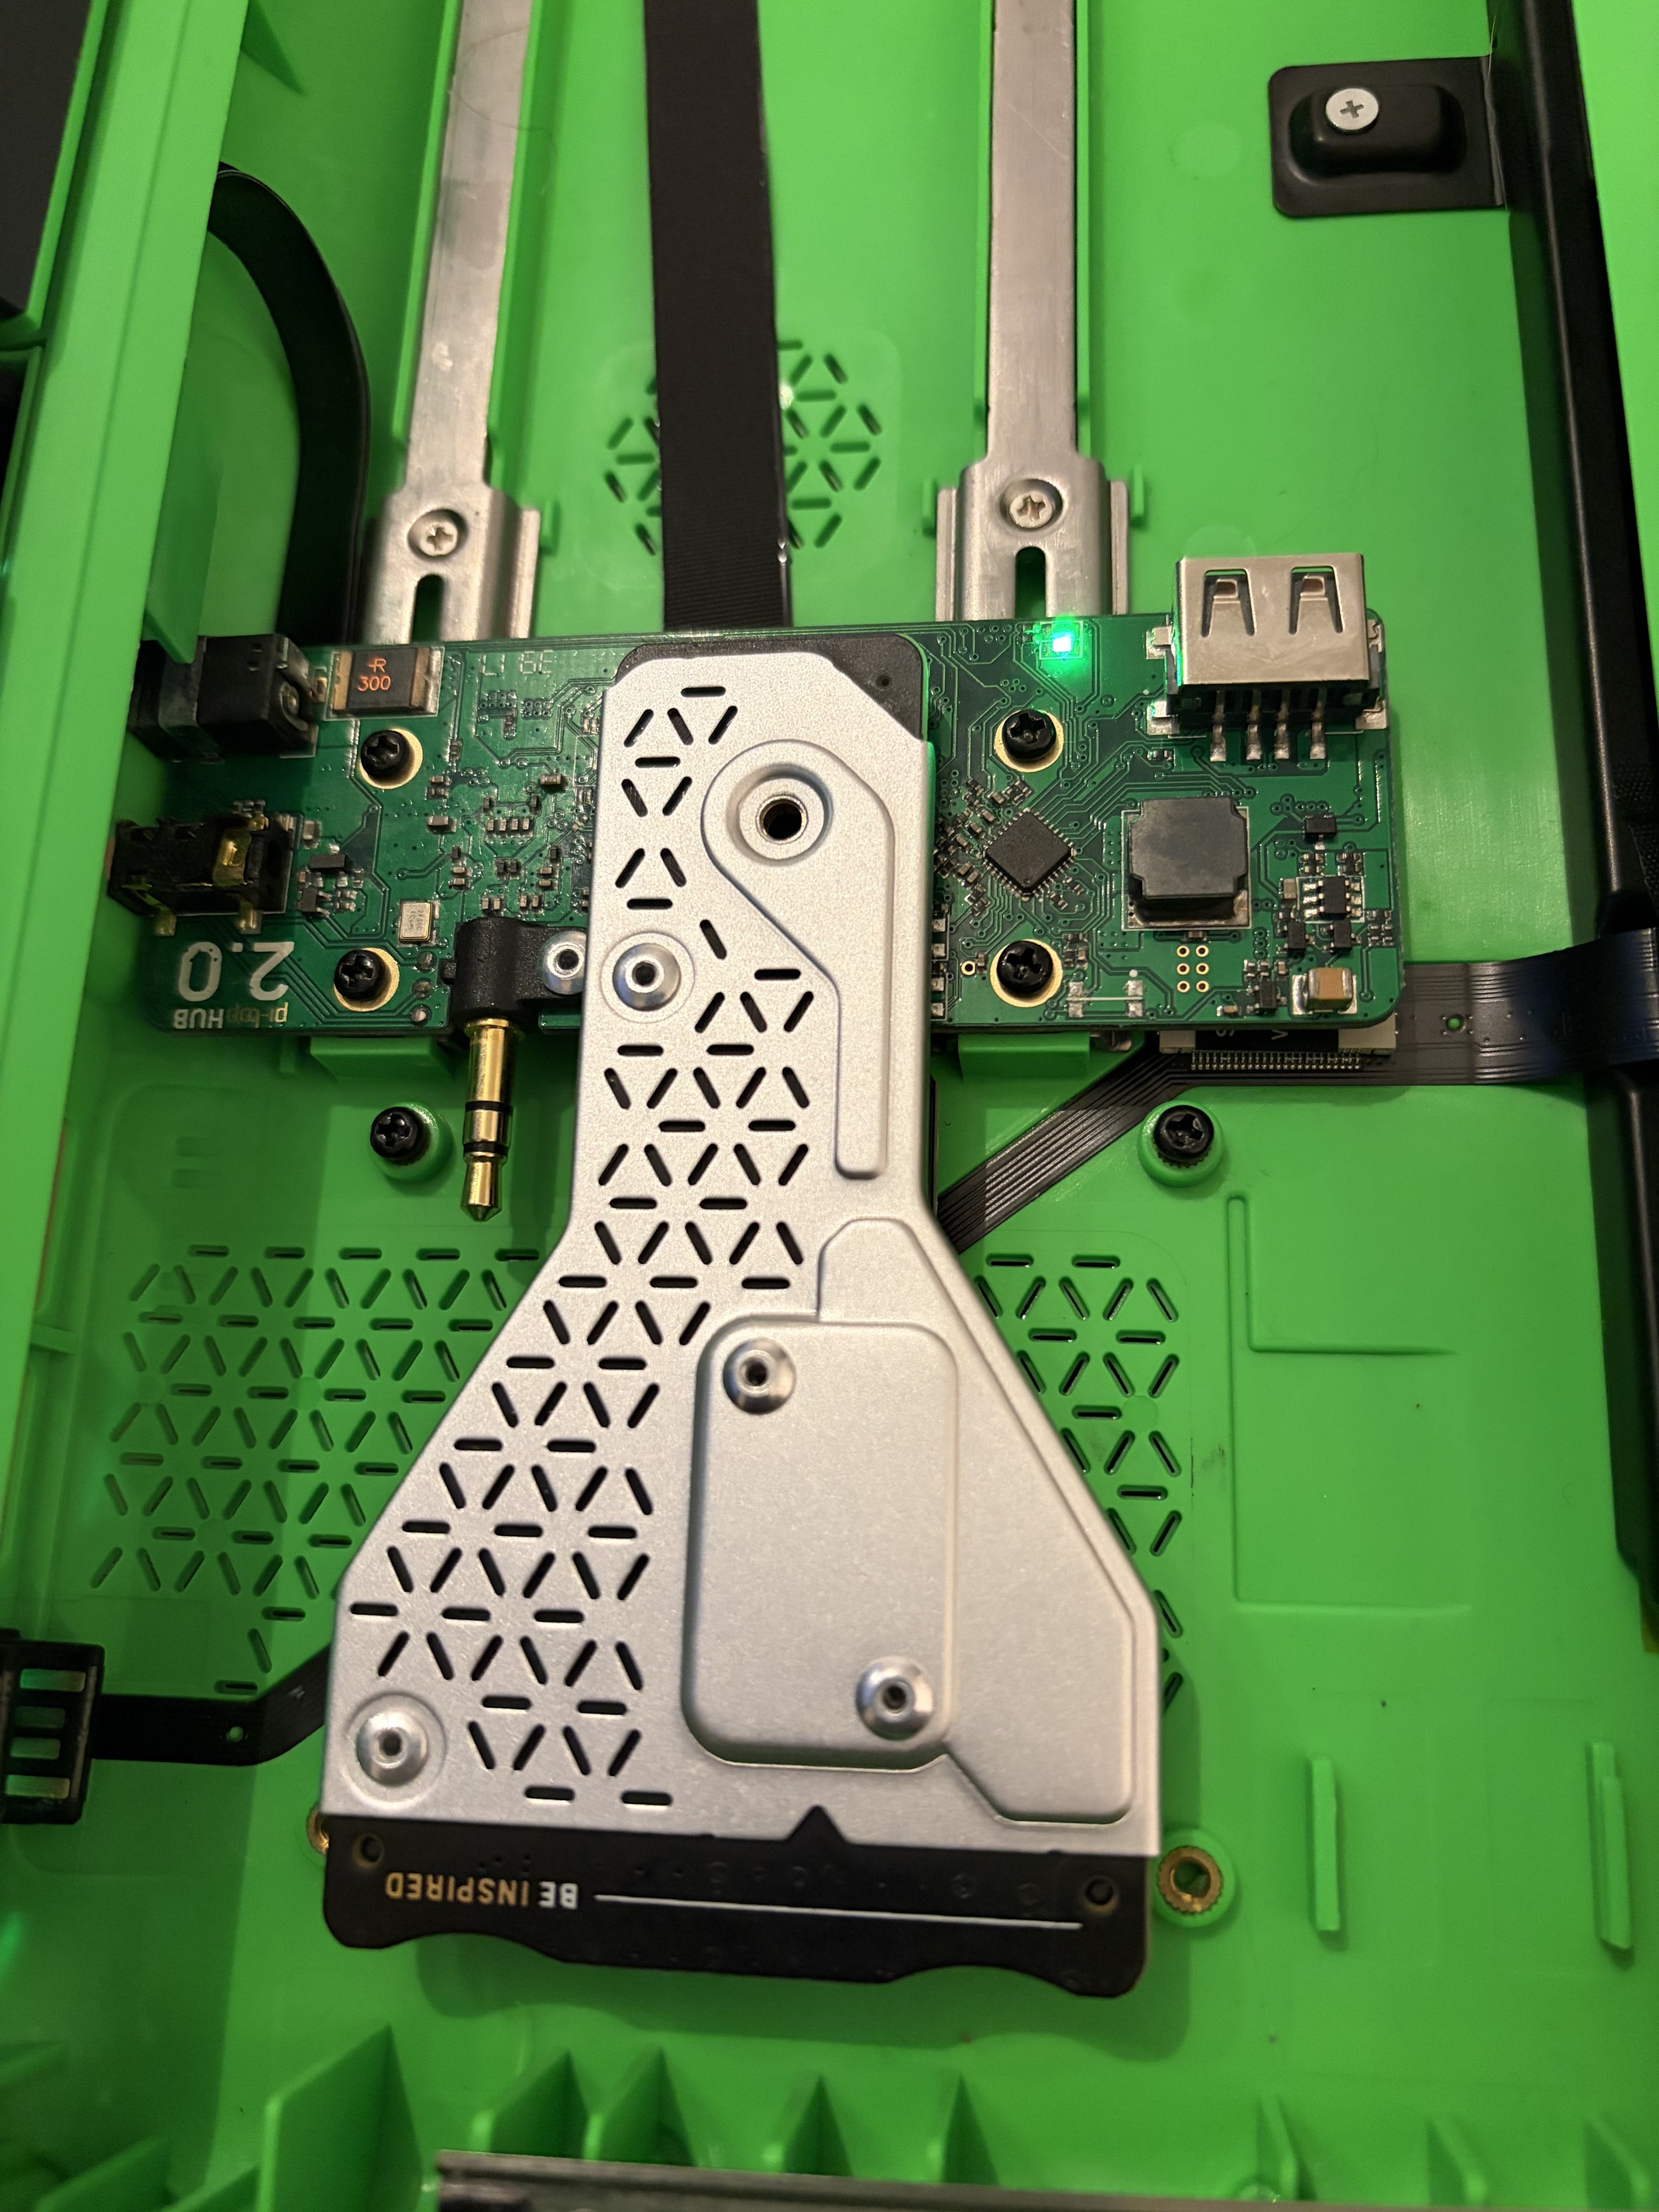
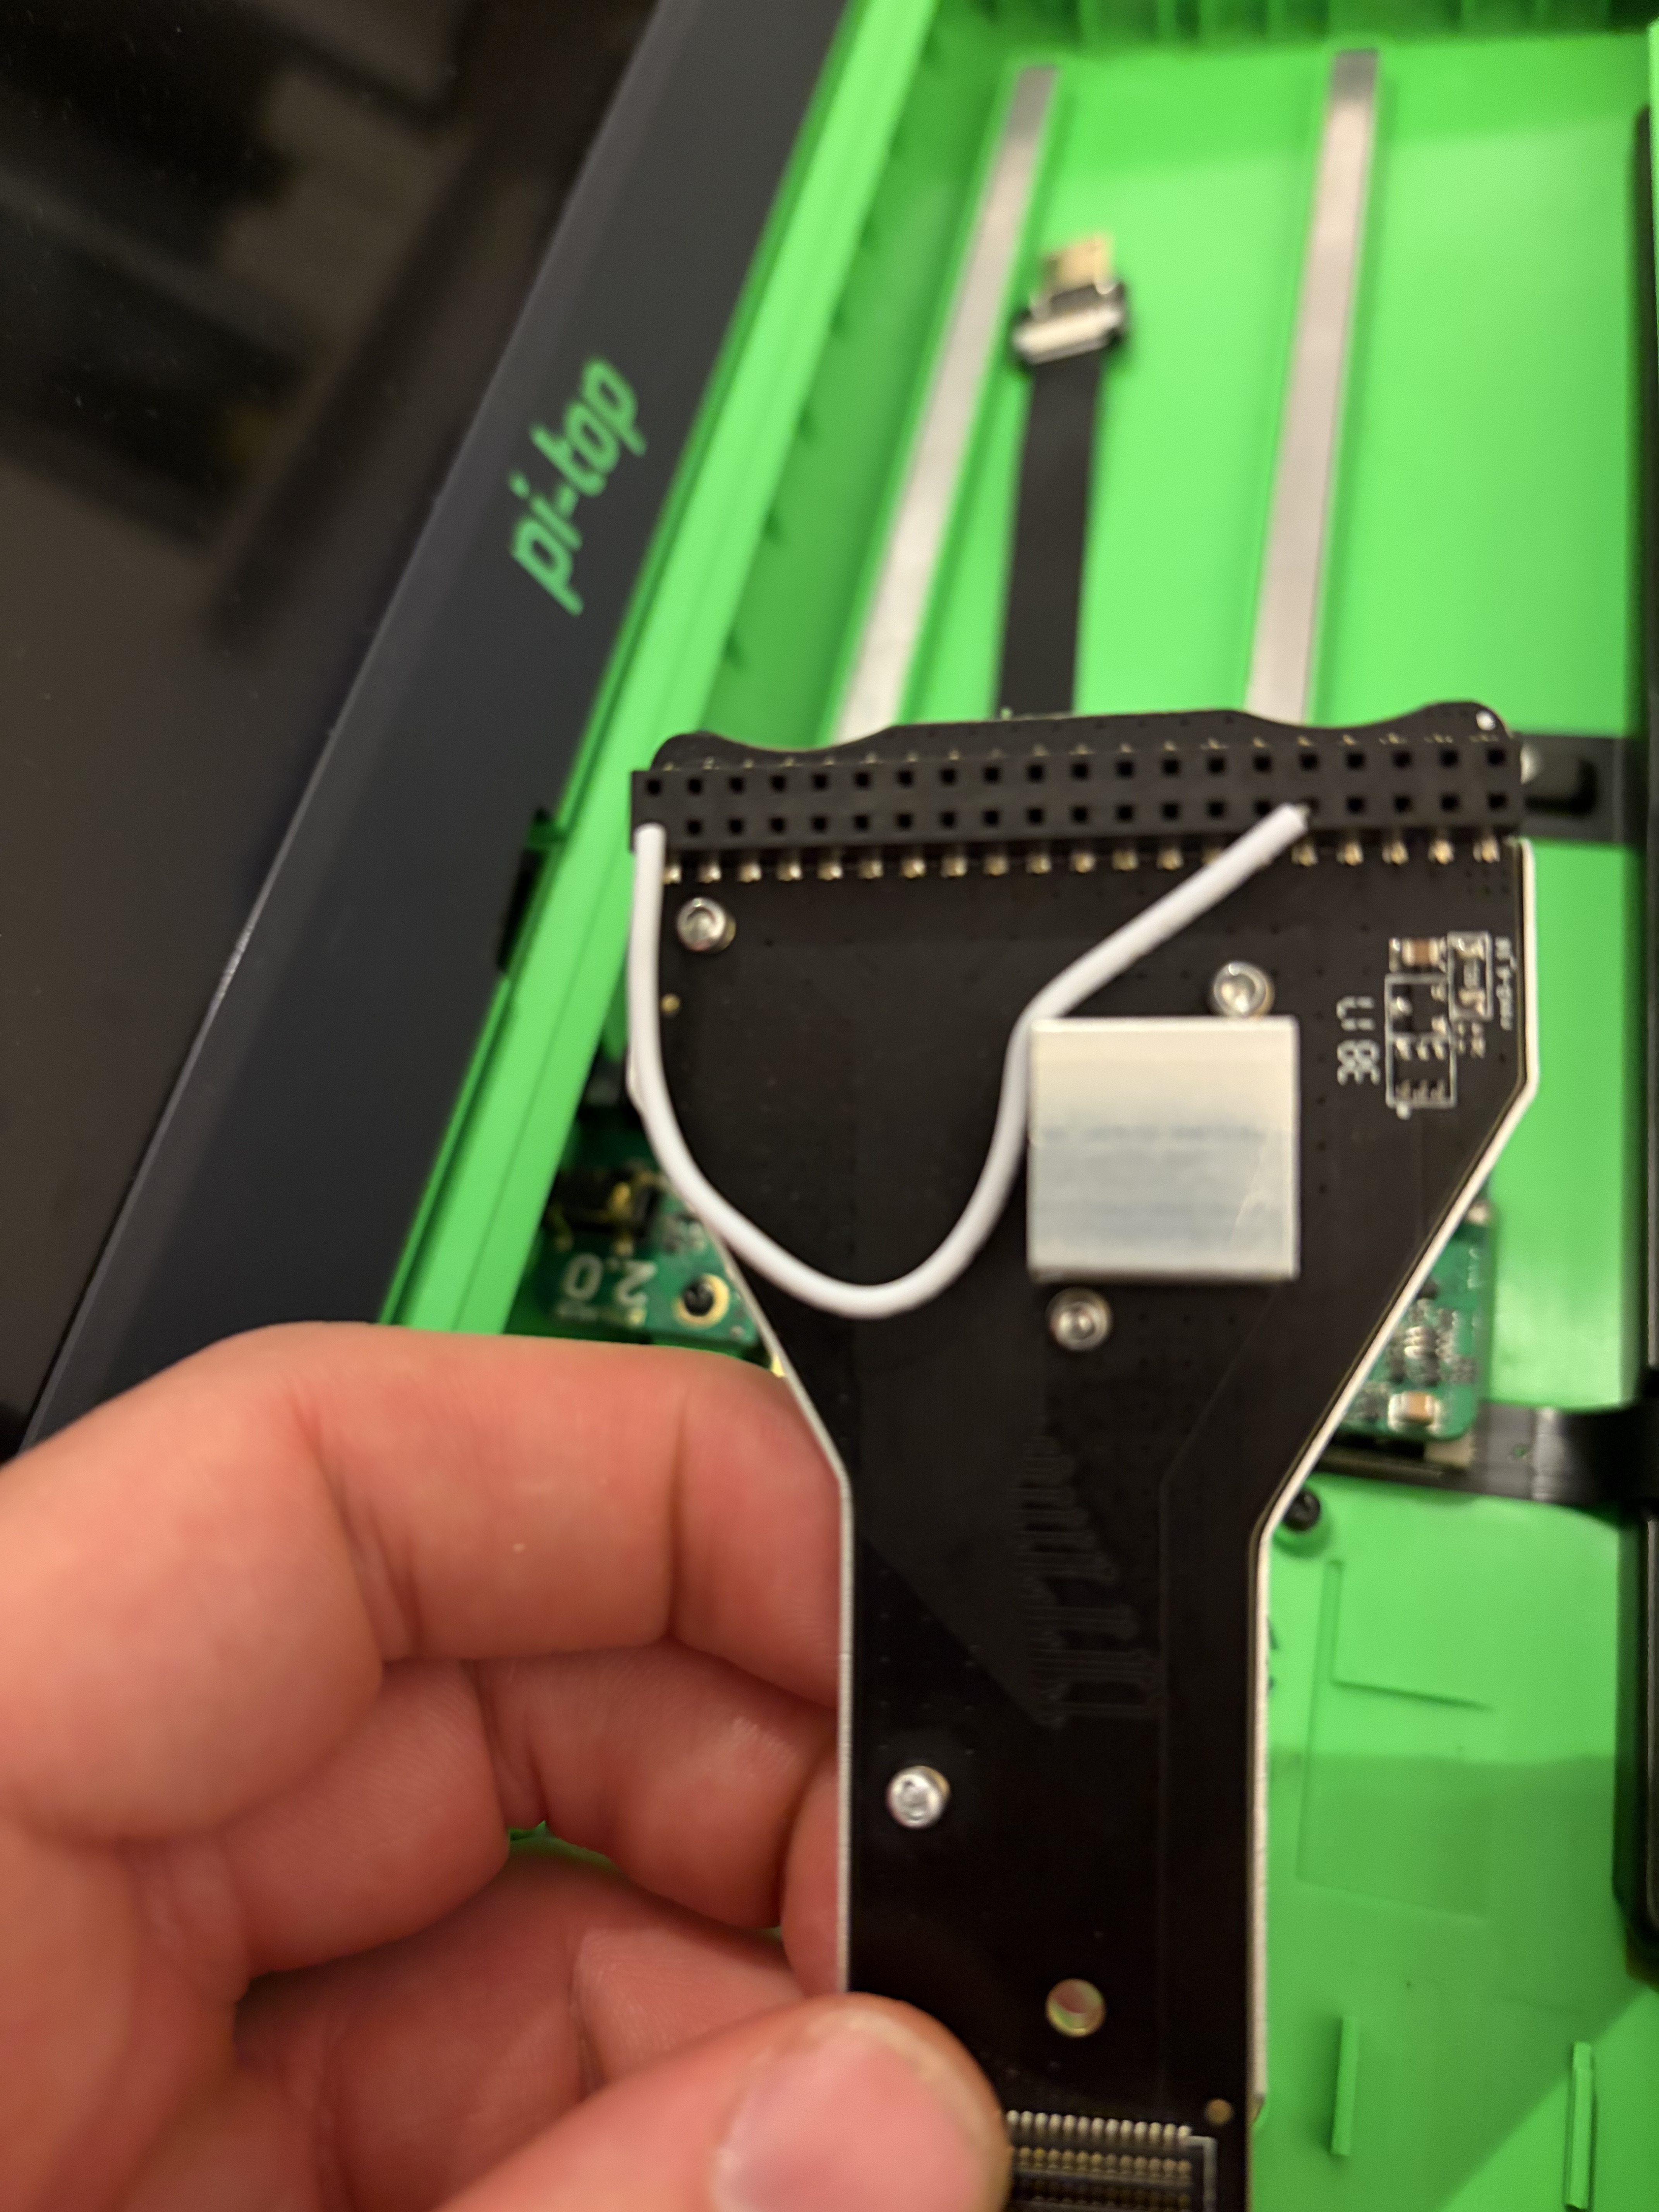
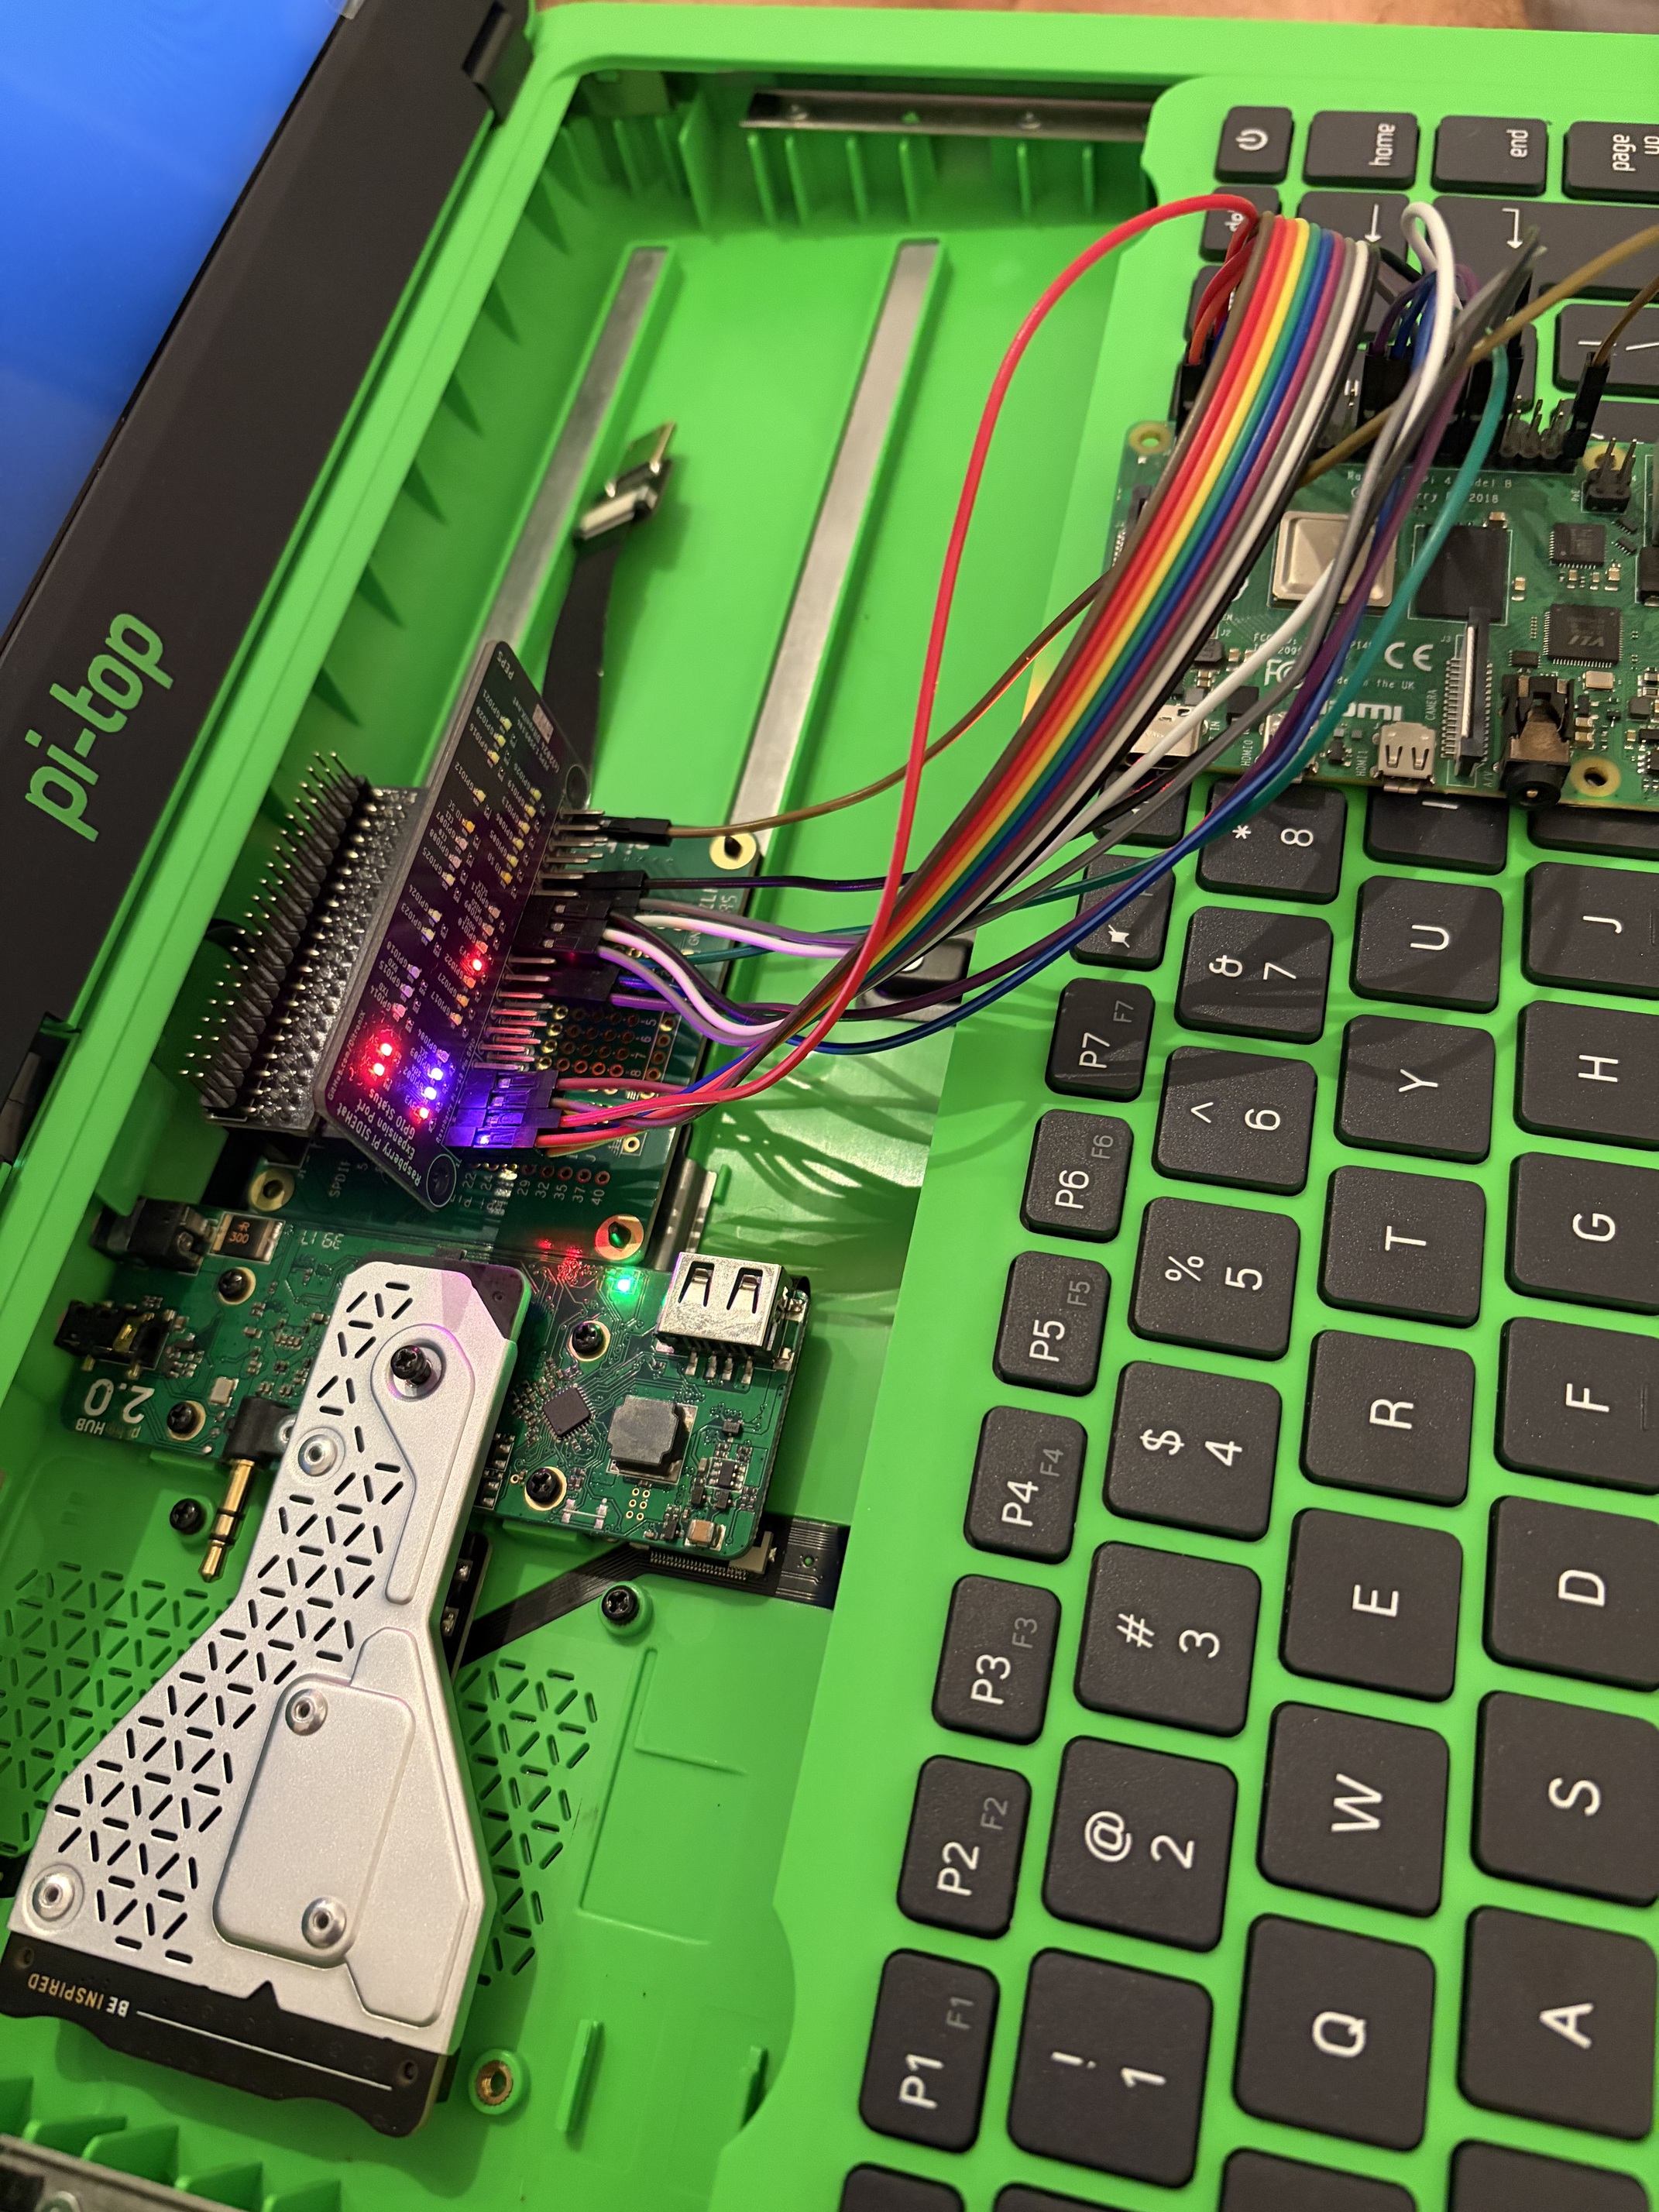
Excuse the Pi not fully turning on and booting; forgot to insert an SD card or attached the HDMI at the time 
1 Like
Why all the cables coming from the board to the pi5
That was me testing and trying to see what GPIO pins the Hub did and didn’t require, and if I could connect the Pi via the PROTO board (you can in this setup by bridging the ground cable on the Cooling Bridge).
I prefer the option of connecting a Pi via the GPIO header on the Cooling Bridge so am still working on the concept of using that:
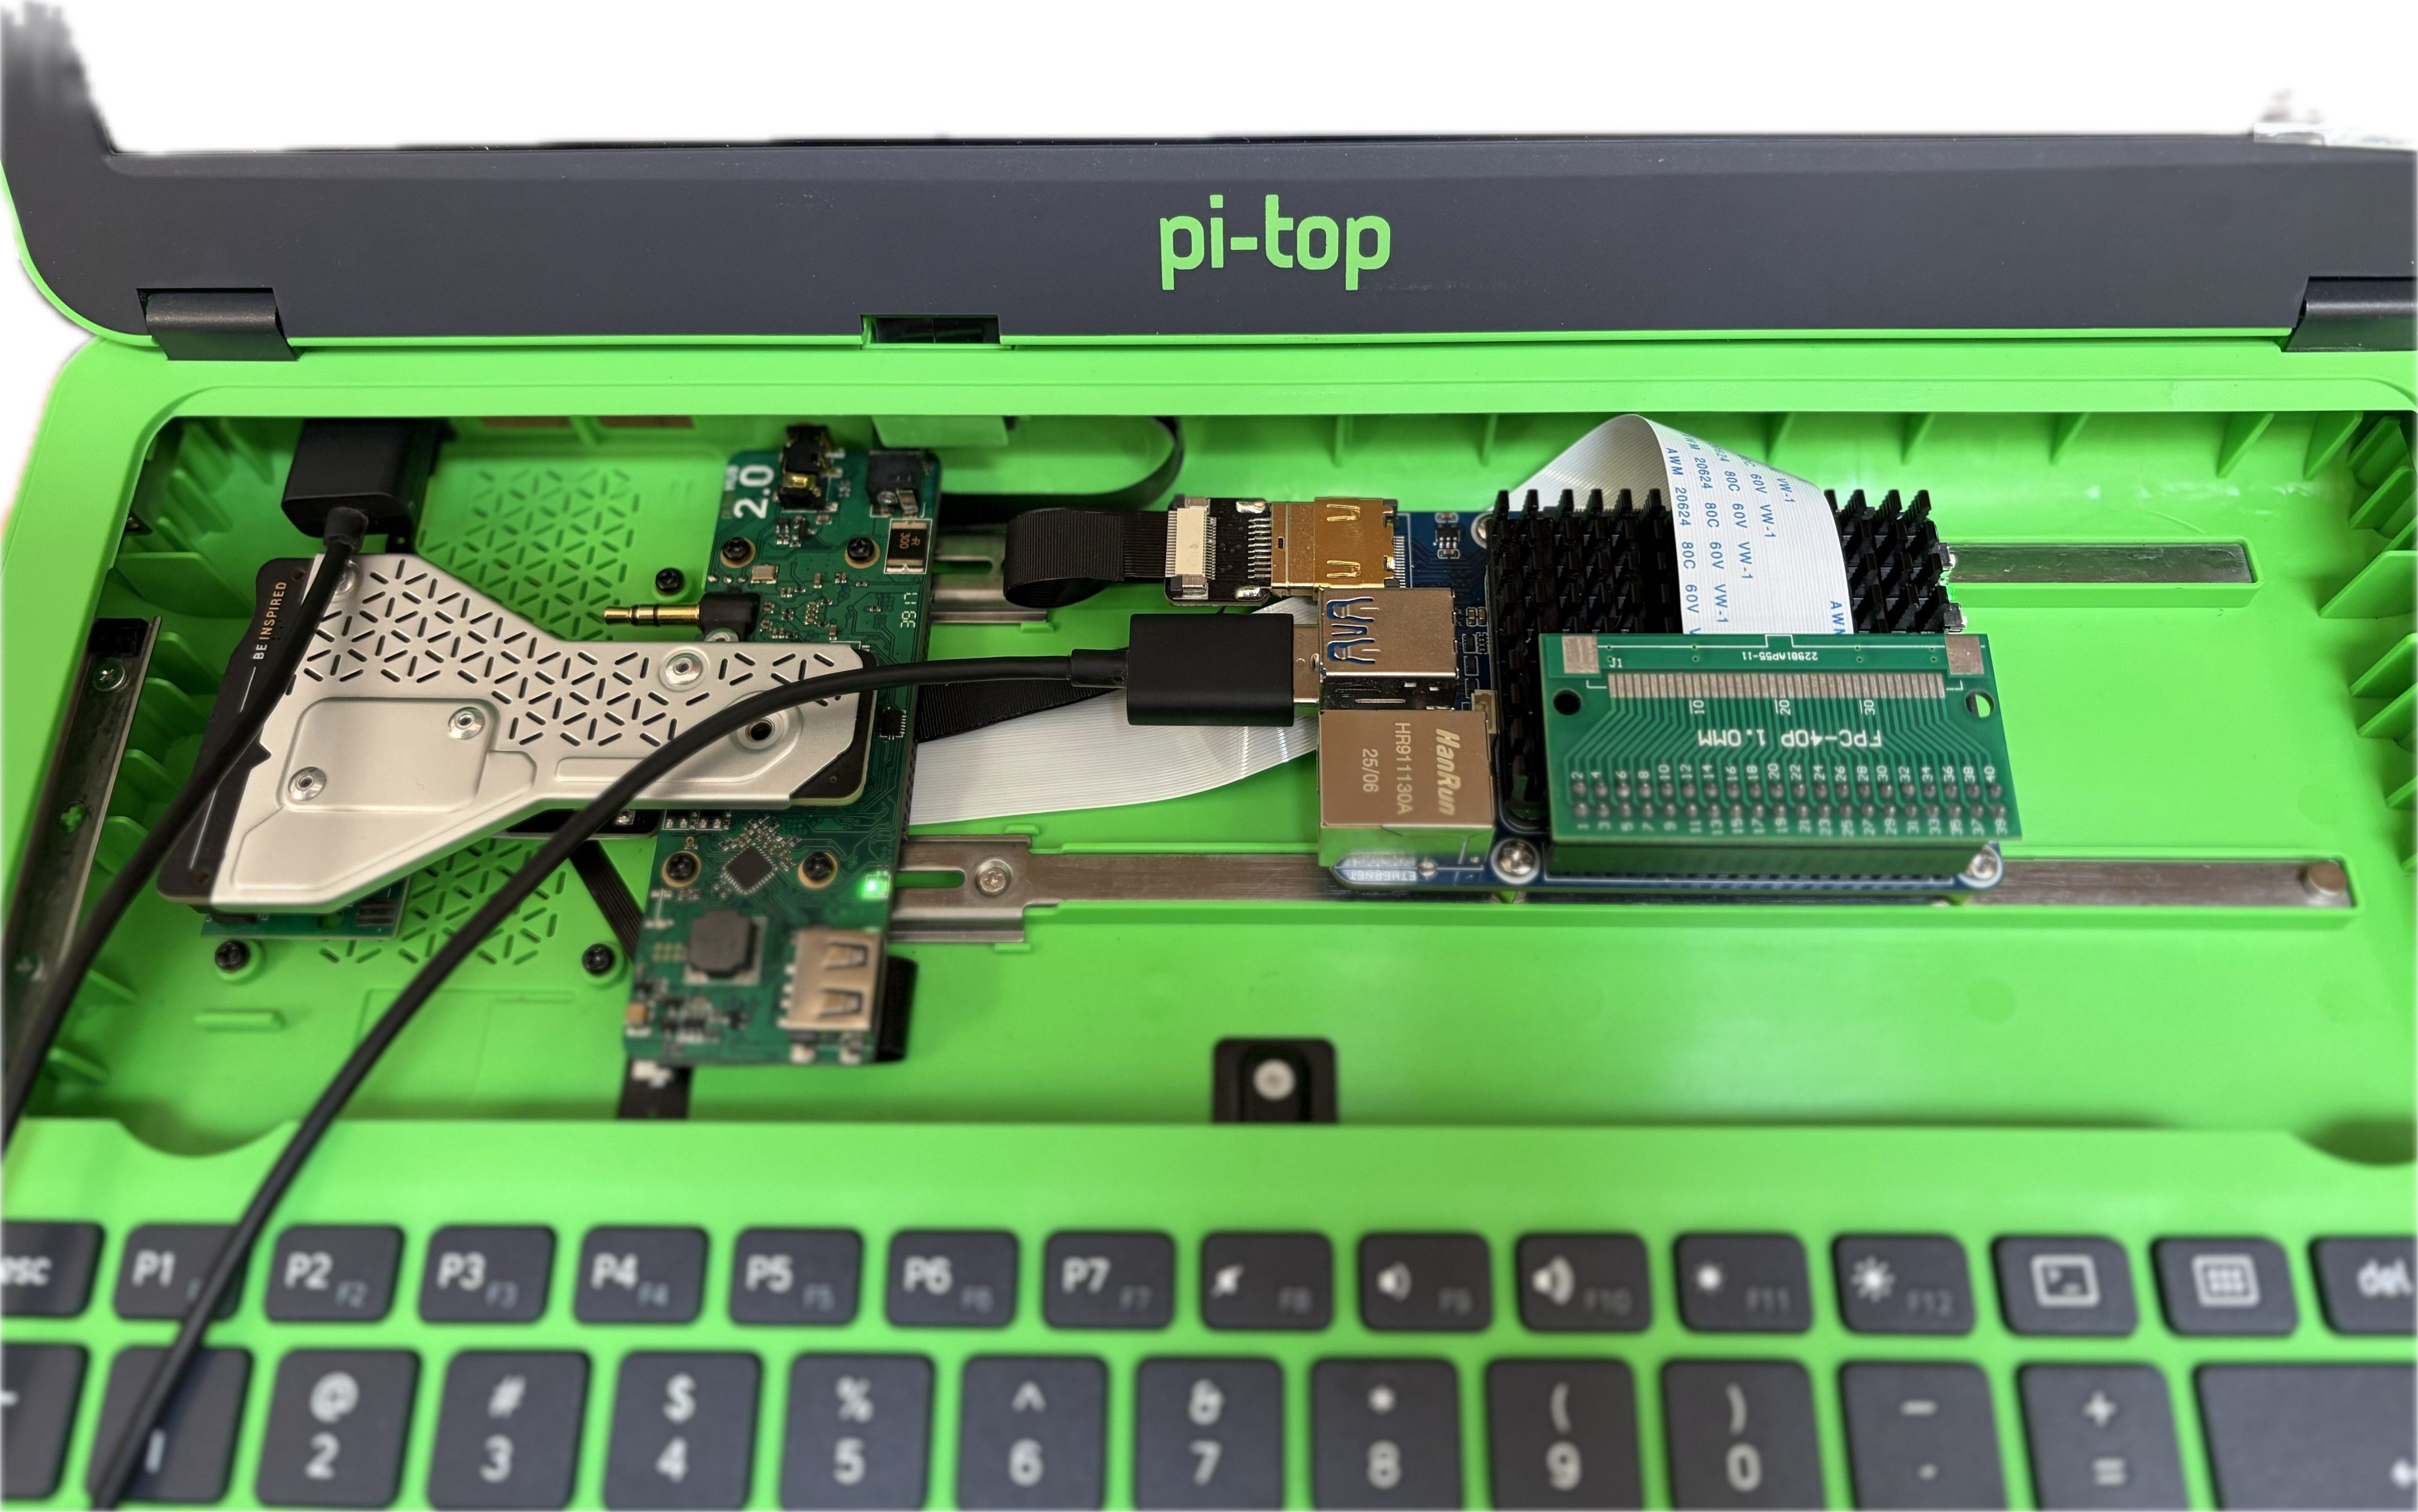
But due to space constraints and not wanting to modify or damage the Pi-Top body or Hub I’m looking to use a CM5; found a low profile board from Terioto so am going to use that - just was weighing up if I wanted to solder on the GPIO pins on the carrier board or look at some pogo pins - going with a 90° header.
However I’m also looking options to fully power the Pi5/CM5 as it needs 25W of power the the Pi-Top Hub just can’t deliver.
Going to play with getting a buck convert soon (Geekworm Raspberry Pi 5 5V 5A Dual PD Power Module | 9–24V) and probe the Hub for its higher amperage 18V pin. There is a easy to get 18V pin on the PROTO board but only 0.5A, but the board itself runs on a higher Wattage so should be able to find something I could tap off and power the buck converter to give PD power for the Pi5/CM5
1 Like
Dani your the man thank you for the info I’m gonna be doing mine soon and are you using the pi5 the one in the picture doesn’t seem to be a pi so don’t connect pi5 to gpio connections
The last picture I posted was of a CM5 connected to the WaveShare CM5 mini base A carrier board, the black heat sink is also a WaveShare CM5 version but this carrier board with its IO is a little too tall for fitting cleanly (could be done) so opted to research other boards.
There’s loads of amazing ways others have achieved this on here so definitely check them out for inspiration, definitely gave me some ideas.
So should I try the pi5 with the gpio cable or don’t try idk I dotnt have cm5 or waveshare products
Yep, definitely try the Pi5 connected to the GPIO pins - maybe look around the forums for different ideas on how to connect the Pi5 to the Pi-Top GPIO pins.
It will work and I found on the latest version of Raspberry Pi OS the screen brightness buttons worked natively. The only downside will be the Pi will complain about under voltage both as only as you don’t connect any accessories or push the Pi5 it will run.
Good luck!